Overview
The Report Scheduler lets you automate the delivery of reports, sending them to one or more email addresses on a schedule you define — hourly, daily, or monthly. Schedules can be set up for any Standard, Custom, or System report, and you can create as many schedules per report as you need.
To access it, go to Reporting > Reporting Suite > Report Scheduler.
The left-hand panel lists all available reports under the Standard, Custom, and System tabs. Clicking a report shows any existing schedules for it in the centre panel. If no schedules exist yet, you will be prompted to create one.
Page controls
| Control | Description |
|---|---|
| Create schedule | Creates a new schedule for the selected report, opening a blank schedule editor in the centre panel. |
| Clone | Creates a copy of the currently selected schedule with all its settings. Useful when setting up similar schedules for different recipients or campaigns. |
| Delete | Permanently deletes the selected schedule. A confirmation warning will appear before the deletion is processed. This action cannot be undone. |
| Save | Saves the new schedule or any changes made to an existing one. |
Creating a schedule
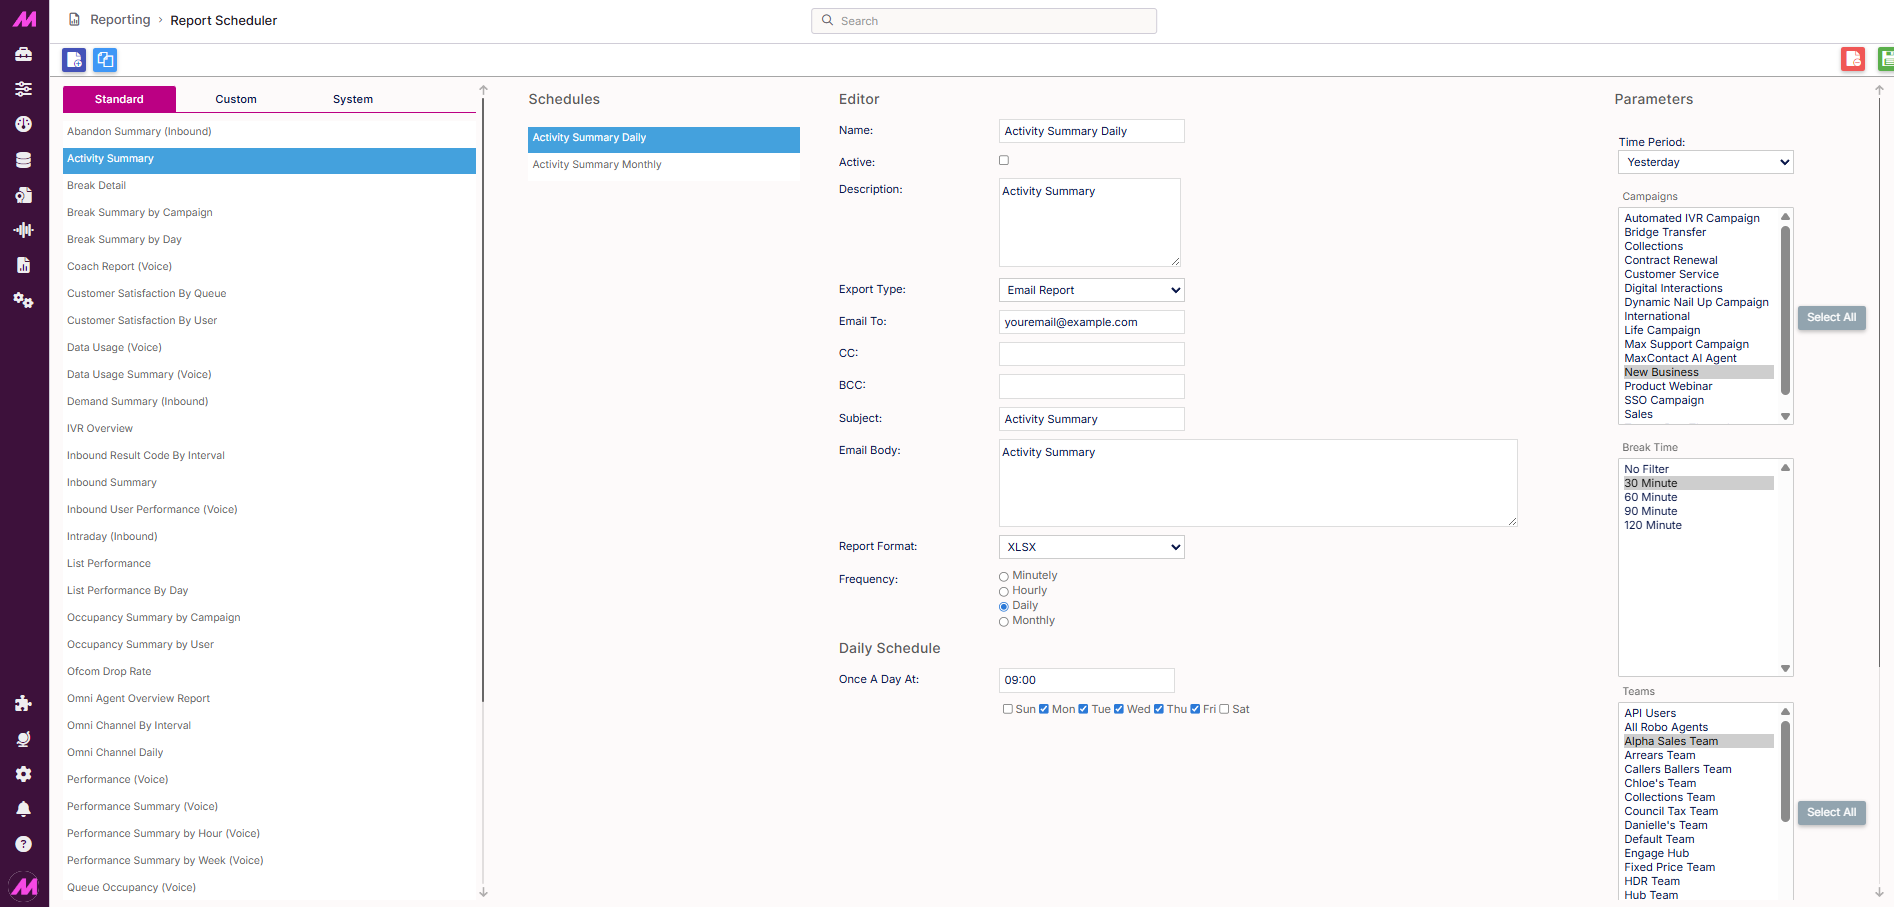
Click Create schedule to open a blank schedule editor. Complete the fields below, then click Save.
General settings
| Field | Description |
|---|---|
| Name * | A name for this schedule. Use something descriptive so it is easy to identify in the list. Required. |
| Active | When ticked, the schedule is active and will run at the configured time. Untick to pause the schedule without deleting it. |
| Description | An internal note explaining what this schedule is for. Not visible to recipients. |
| Export type * | Controls how the report is delivered. Three options are available: Email Report — the report is generated and attached to the email in your chosen file format (PDF, TIFF, or XLS). Email Link — a link to the report is emailed instead of the file itself. The recipient must be logged into the portal to view it. SFTP Upload — the report is sent directly to a configured SFTP location. An SFTP plan must be set up in Settings > Plans > SFTP Uploads before this option can be used. Once configured, select the relevant SFTP plan from the dropdown that appears. |
* Required field
Email settings
| Field | Description |
|---|---|
| Email to * | The primary recipient email address. Required. |
| CC | Additional recipients to be copied in on the email. |
| BCC | Additional recipients to be blind copied in. BCC recipients are not visible to other recipients. |
| Subject | The subject line of the email containing the report. |
| Email body | Any additional information or context you want to include in the email alongside the report. |
| Report format | Only visible when Export type is set to Email Report. Select the file format: PDF, TIFF, or XLS. |
Frequency and schedule
| Setting | Description |
|---|---|
| Frequency * | Sets how often the schedule runs. Choose from Hourly, Daily, or Monthly. The options available in the Schedule section below change depending on the frequency selected. Required. |
| Hourly | Set the interval in hours, the start and end times, and the days of the week the report should run. The minimum interval is one hour. Note. Report statistics are only updated on the hour. For best results, schedule hourly reports to run at five minutes past the hour — for example, 09:05 rather than 09:00. |
| Daily | Set the time the report runs each day. Use the Parameters panel on the right to set the time period — either Today or Yesterday, depending on when you want the report to run. Running at the end of a shift with Today selected, or first thing in the morning with Yesterday selected, are both common approaches. |
| Monthly | Choose to run on the first day or the last day of the month. The report will contain data for the full calendar month. Bear in mind the report may run over a weekend if the first or last day falls on a Saturday or Sunday. |
Parameters
The right-hand panel of the schedule editor controls which data appears in the report. The options available vary by report — some allow you to select a time period (Today, Yesterday, This Week, Last Week), while others let you filter by campaign, team, user, and so on. Configure these to match what the recipient needs to see.
Managing schedules
Once a schedule is saved it appears in the centre panel when that report is selected. You can create as many schedules per report as needed — for example, sending the same report to different team leaders filtered to their own team's data, or sending a full-view version to management.
To pause a schedule without deleting it, open it and untick the Active checkbox, then save. To remove it entirely, select it and click Delete — this cannot be undone.
Scheduling considerations
Running a large number of schedules at exactly the same time can affect report delivery speeds, particularly for larger reports, as it increases load on the database. Where possible, stagger schedules by a few minutes to avoid them all triggering simultaneously.
Setting up SFTP delivery
To deliver reports via SFTP, you first need to set up an SFTP plan before configuring the schedule.
- Go to Settings > Plans > SFTP Uploads.
- Click Create new plan.
- Enter a name for the plan and the SFTP connection details, then click Save.
- Return to the Report Scheduler, set the Export type to SFTP Upload, and select your new plan from the dropdown.