
Overview
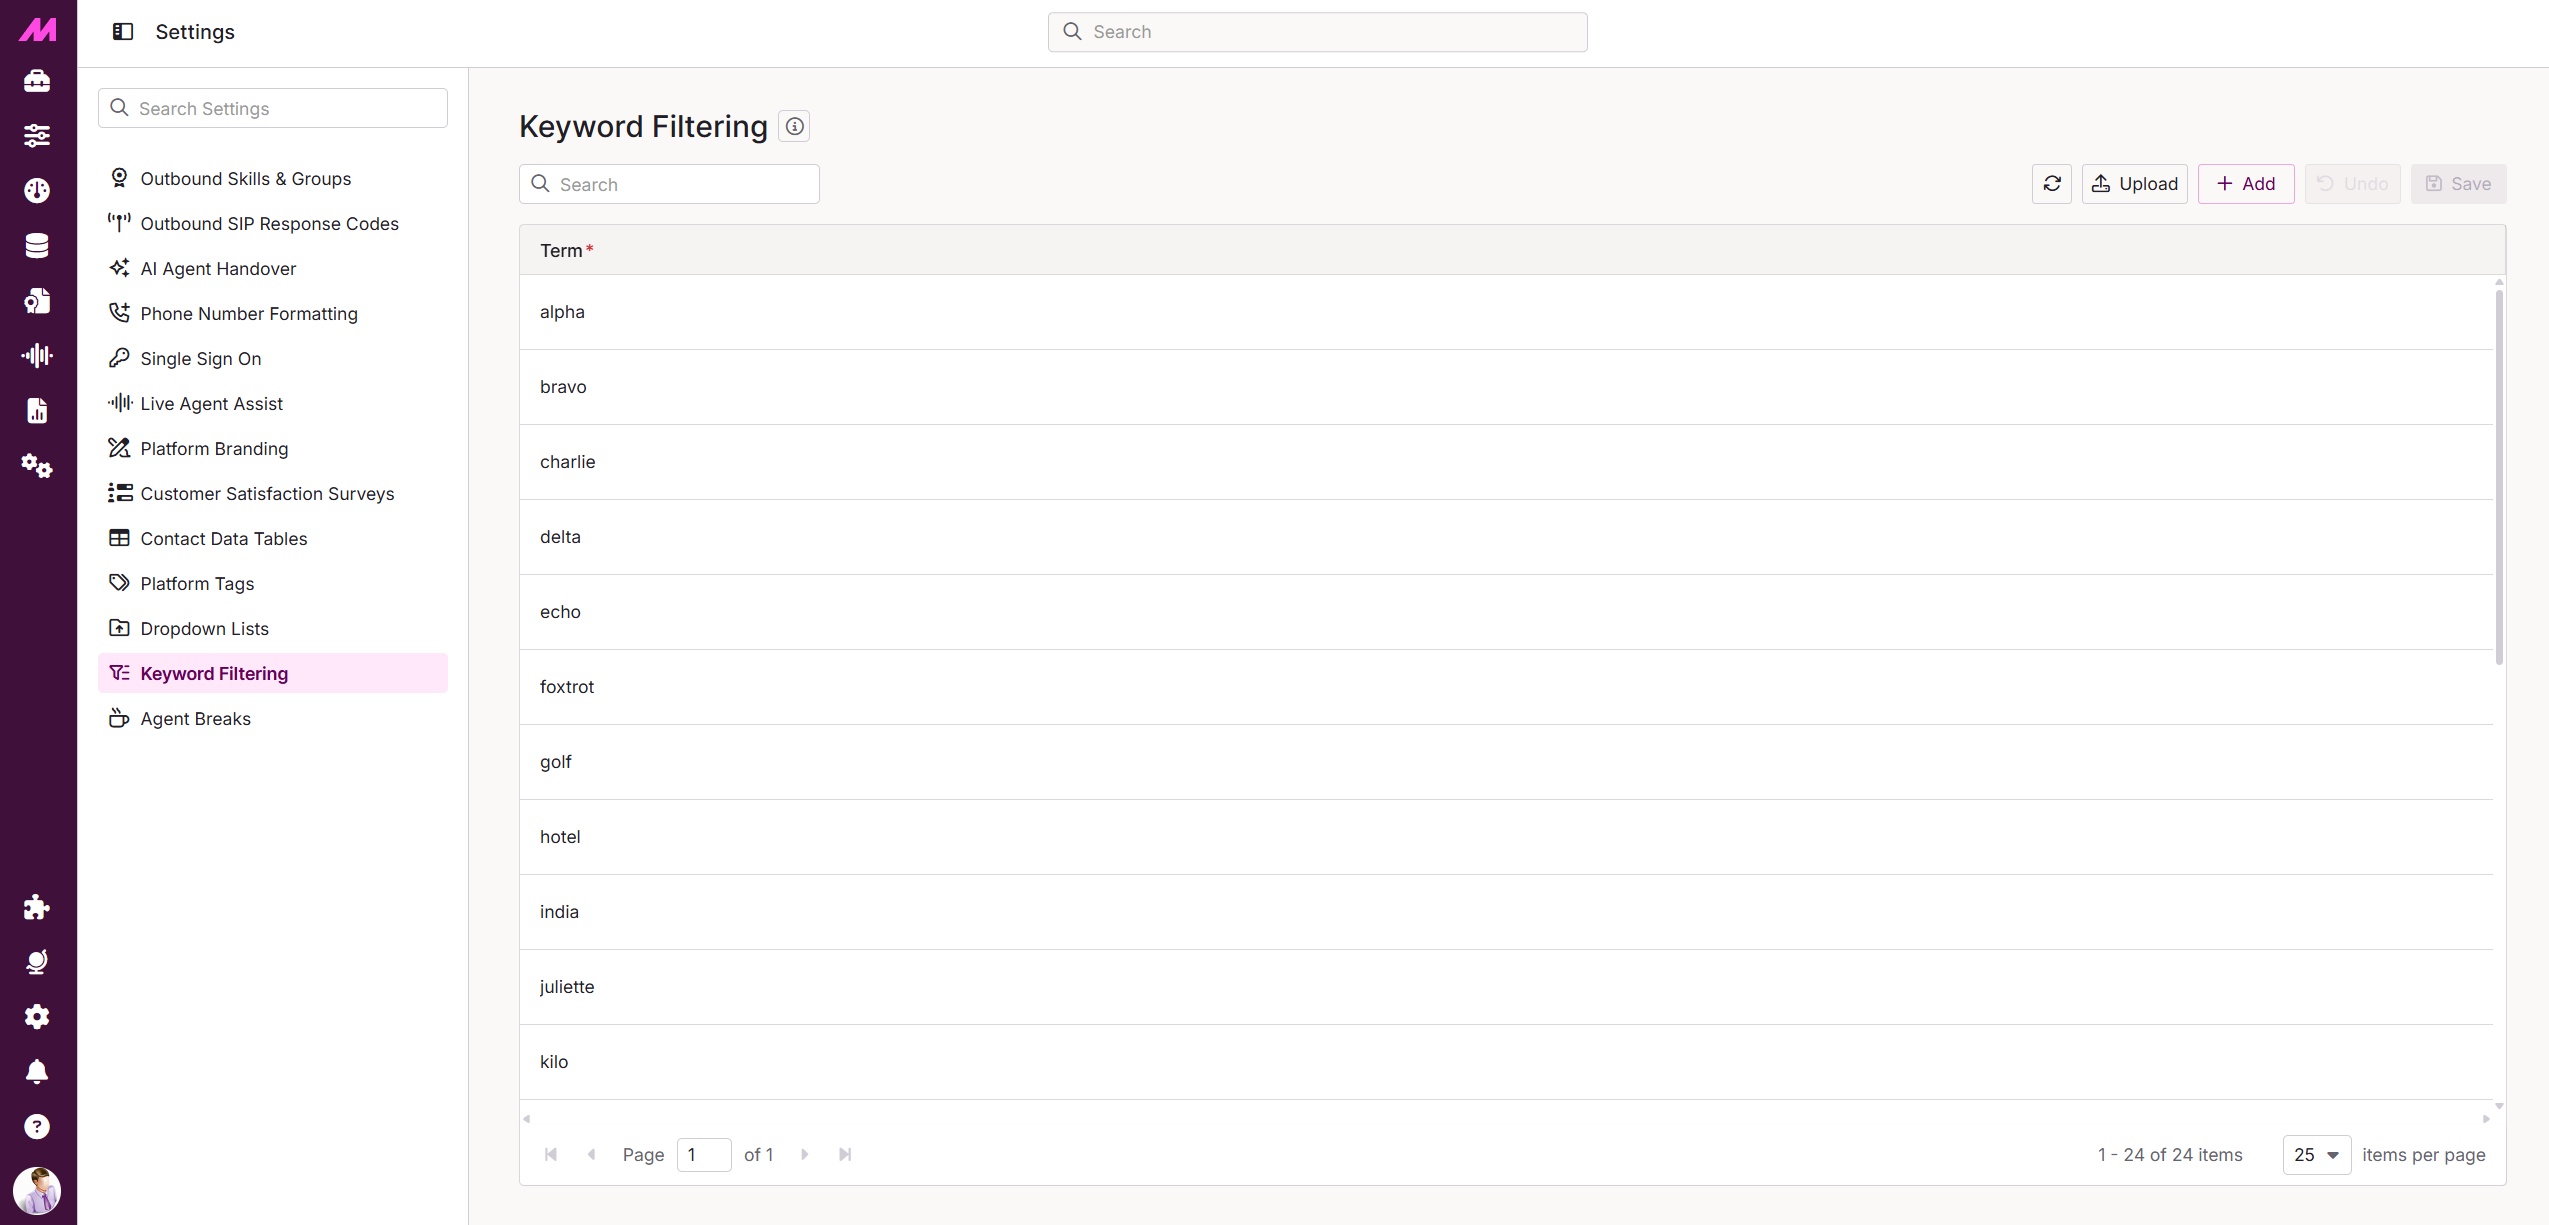
The Keyword Filtering page lets you create lists of words or phrases to be automatically filtered from agent interactions (Chat, Email, SMS, WhatsApp and Facebook Messenger). Any message containing a filtered word is displayed with the word replaced by *****.
To access it, go to Settings > Keyword Filtering.
Note. This page was previously named Content Filtering. It can be accessed via the Keyword Filtering tab on the main Settings page.
Setting up permissions
Before you can use Keyword Filtering, the relevant permission must be enabled for the appropriate roles in your organisation.
- Go to Settings > Permissions.
- Locate the role you want to grant access to.
- Under Page level Admin Permissions, enable the Settings - Keyword Filtering checkbox.
- Click Save.
Note. Always log out and back in after making changes on the Permissions page for them to take effect.
Adding and Editing Keywords
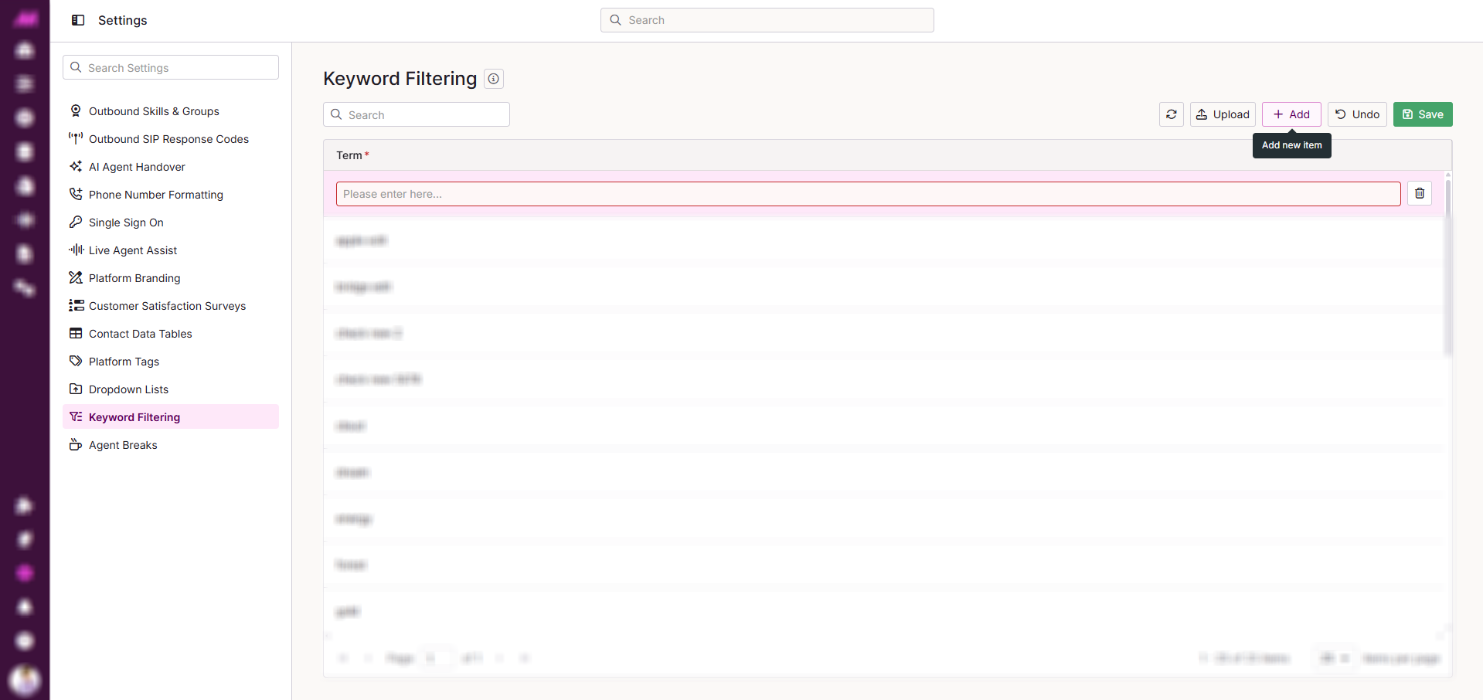
Add individual keywords by clicking Add. This creates a new row for you to enter the keyword. Make sure to save your changes once done.
To edit an existing keyword, click on it to open the text editor. Make your changes, then click Save.
To remove a keyword, click the bin icon next to the relevant entry.
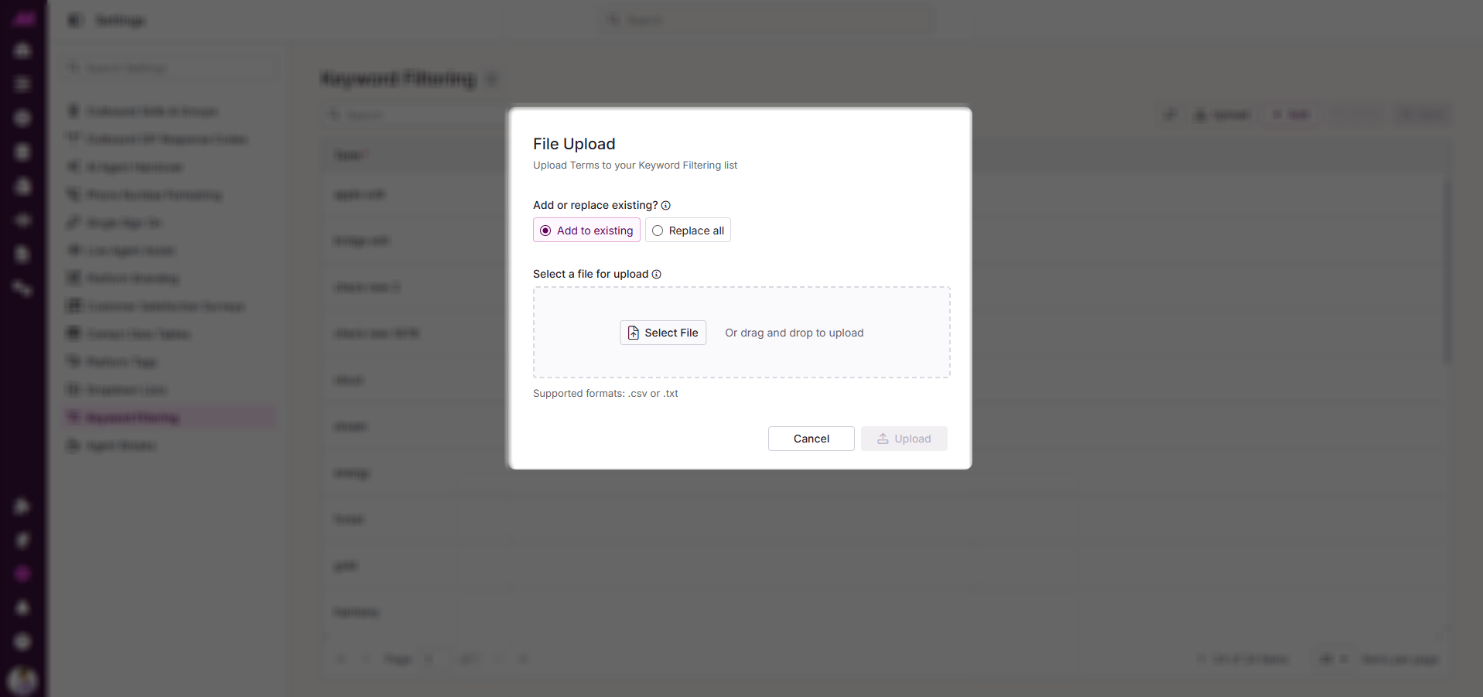
Uploading a keyword filter file
Words and phrases can also be added by uploading a file. To upload, click the Upload button in the top right of the page.
The uploader accepts both .txt and .csv files. Format your file as follows before uploading:
- CSV files — the column containing your words or phrases must be headed phrases
- Text files — each word or phrase must be on a separate line
| Field | Description |
|---|---|
| Add or replace existing? | Choose to either add to your existing list of keywords. Or to replace and delete your current keywords with those within the uploaded file. |
| File Upload | Click to select your file, or drag and drop it directly into the upload area. .csv or .txt are the supported formats. |
Tracking filtered messages
There are two ways to monitor which messages have triggered Keyword Filtering.
 Dashboard widget
Add a Queues Tile widget to your dashboard and configure it to display either Interaction Message Filtered Customer or Interaction Message Filtered Agent for the queue you want to monitor. This gives you a live count of filtered messages per queue.
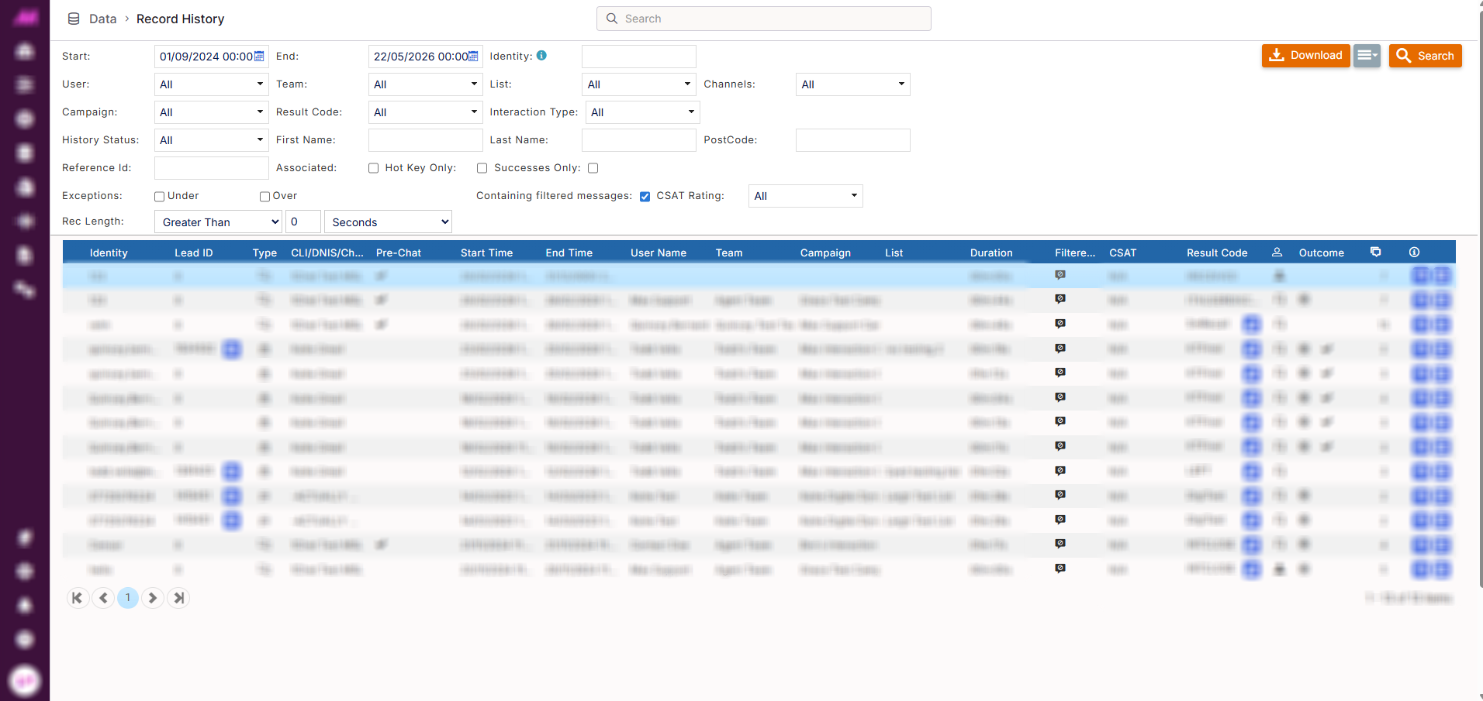
Record History
In Record History, use the Containing filtered messages option in the advanced filters to return only interactions where at least one message triggered Keyword Filtering. Filtered interactions are also flagged with a red flag icon in the results.