Overview
The Import DNC page lets you add numbers to your Do Not Call list in bulk (either by entering them manually or uploading a file). It also has a Remove Numbers tab for bulk removal of numbers that no longer need to be suppressed.
To access it, go to Data > Data Handling > Import DNC.
Numbers can be added to the DNC list in several ways. The most common is automatically, when an agent dispositions a call with a DNC result code, the customer's number is added to the relevant DNC category without any manual steps. Use this page when you need to add or remove numbers in bulk, for example, from a supplier suppression file or a GDPR removal list.
Adding numbers to the DNC list
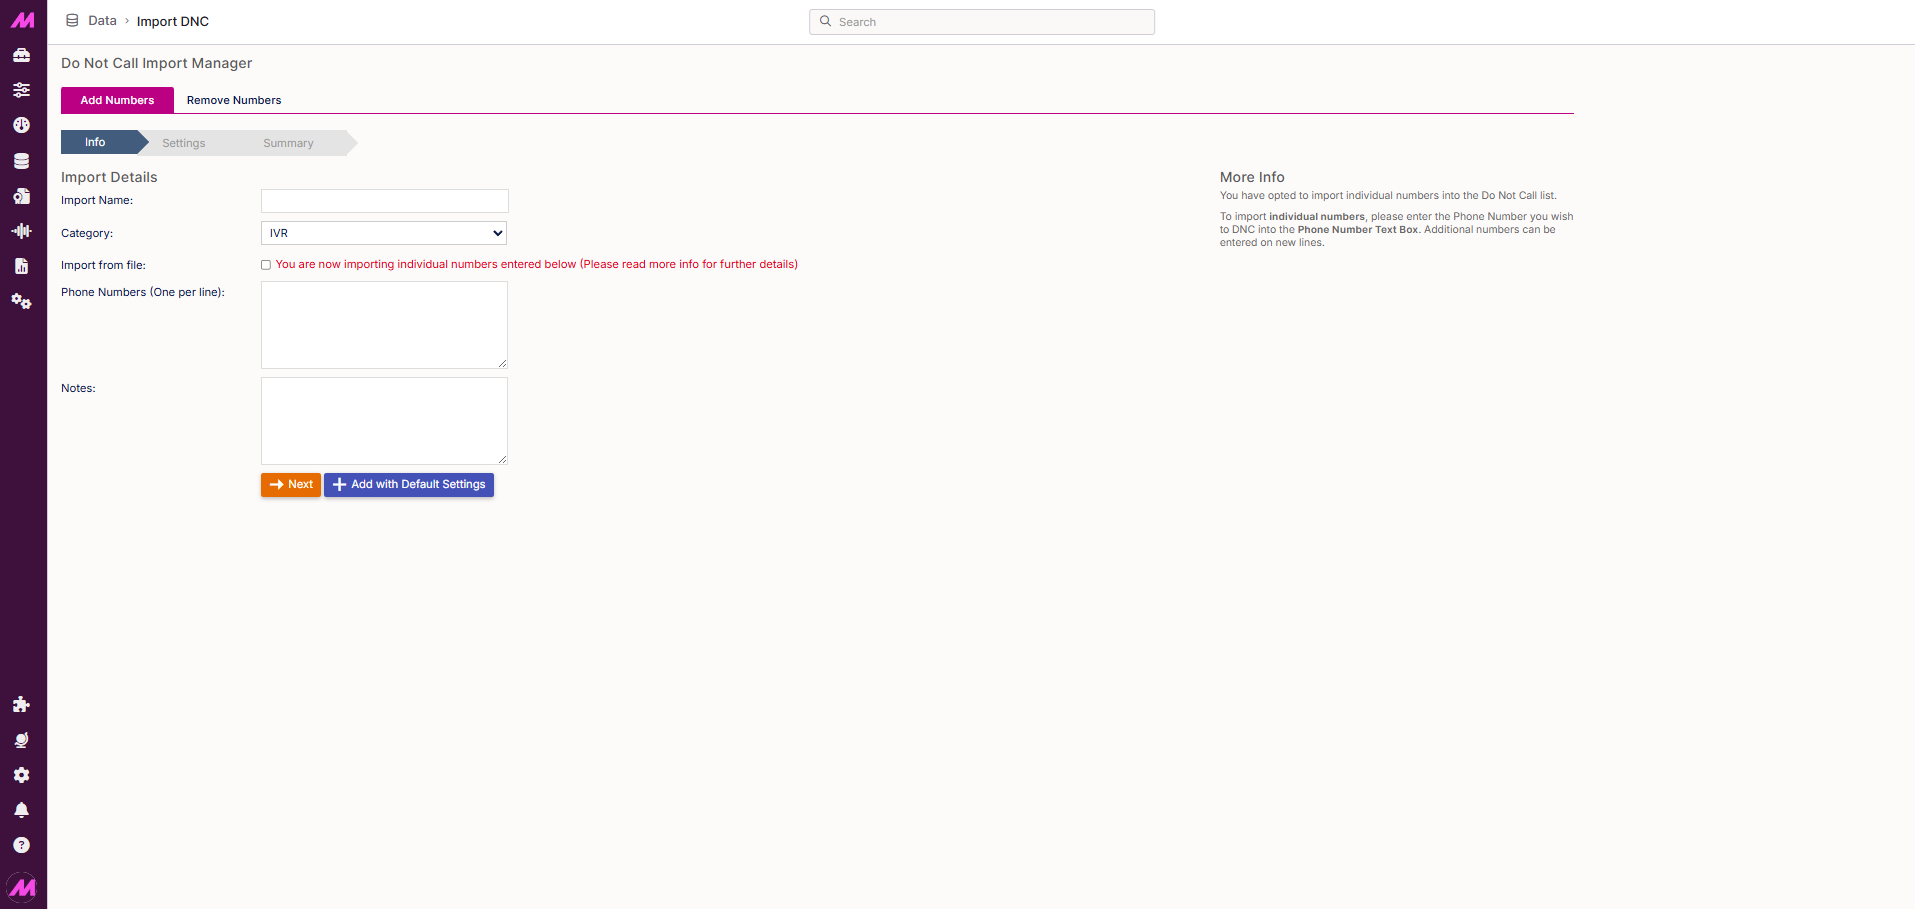
The Add Numbers tab is selected by default. The process has three stages: Info, Settings, and Summary.
Stage 1: Info
| Field | Description |
|---|---|
| Import name * | A name for this import. Use something descriptive so the import is identifiable in the history log. Required. |
| Category * | The DNC category to add the numbers to. Three default categories are available (IVR, Imported, and Requested), along with any custom categories created on your system. Required. |
| Import from file | When unticked, numbers are entered manually in the phone number field below. When ticked, a file upload option appears instead. Accepted file types are .csv and .txt,. Numbers must be listed one per line with no additional columns or headers required. |
| Phone number (one per line) | Visible when Import from file is unticked. Enter each number on a separate line. Only visible for manual entry. |
| Notes * | A description of why these numbers are being added to the DNC list. This is mandatory and will be visible in the import history — keep it clear enough to be useful to other users. Required. |
* Required field
Once complete, click Next to proceed to the Settings stage, or click Add with default settings to skip Settings and go straight to the Summary using the system defaults.
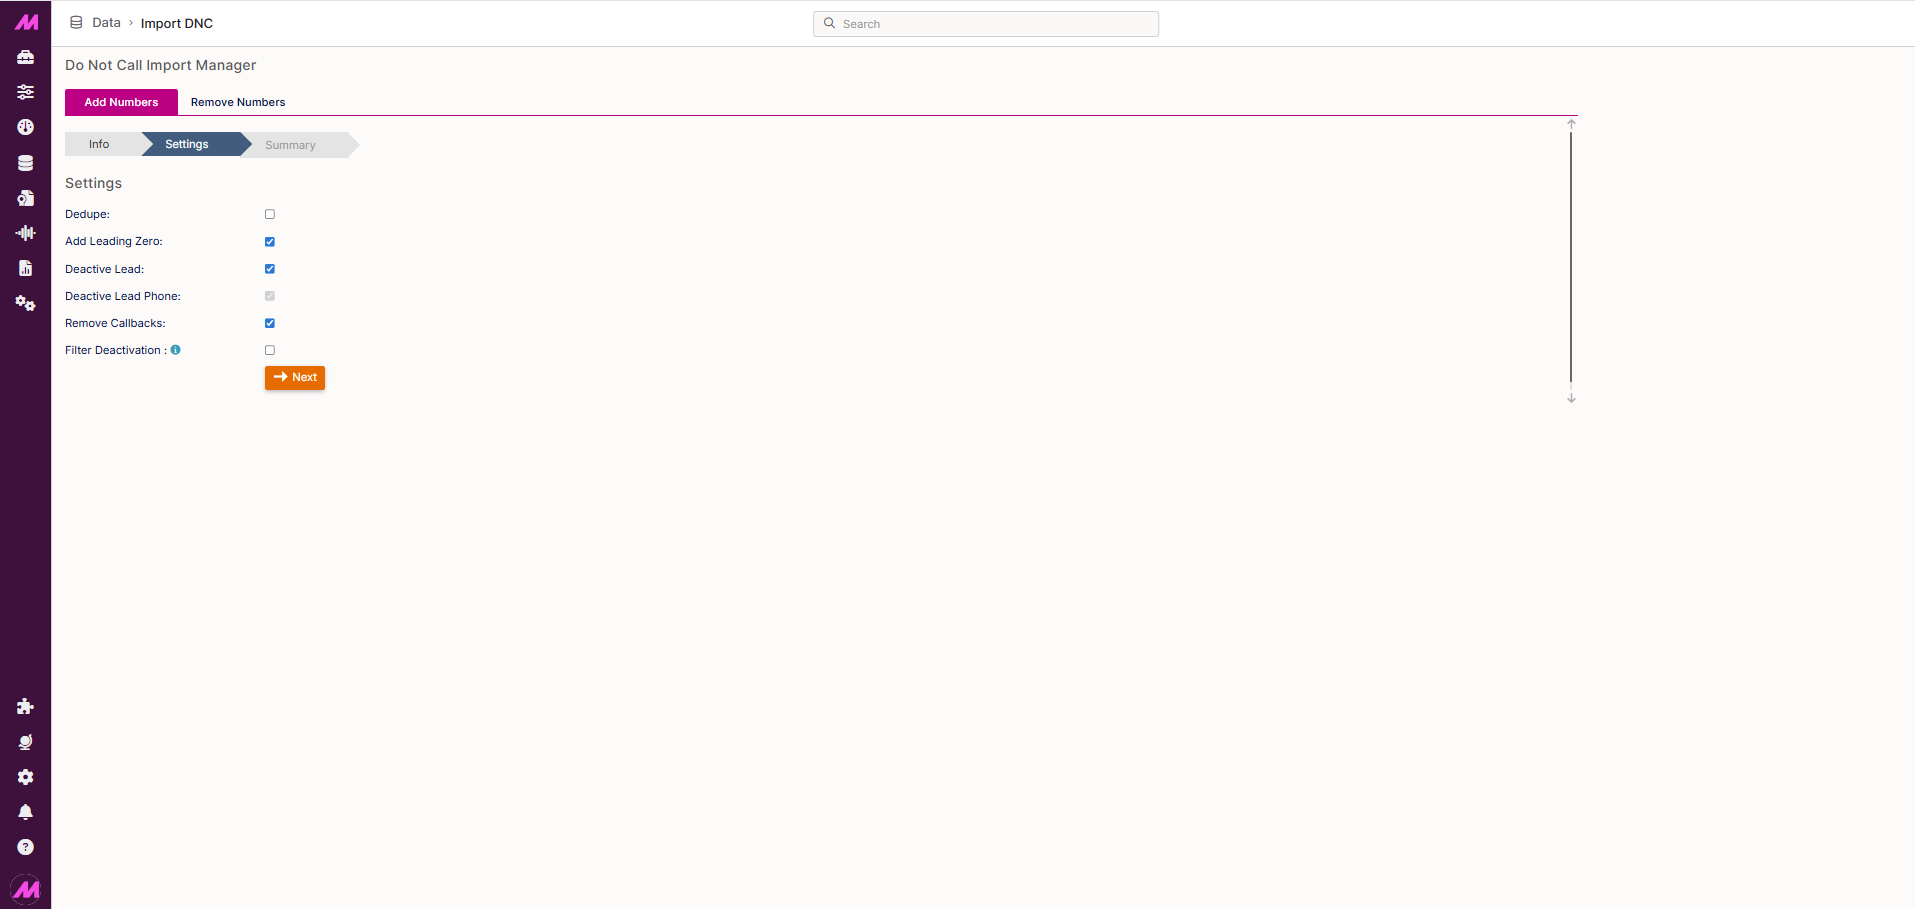
Stage 2: Settings
| Setting | Description |
|---|---|
| Dedupe | When checked, any number in your import file that already exists on the DNC list will not be added again (the existing entry is kept as-is). |
| Add leading zero | When checked, a leading zero is automatically prepended to any numbers that are missing one on import. |
| Deactivate lead | When checked, any lead on the system matching a number in the import file will be deactivated entirely (all phone numbers on that lead will be suppressed). |
| Deactivate lead phone | Only available when Deactivate lead is unticked. Deactivates the specific phone number matched rather than the entire lead (the lead remains active and can still be called on other numbers). |
| Remove callbacks | When checked, any scheduled callbacks associated with matching numbers are removed at the point of import. |
| Filter deactivation | When checked, lead deactivation is restricted to leads assigned to lists matched by the selected tags. Additional tag options appear when this is enabled. Only relevant if tagging is active on your system. |
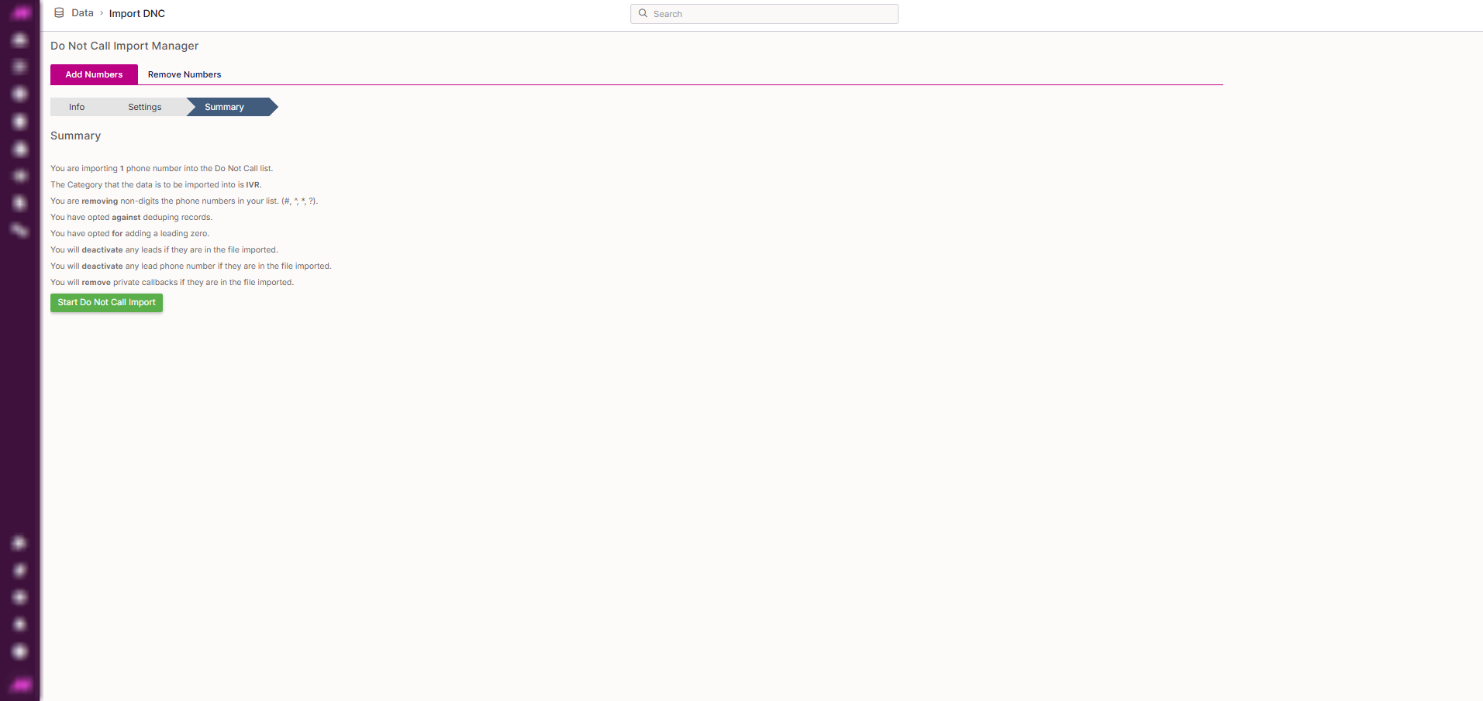
Stage 3: Summary
The Summary tab shows a full breakdown of the import based on the settings chosen. Review this carefully before proceeding.
Once satisfied, click Start Do Not Call Import. A green notification will confirm the import was successful; red indicates a failure.
Two options appear after the import completes:
| Option | Description |
|---|---|
| Do another import | Returns to the Info tab to start a new import. |
| Go to DNC import history | Opens the Import DNC History page where you can review all previous imports and confirm the current one has been recorded. |
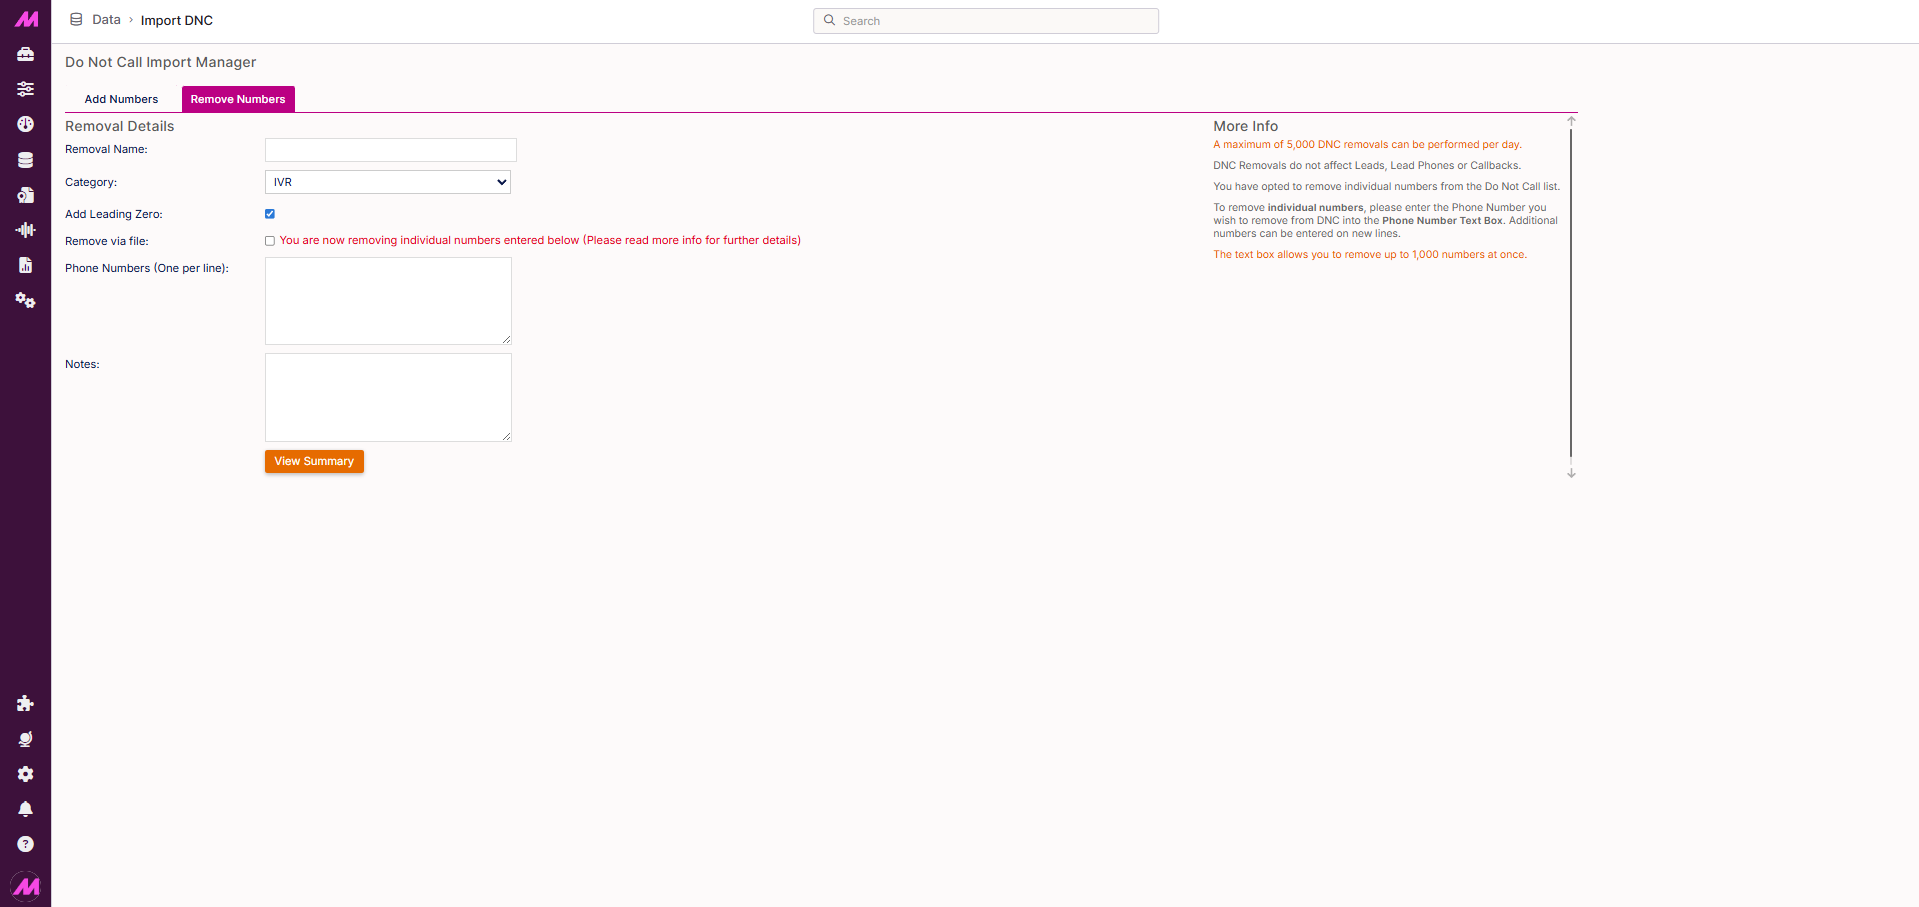
Removing numbers from the DNC list
To remove numbers in bulk, select the Remove Numbers tab at the top of the page. This works in the same way as adding numbers (you can enter them manually or upload a file).
Note. A maximum of 5,000 DNC removals can be performed per day. Each file or manual entry can contain up to 1,000 numbers at a time.
- Enter a name for the removal. Useful if this is a regular process and you want it to be identifiable in the history log.
- Select the DNC category you want to remove numbers from using the dropdown. Make sure you select the correct list (numbers are only removed from the category selected, not all lists).
- Enter the numbers to remove. Two options are available:
| Method | Description |
|---|---|
| Manual entry | Enter numbers directly into the text box, one per line (each number must be on a separate line for the system to read them correctly). Up to 1,000 numbers can be entered at once. |
| Remove via file | Tick Remove via file and upload a file containing the numbers to remove. Numbers must be listed one per line. Accepted file types are .csv and .txt. Maximum 1,000 numbers per file. |
- Enter a note explaining why these numbers are being removed. This is mandatory.
- Click Summary to review the removal details, then click Start bulk delete operation to confirm.