
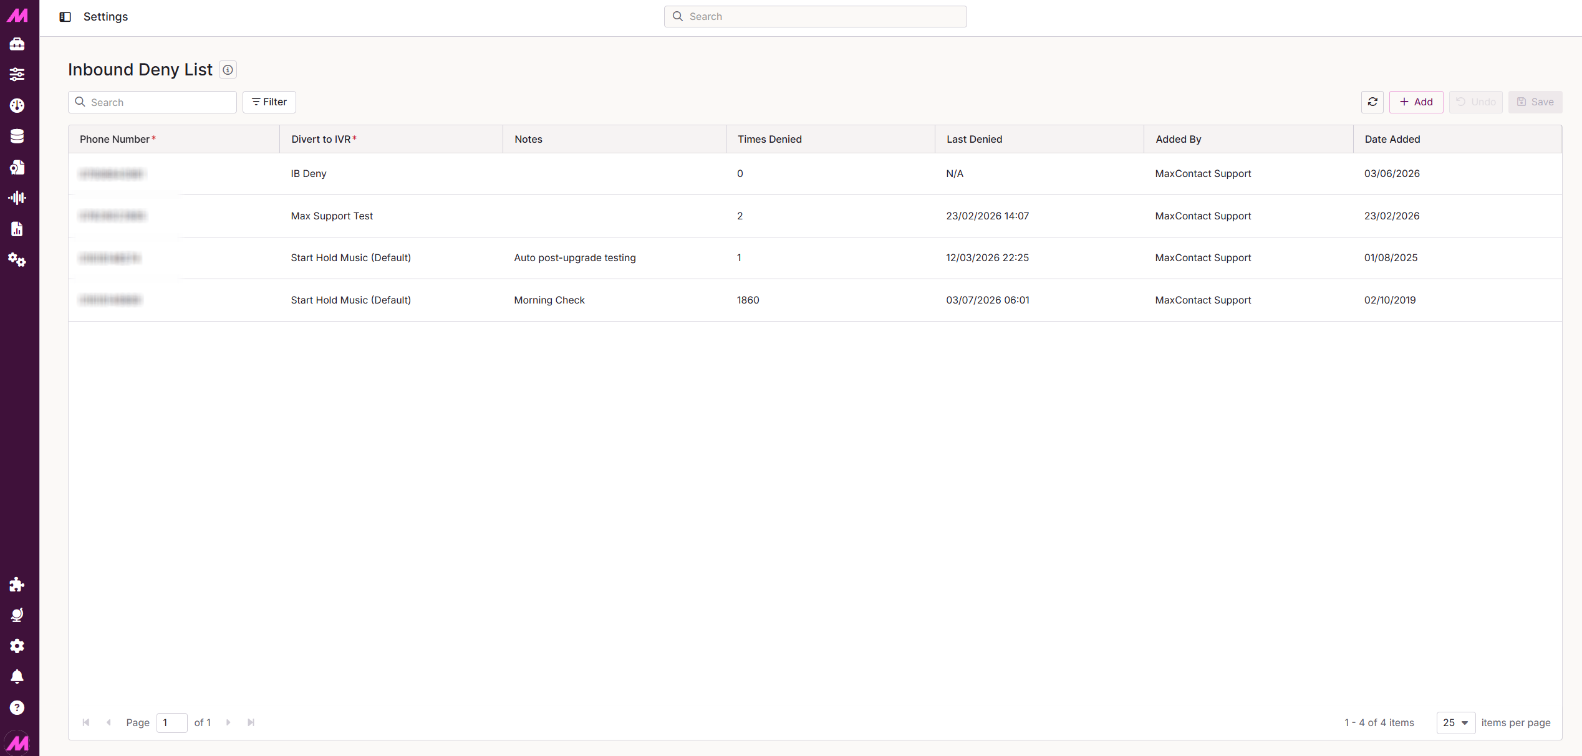
Inbound Deny List
The Inbound Deny List holds a list of inbound numbers that are diverted to an IVR to prevent them from reaching an agent. It lets you block specific numbers from calling into your system by routing them to an IVR of your choice — for example, a message or hold music. You will need to have the relevant IVR already configured before adding numbers to the list.
To access it, go to Centralised Settings > Inbound Deny List.
Page controls
| Control | Description |
|---|---|
| Search | Searches across both the Phone Number and Notes fields. |
| Filter | Opens advanced filtering options. You can filter by Divert to IVR, Times Denied, Last Denied, Added By, and Date Added. |
| Reload data | Reloads the page data. Useful when multiple users have access to this page and you want to see the most up-to-date entries. |
| Add entry | Adds a new number to the deny list. |
| Undo | Reverts any unsaved changes made in the current session. |
| Save | Saves any changes made on the page. |
Deny list table
The table lists all numbers currently on the deny list. The columns displayed are as follows.
| Column | Description |
|---|---|
| Phone Number | The inbound number being blocked. |
| Divert to IVR | The IVR route the number is directed to when it calls in. |
| Notes | Any notes recorded against this entry. |
| Times Denied | The total number of times this number has been denied since being added to the list. |
| Last Denied | The date and time the number was most recently denied. |
| Added By | The user who added this number to the list. |
| Date Added | The date the number was added to the list. |
Deleting an entry
To delete a single entry, hover over its row in the table. A bin icon will appear next to the phone number — select it to open a confirmation prompt before the deletion is carried out.
Bulk actions
To select multiple entries, hover over a row and select the tick box to the left of the row number. Repeat for each entry you want to include. Once one or more entries are selected, a Delete button appears at the top of the table, allowing you to delete all selected entries in a single action. There is no limit on how many entries can be bulk deleted at once.
To select all entries currently visible, hover next to the Phone Number column header and select the tick box that appears. This will select every entry in the current view.