What is SSO and what are its benefits
SSO allows users to log into multiple systems with one set of login details by connecting them to your main active directory. An Active Directory is simply a directory of users that have been set up with a login and password for their organisation. Using SSO reduces the number of usernames and passwords users have to remember and also provides a central location for authentication via a single identity provider.
Main benefits
Improved user experience - less time spent logging in.
Increased security - centralised access control and credential management.
Reduced IT costs - no need to manage credentials separately for each application.
Increased compliance - centralised logging, auditing and access controls.
How it works
In basic terms, users log into the identity provider (IdP) login presented within MaxContact (Via an active directory such as Azure) and the credentials are verified by the IdP. The IdP then presents a token which comes back to MaxContact (or other applications) and tells the system that this users valid and can access the system without having to add credentials directly to MaxContact.
Note - the SSO login button wording can be configured to read however you require.
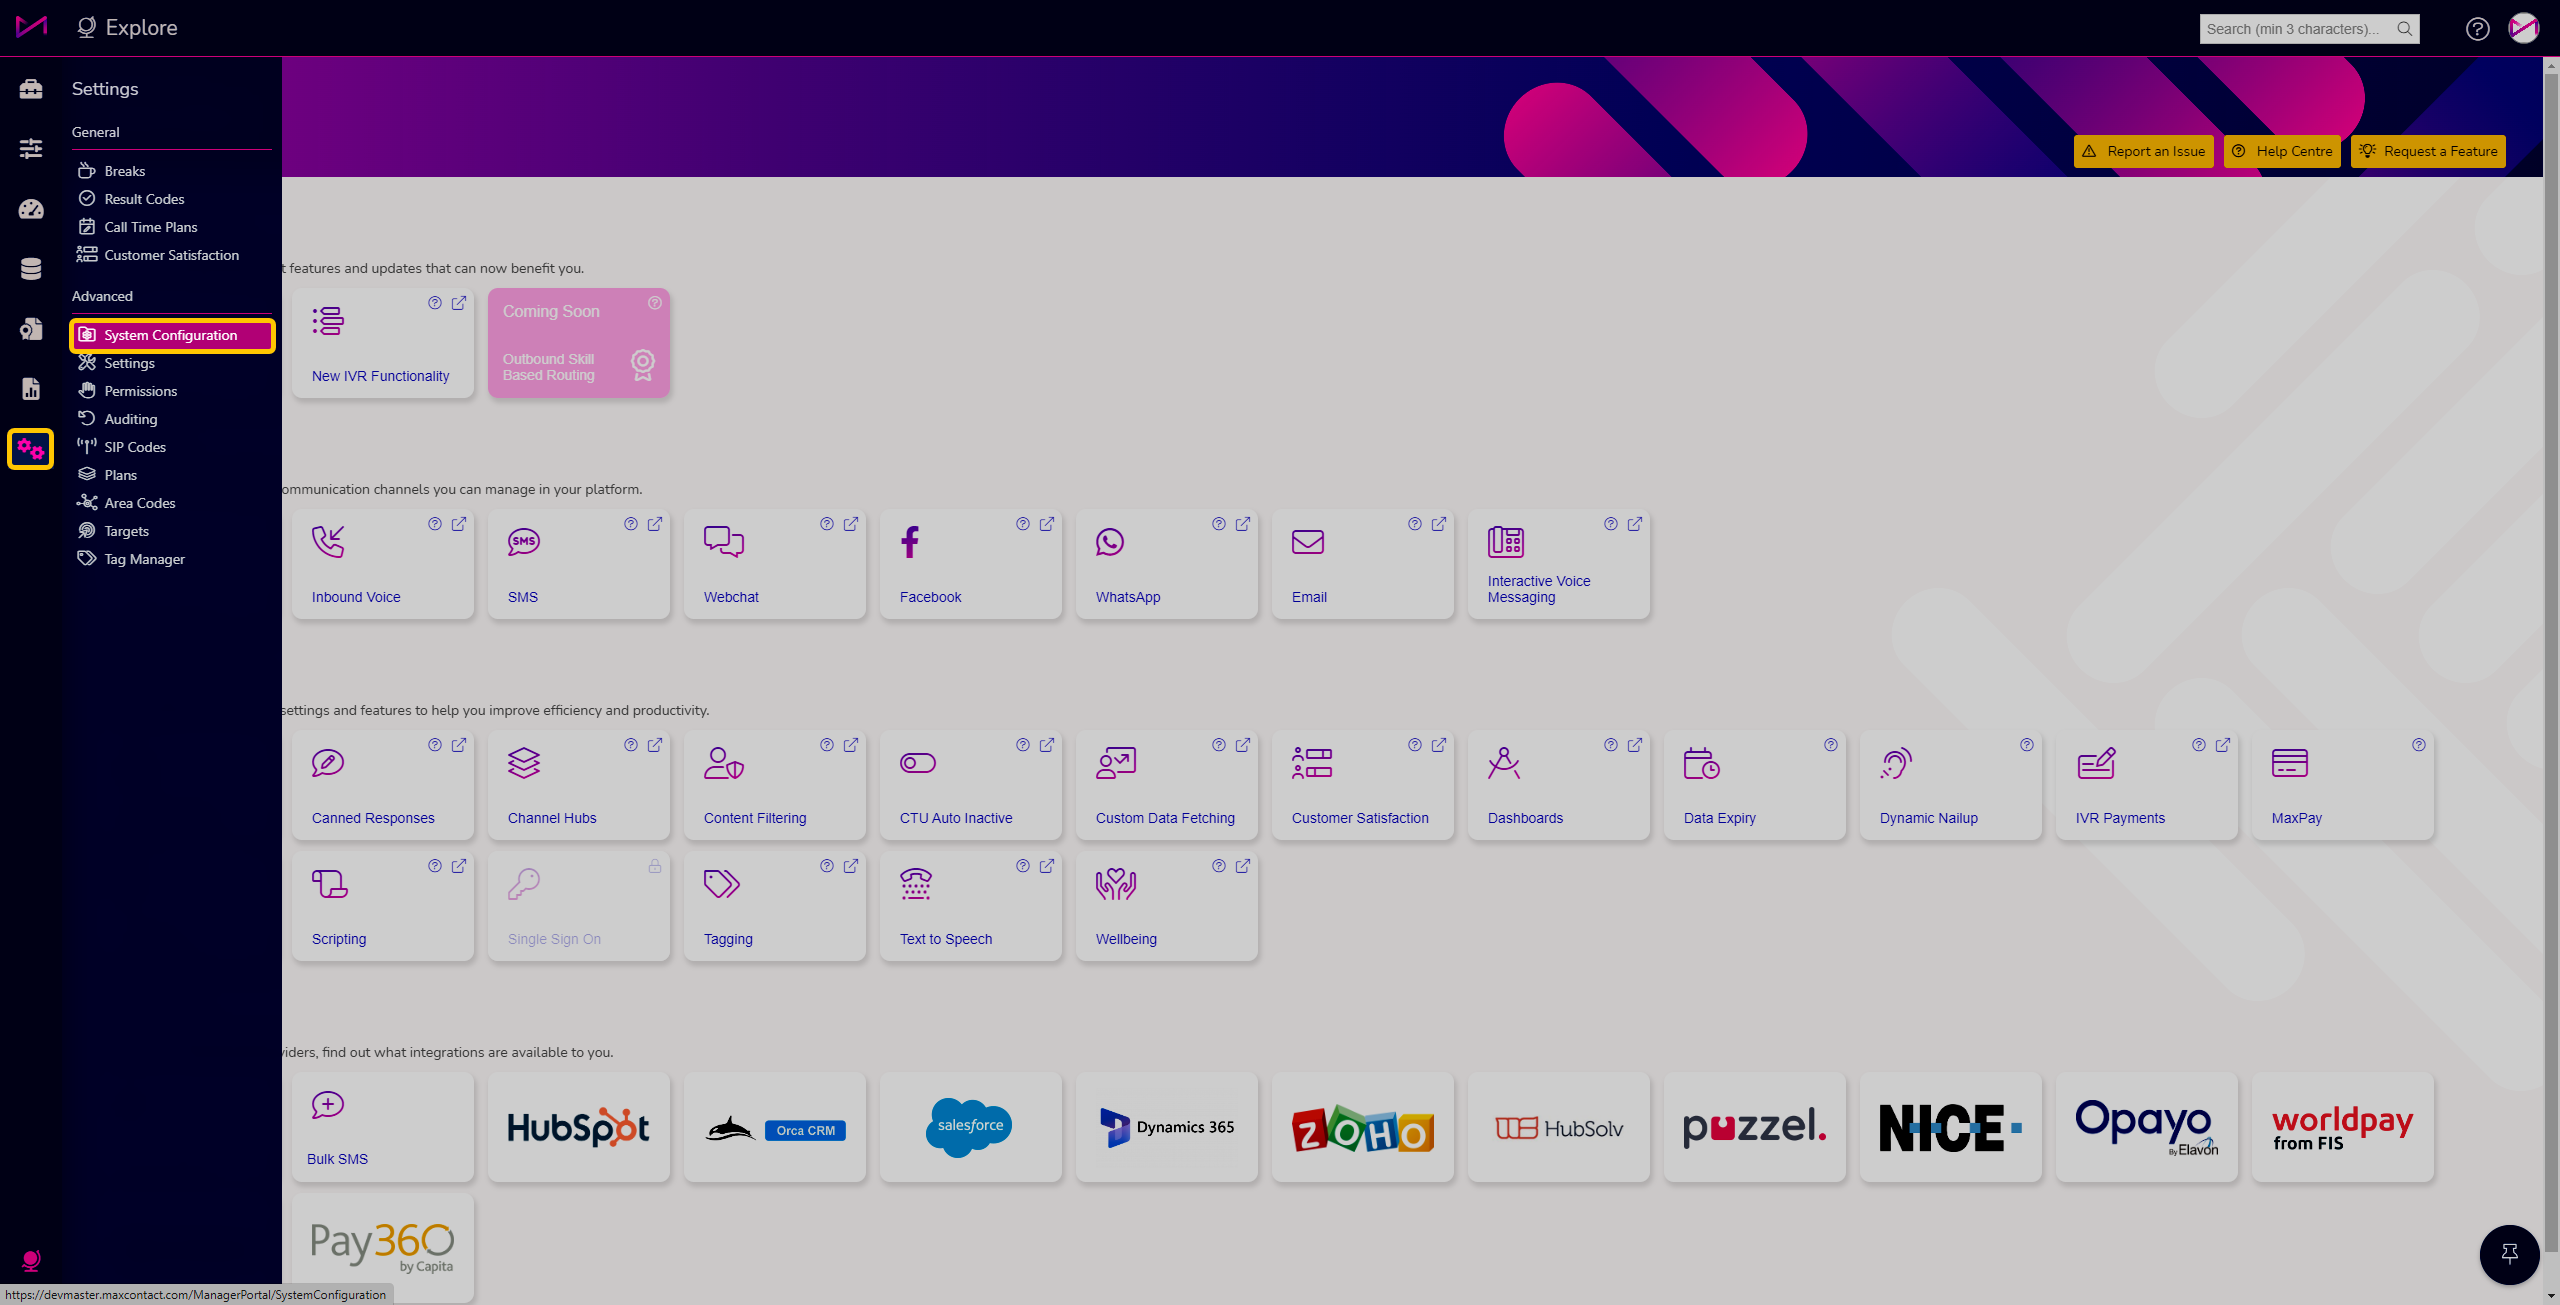
SSO implementation
Configuration
Once the feature has been initialised on your system, you will have access to the System Configuration page.
Your IT department will need to work closely with our team to ensure it is setup correctly.
General tab
If you are setting SSO up, we recommend you turn on both SSO and local Authentication until everything is configured. Within the page, you can enable/disable SSO and can also enable/disable the use of the standard Local Authentication method - Username & Password from the CTU page. Local authentication is an override, we would advise you have this switched on until your SSO is completely setup. The idea is that when using SSO, if anything went wrong, you wouldn't have to turn it off for each user individually, you can just allow all users to access the system with the default login option. More on this later.
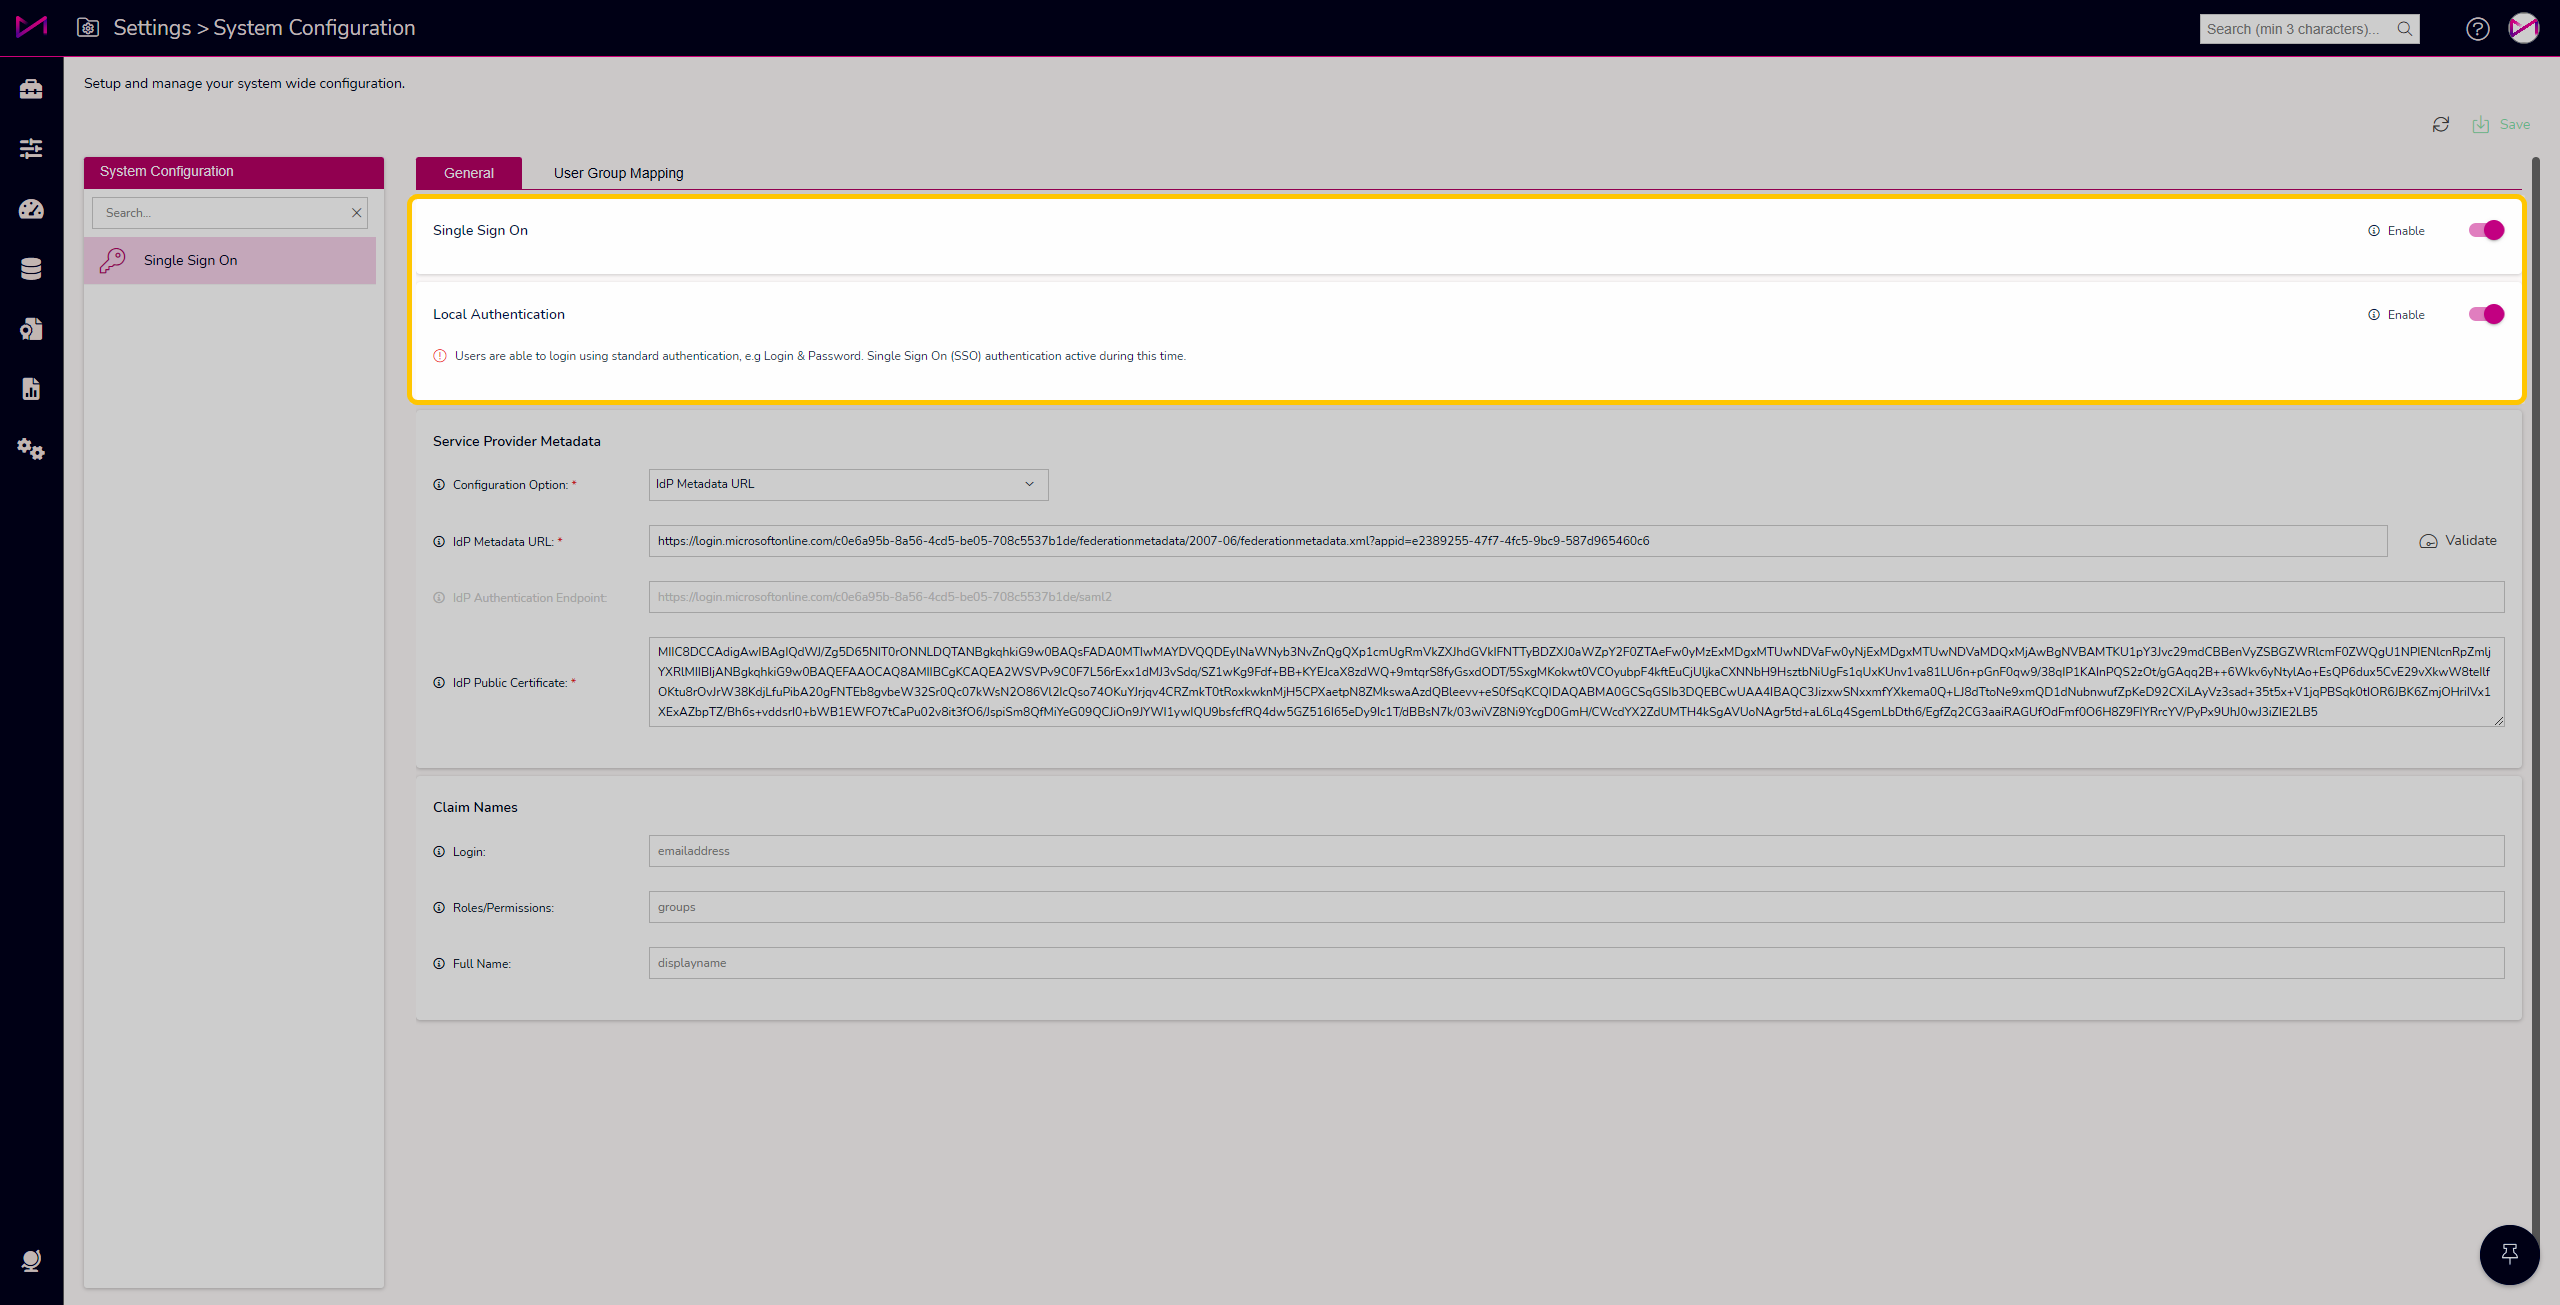
Once you have the required information from your team and/or MaxContact, you can then configure the system via the Service Provider Metadata card.
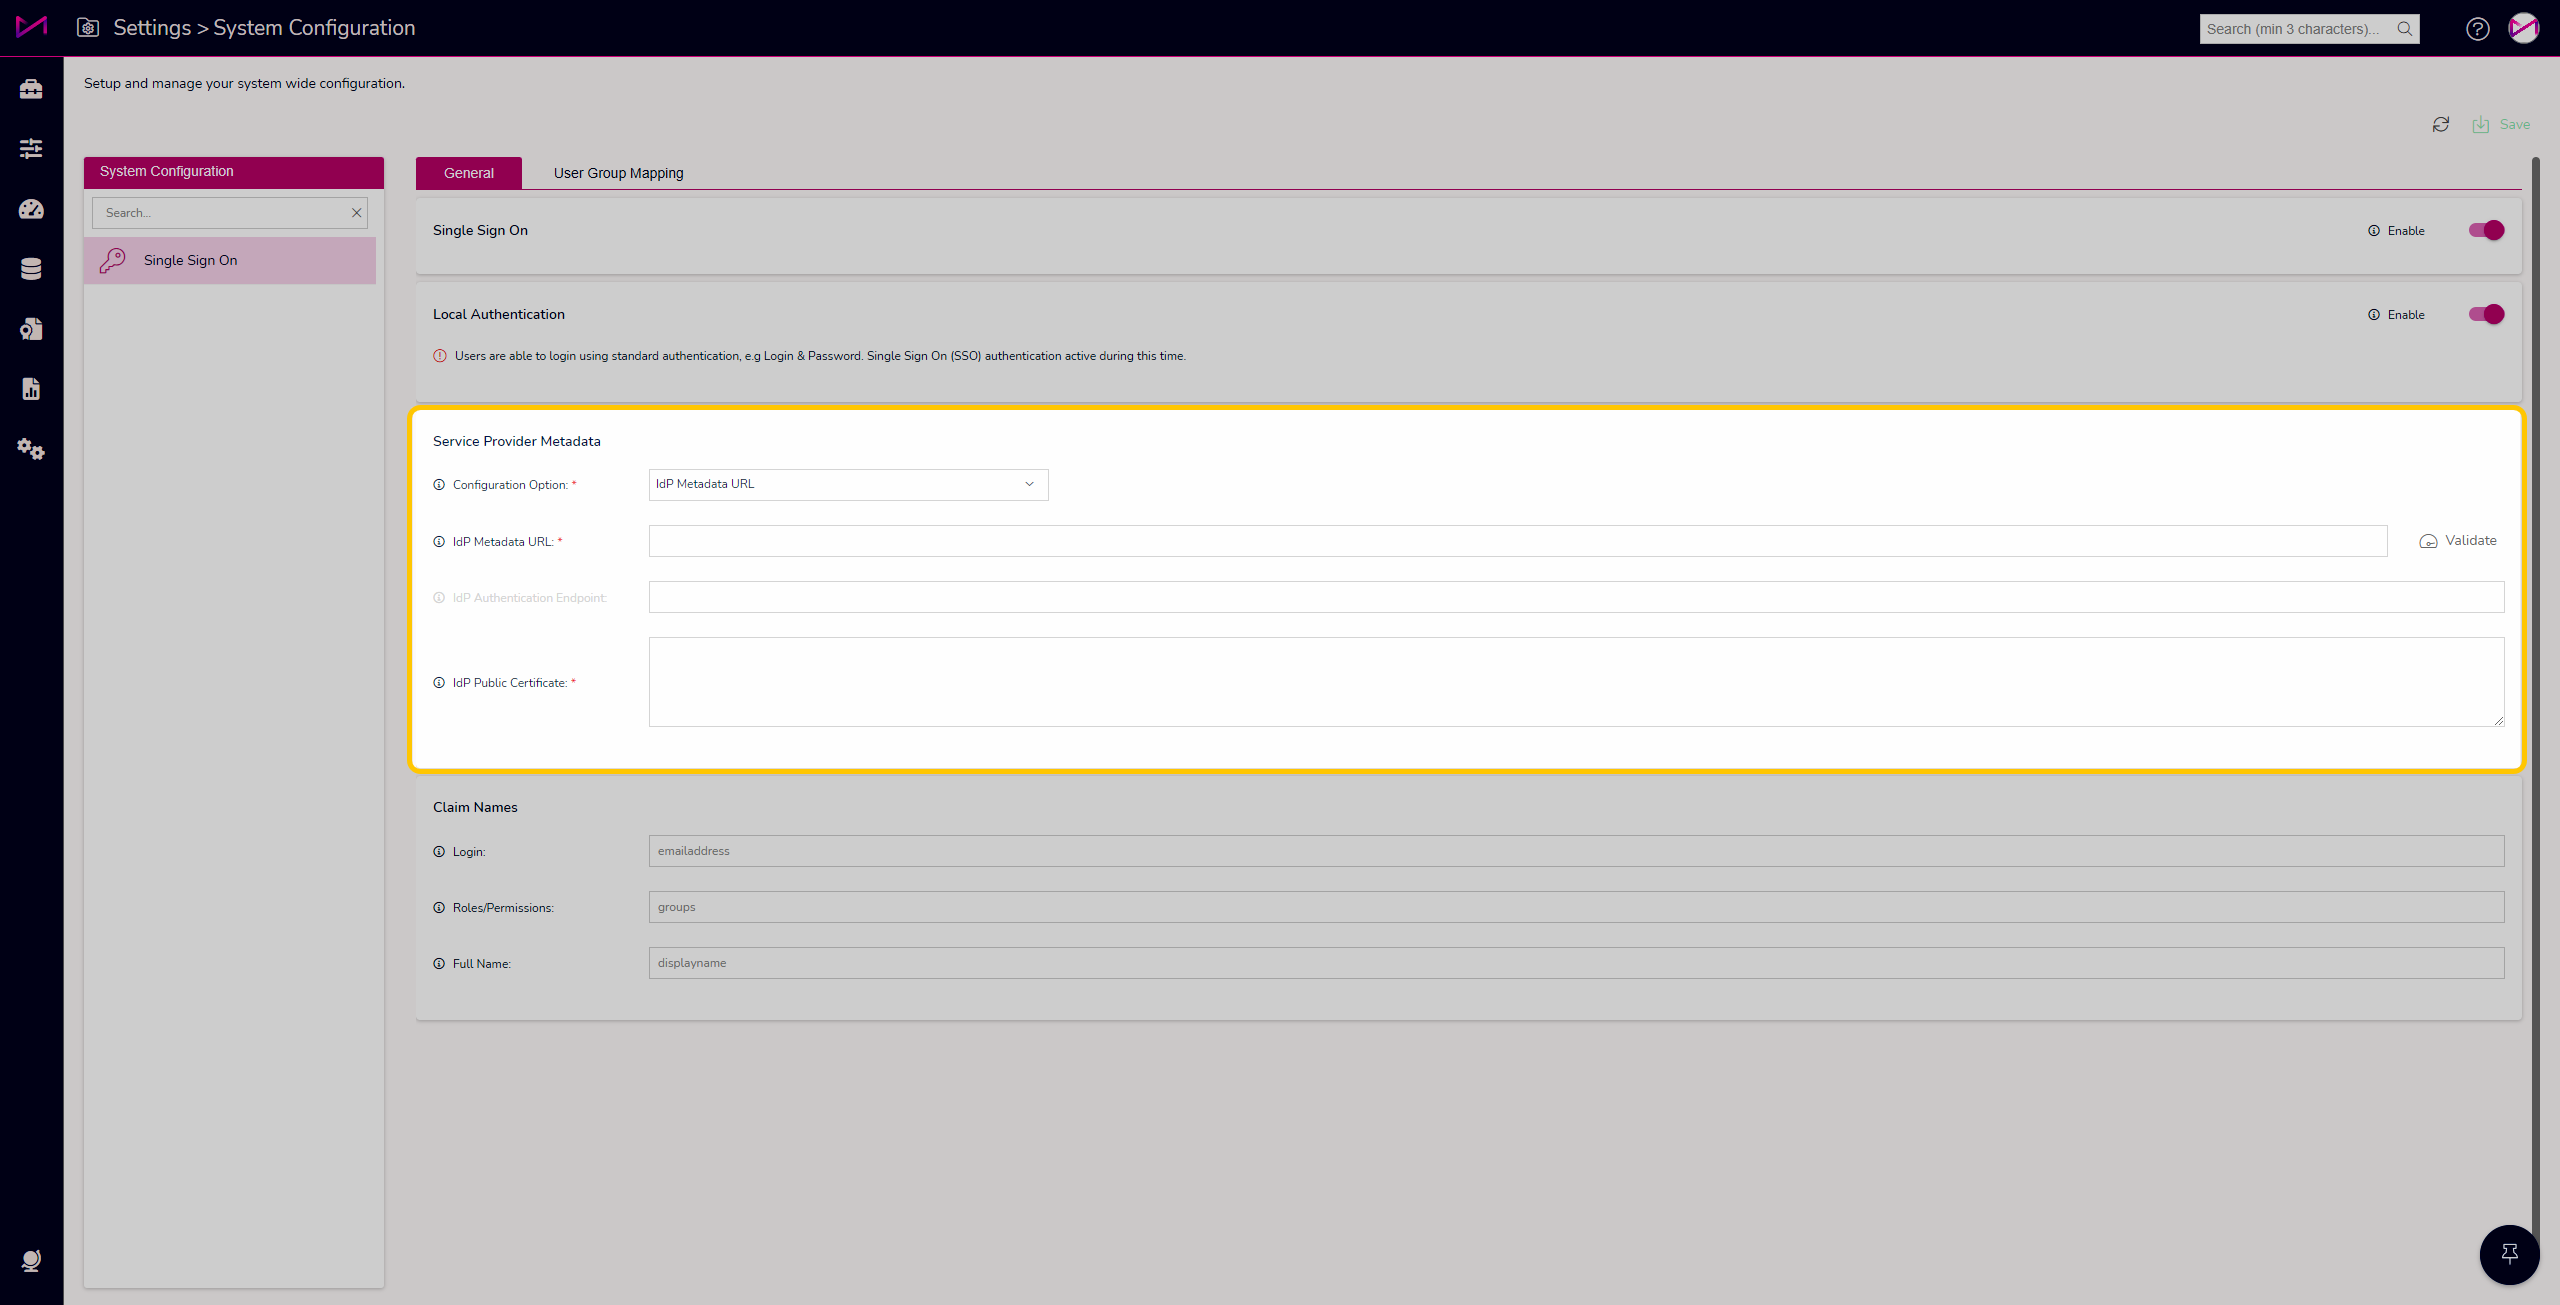
| Configuration Option - Select how you will be configuring your Service Provider Metadata. |  |
Manual Configuration. | Manually enter details in the 3 boxes; |
| IdP Authentication Endpoint | The Identity Provider (IdP) Authentication Endpoint is the URL endpoint on your identity provider that handles the SAML 2.0 authentication requests. When a user attempts to sign in, we will redirect their browser to this endpoint on your IdP to authenticate them. The IdP will prompt the User to log in using their credentials, validate them, and then post the SAML assertion back to our service to complete the sign-on process. If you are doing a manual configuration make sure you enter the full URL including https:// A common endpoint may look like: https://idp.example.com/saml2/sso Please check with your IdP administrator if you need help locating the authentication endpoint This is required in order to enable SAML 2.0 SSO |
| Application ID | The Application ID specifies a unique identifier for your service provider (SP) registration with the identity provider (IdP). Some IdPs require registering an application for each system you wish to federate via SAML SSO. During this registration process, an ID is assigned to represent your application. Enter the exact Application ID assigned when registering your application in the IdP. This links the configuration to the appropriate registration stored in the IdP. The Application ID is included in SAML requests from the SP to identify the target application to the IdP. Check with your IdP administrator if you are unsure of the Application ID to specify for your SP registration. |
| IdP Public Certificate | The Identity Provider (IdP) Public Certificate allows our service to validate the integrity of the SAML assertions sent by your IdP. This certificate is used to electronically sign each SAML assertion to prevent tampering. Our service will use the public key contained in this certificate to verify the signature and confirm the assertion can be trusted. Uploading this public certificate establishes trust between the two systems and provides cryptographic proof that the identity assertions originate from your organization's true IdP. If you are doing a manual configuration obtain this certificate file from your IdP administrator. The certificate must be in PEM format. |
| IdP Metadata URL | Fetch the XML metadata file directly from your identity provider. Paste the URL into the IdP Metadata URL box and select the 'Validate' button. |
| IdP Metadata URL | The Identity Provider (IdP) Metadata URL allows you to specify the location of the XML metadata file provided by your identity provider. This metadata file contains important information about the IdP that is required to set up the SAML 2.0 connection, including the entity ID, endpoints, X.509 certificates, and more. Downloading and uploading this metadata file to our system allows us to validate assertions sent by the IdP during the Single Sign-On process. It establishes trust between the two systems and enables seamless authentication without requiring users to re-enter their credentials. If you are unsure where to find this metadata file, check with your IdP administrator. |
| IdP Authentication Endpoint | Greyed out using this option as it is auto populated. The Identity Provider (IdP) Authentication Endpoint is the URL endpoint on your identity provider that handles the SAML 2.0 authentication requests. When a user attempts to sign in, we will redirect their browser to this endpoint on your IdP to authenticate them. The IdP will prompt the User to log in using their credentials, validate them, and then post the SAML assertion back to our service to complete the sign-on process. If you are using IdP Metadata URL as your Configuration Option, this URL will populate automatically from the IdP metadata file. If you are doing a manual configuration make sure you enter the full URL including https:// A common endpoint may look like: https://idp.example.com/saml2/sso Please check with your IdP administrator if you need help locating the authentication endpoint This is required in order to enable SAML 2.0 SSO |
| IdP Public Certificate | The Identity Provider (IdP) Public Certificate allows our service to validate the integrity of the SAML assertions sent by your IdP. This certificate is used to electronically sign each SAML assertion to prevent tampering. Our service will use the public key contained in this certificate to verify the signature and confirm the assertion can be trusted. Uploading this public certificate establishes trust between the two systems and provides cryptographic proof that the identity assertions originate from your organization's true IdP. If you are using IdP Metadata URL as your Configuration Option, this URL will populate automatically from the IdP metadata file but can be manually updated if required. |
Finally, you can then configure the Claim Names card.
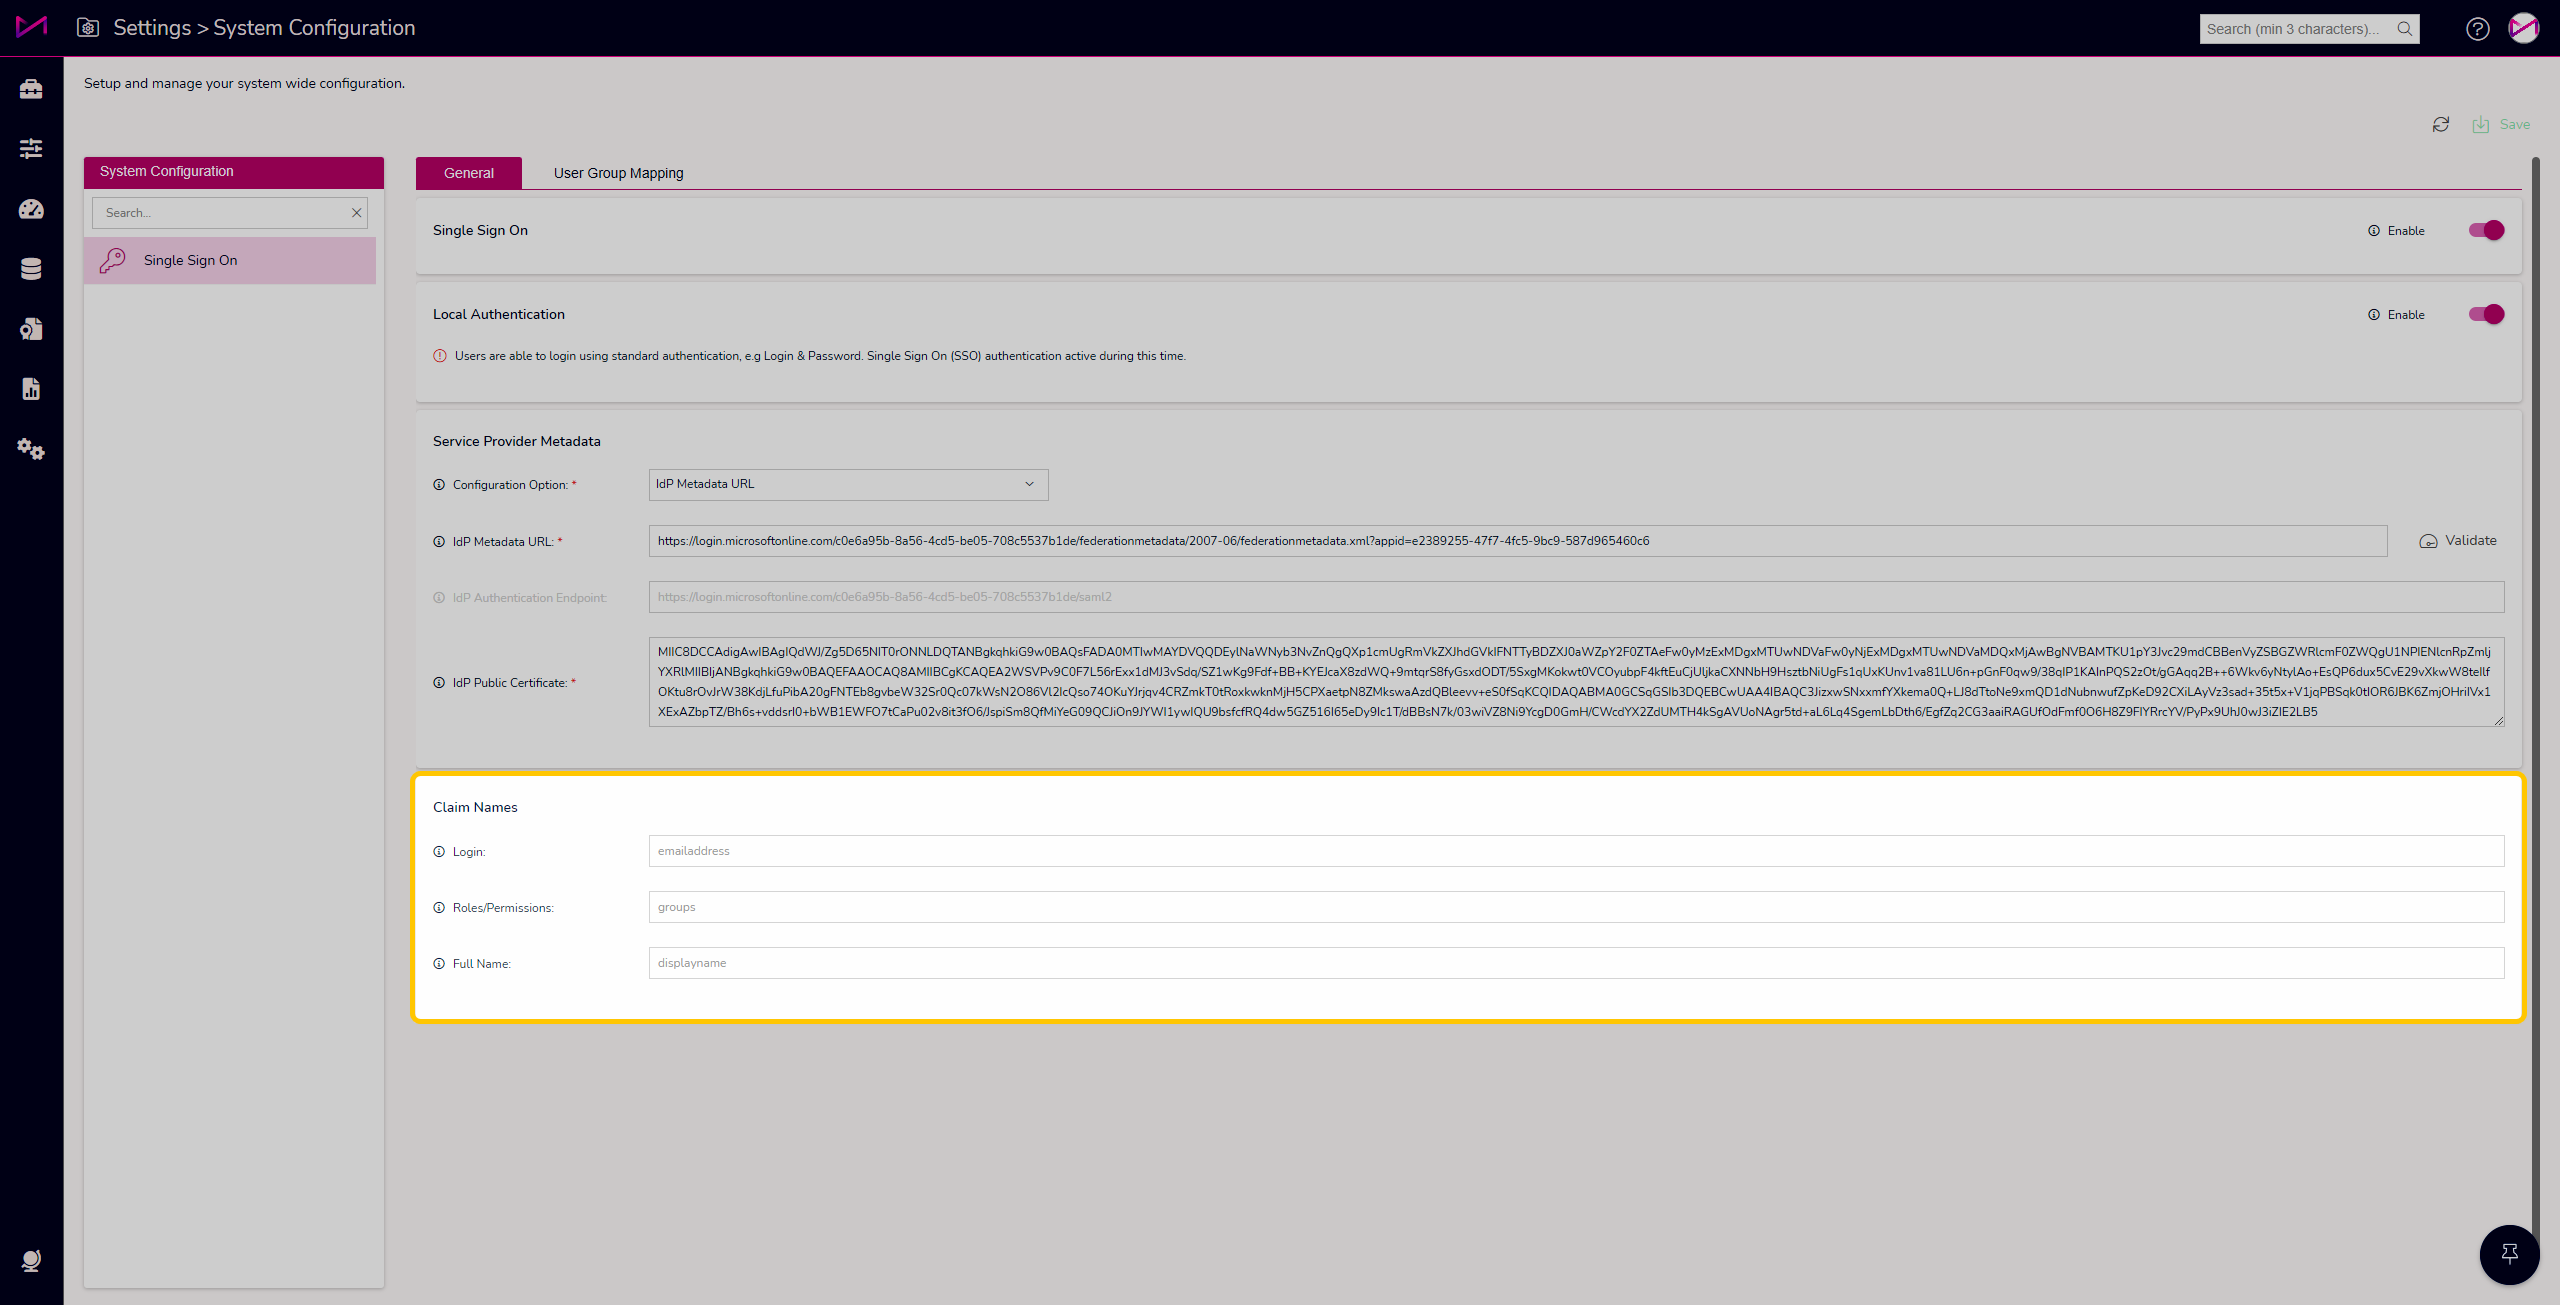
Claim Names - These are what your active directory passes to MaxContact to let it know what to expect for the Login, Role/Permission group and the users Full Name. The defaults are based on Azure active directory but can be changed to align to your internal setup.
| Claim Names | |
| Login | Enter the exact claim name to be mapped to the Login field. Common names for the login ID claim are "NamelD", "UserlD", or "Username". Our application will use the value from this claim to populate the Login field for each user after successful authentication. Don't worry, you may not always need to customise this claim name as if none is entered this will default to email address. |
| Roles/Permissions | Enter the exact claim name to be utilised for User group membership. Our application will read this claim after authentication and associate the User with the appropriate permission roles. This enables our application to make authorisation decisions based on the user's identity and roles provided by the IdP. Don't worry, you may not always need to customise this claim name as if none is entered this will default to groups. |
| Full name | Enter the exact claim name to be utilised for User group membership. Our application will read this claim after authentication and associate the User with the appropriate permission roles. This enables our application to make authorisation decisions based on the user's identity and roles provided by the IdP. Don't worry, you may not always need to customise this claim name as if none is entered this will default to groups. |
User Group Mapping tab
This tab allows you to define what 'security group' the users need to be part of and allows you to map them. E.g. In your active directory the groups are named something different to what they are called in MaxContact.
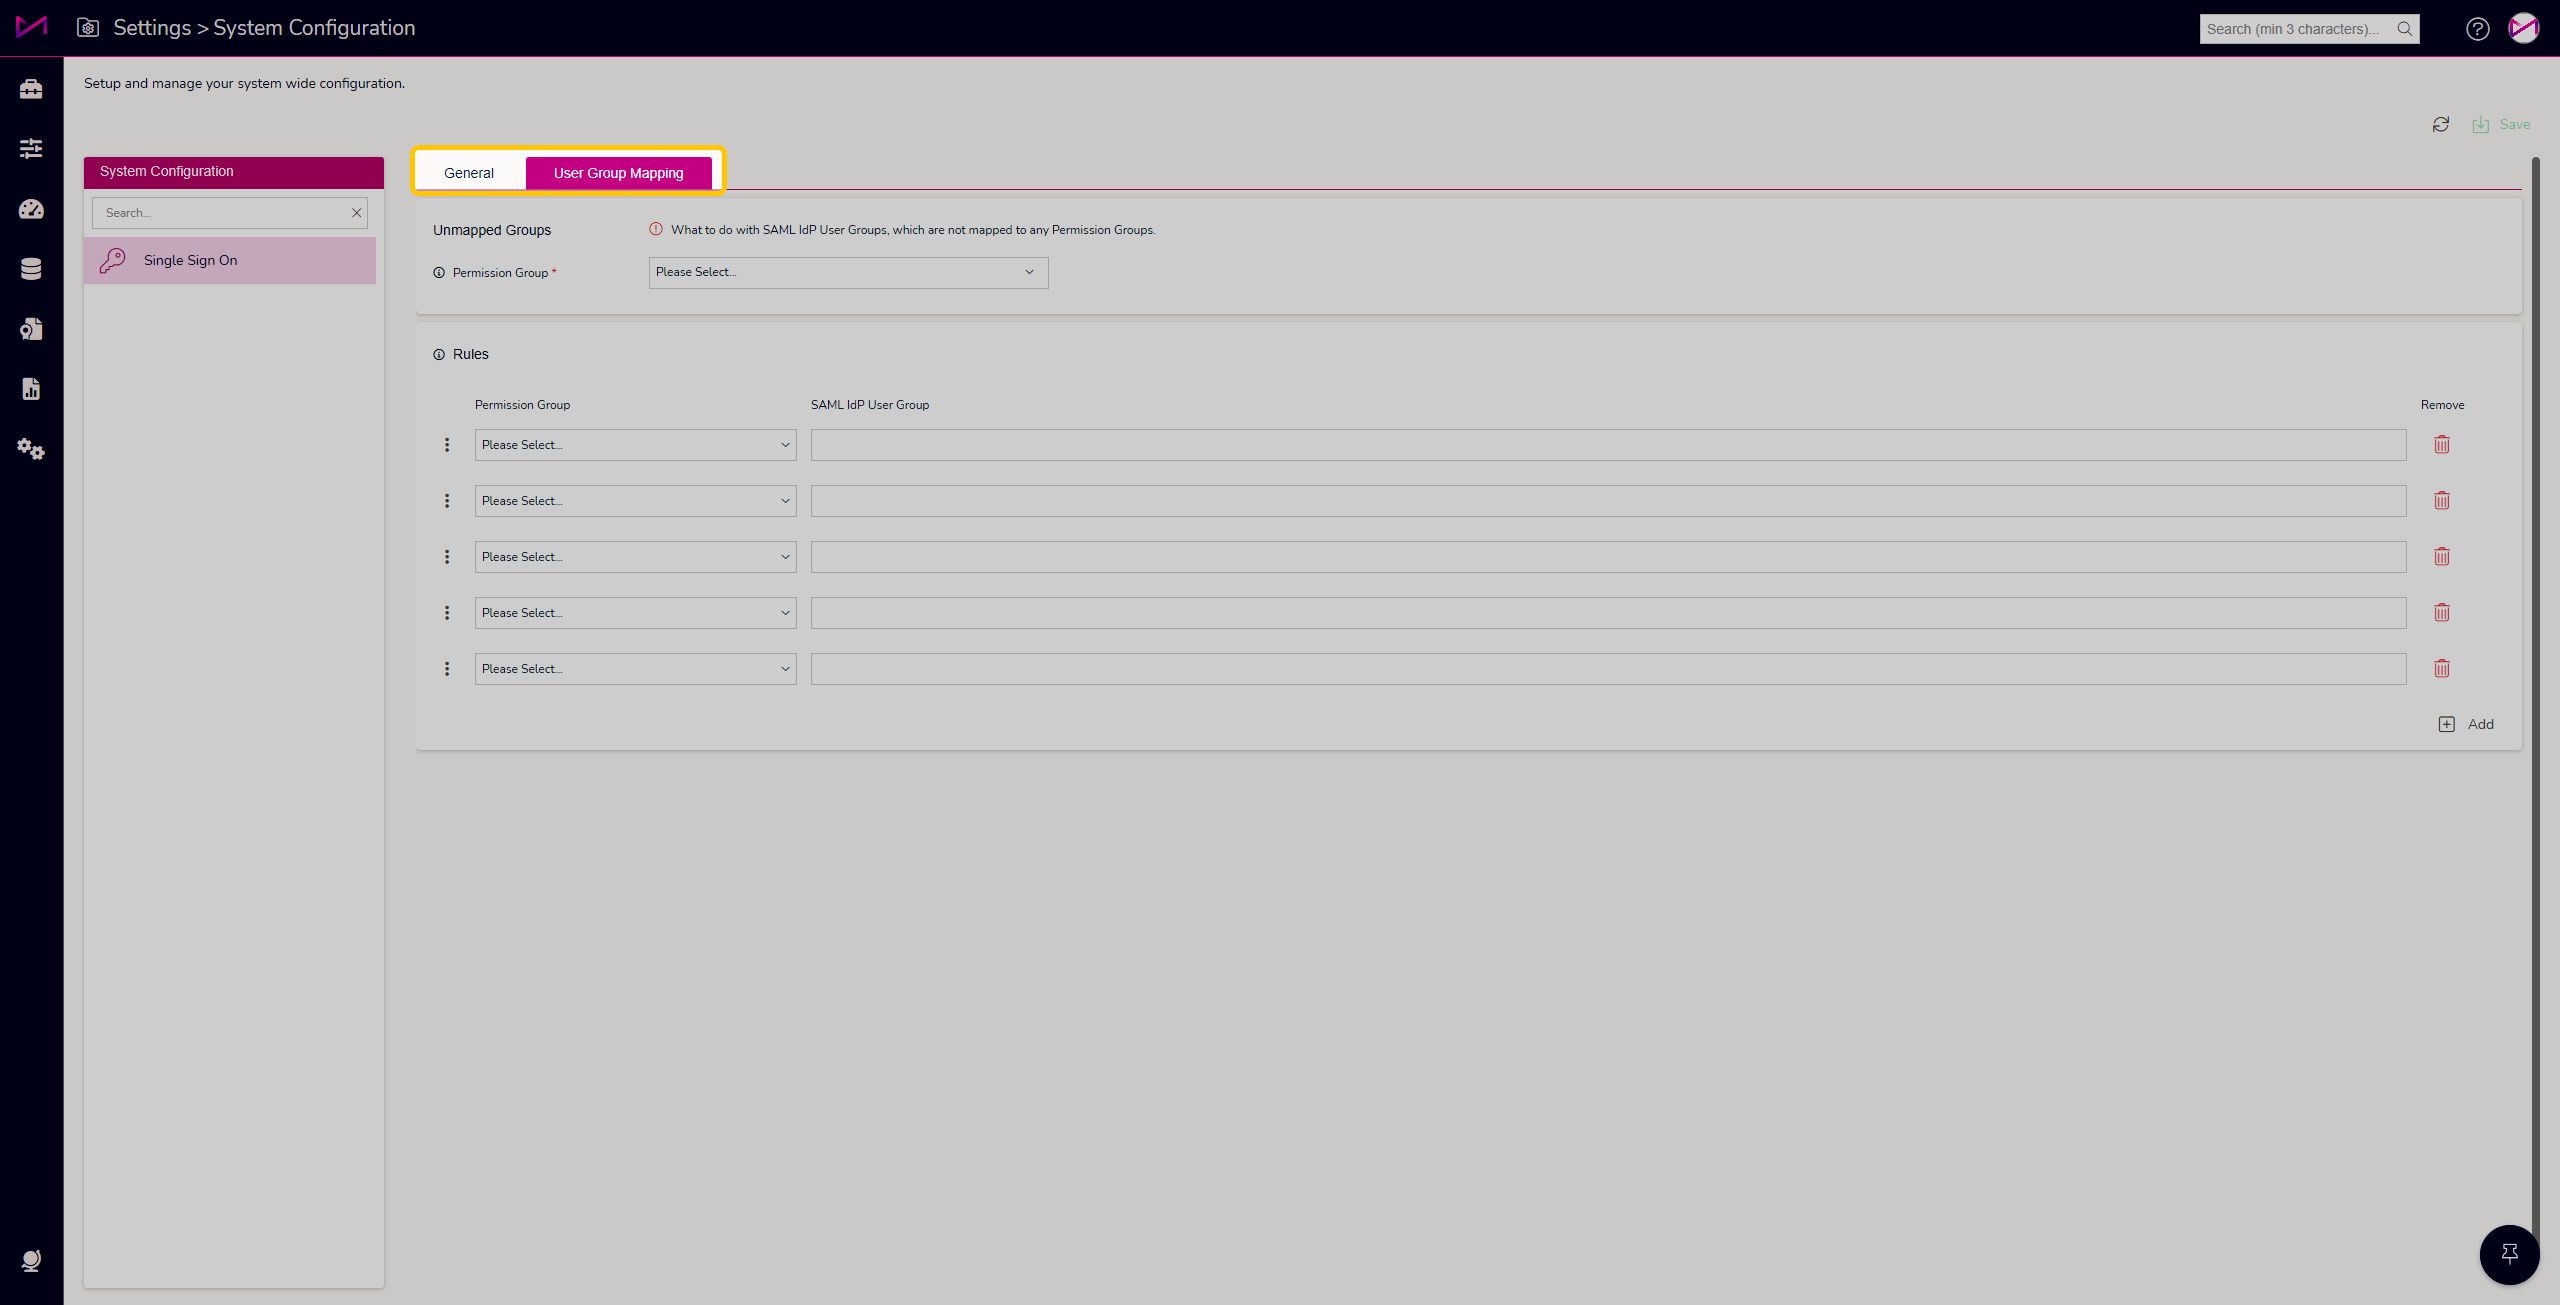
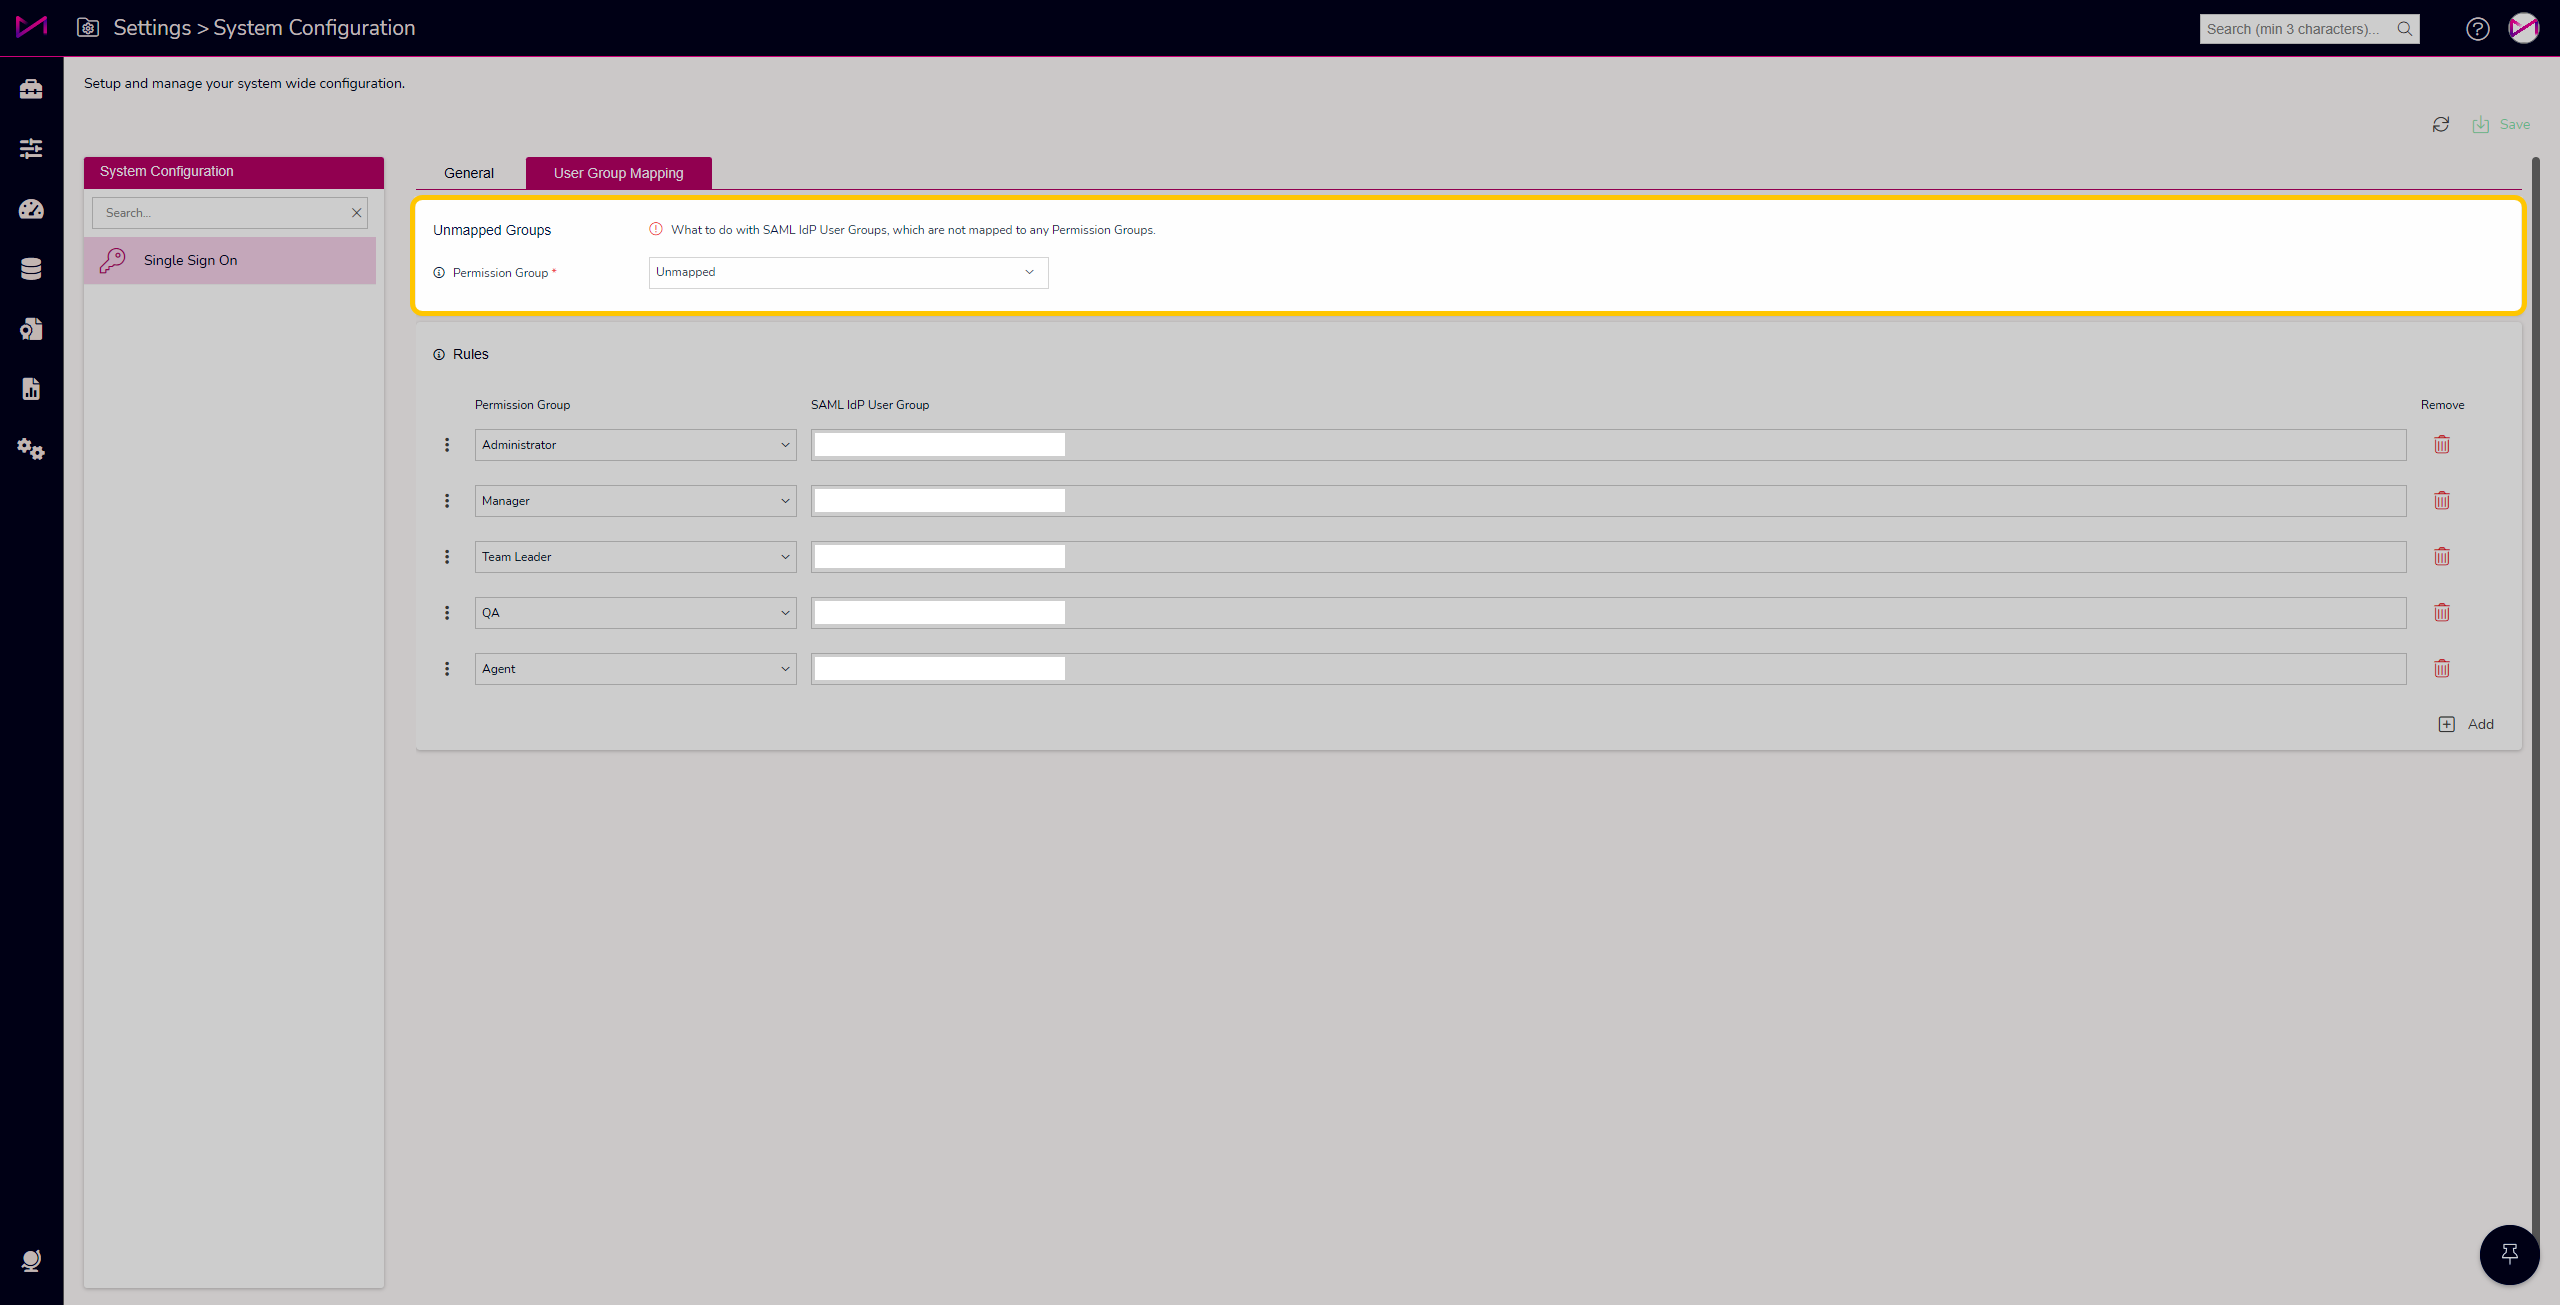
Unmapped Groups
Select the Permission Group that Users should be mapped to who do not match an explicit group mapping.
As a Users' group membership is determined by the Identity Provider, it's possible some authenticated users may not match any of the SAML group mappings defined below.
Adding users to the Unmapped Groups permissions group allows you to grant general access rights in this scenario instead of denying access.
We suggest reviewing users in this group periodically to determine if new group mappings should be added to grant more specific permissions based on the groups assigned in your IdP.
Don't forget to use caution when granting permissions to Unmapped Groups to avoid giving unintended access to unknown users.
Rules
Firstly, you can add in the number of permission groups you require by selecting the + add button in the Rules card.
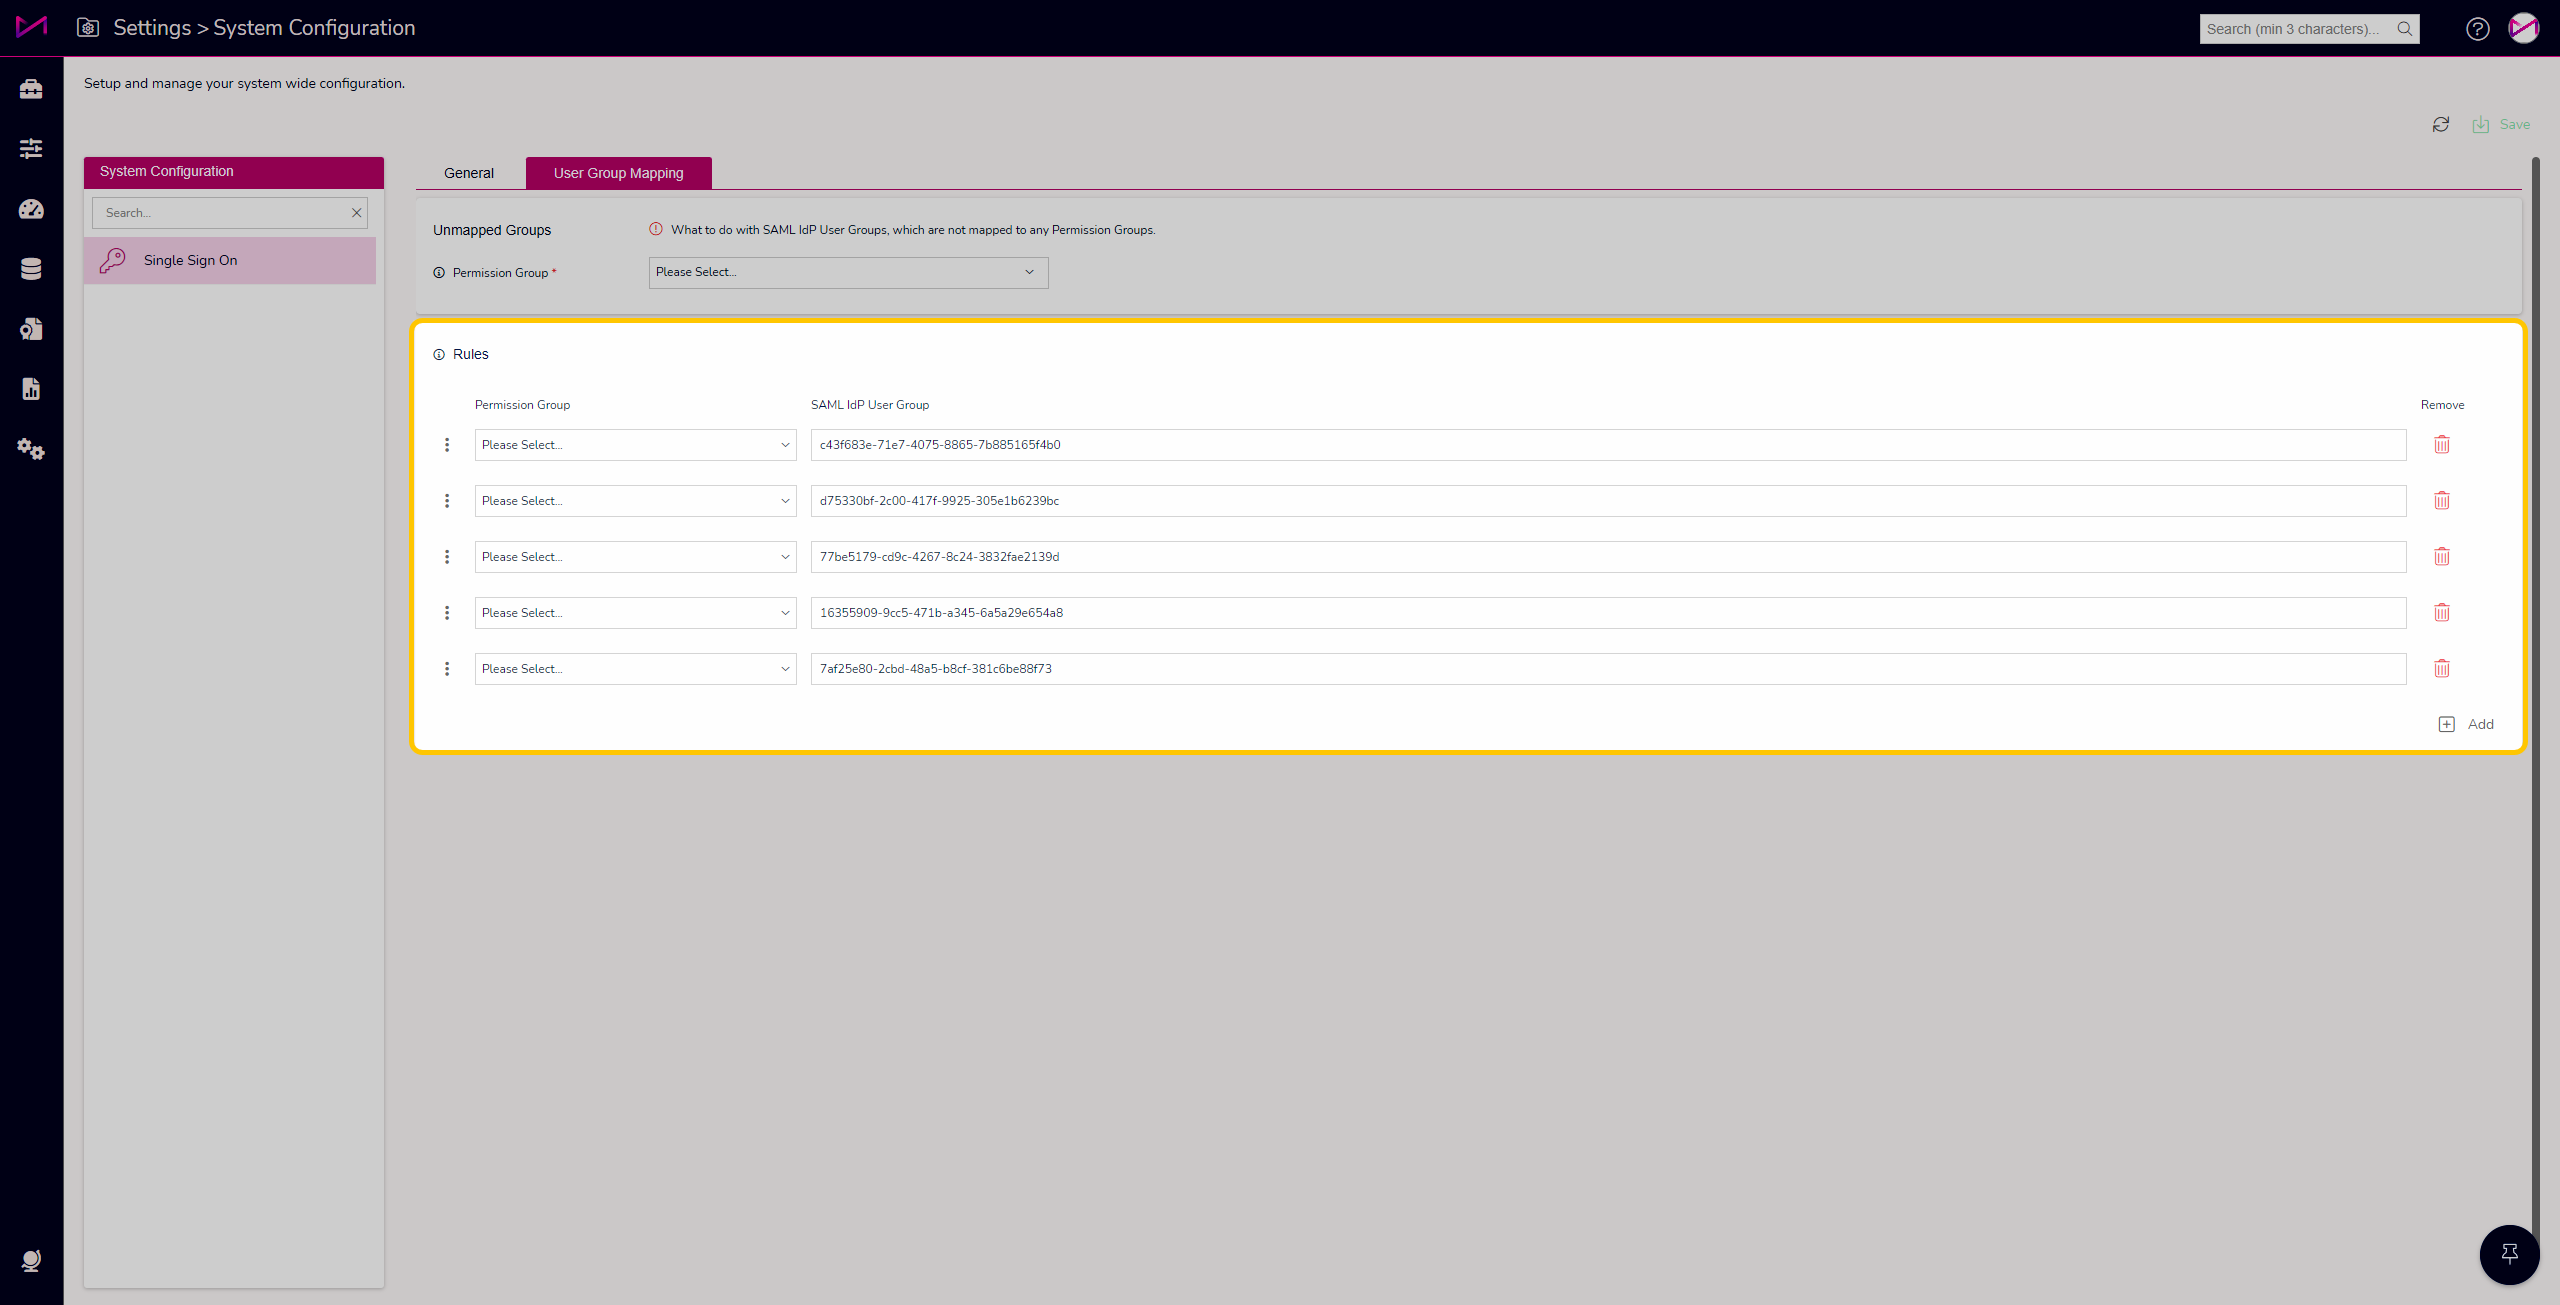
Next, select the Permission groups (also known as Roles) you wish to assign from the drop down (These will show all permission groups created on the Permissions page of MaxContact).
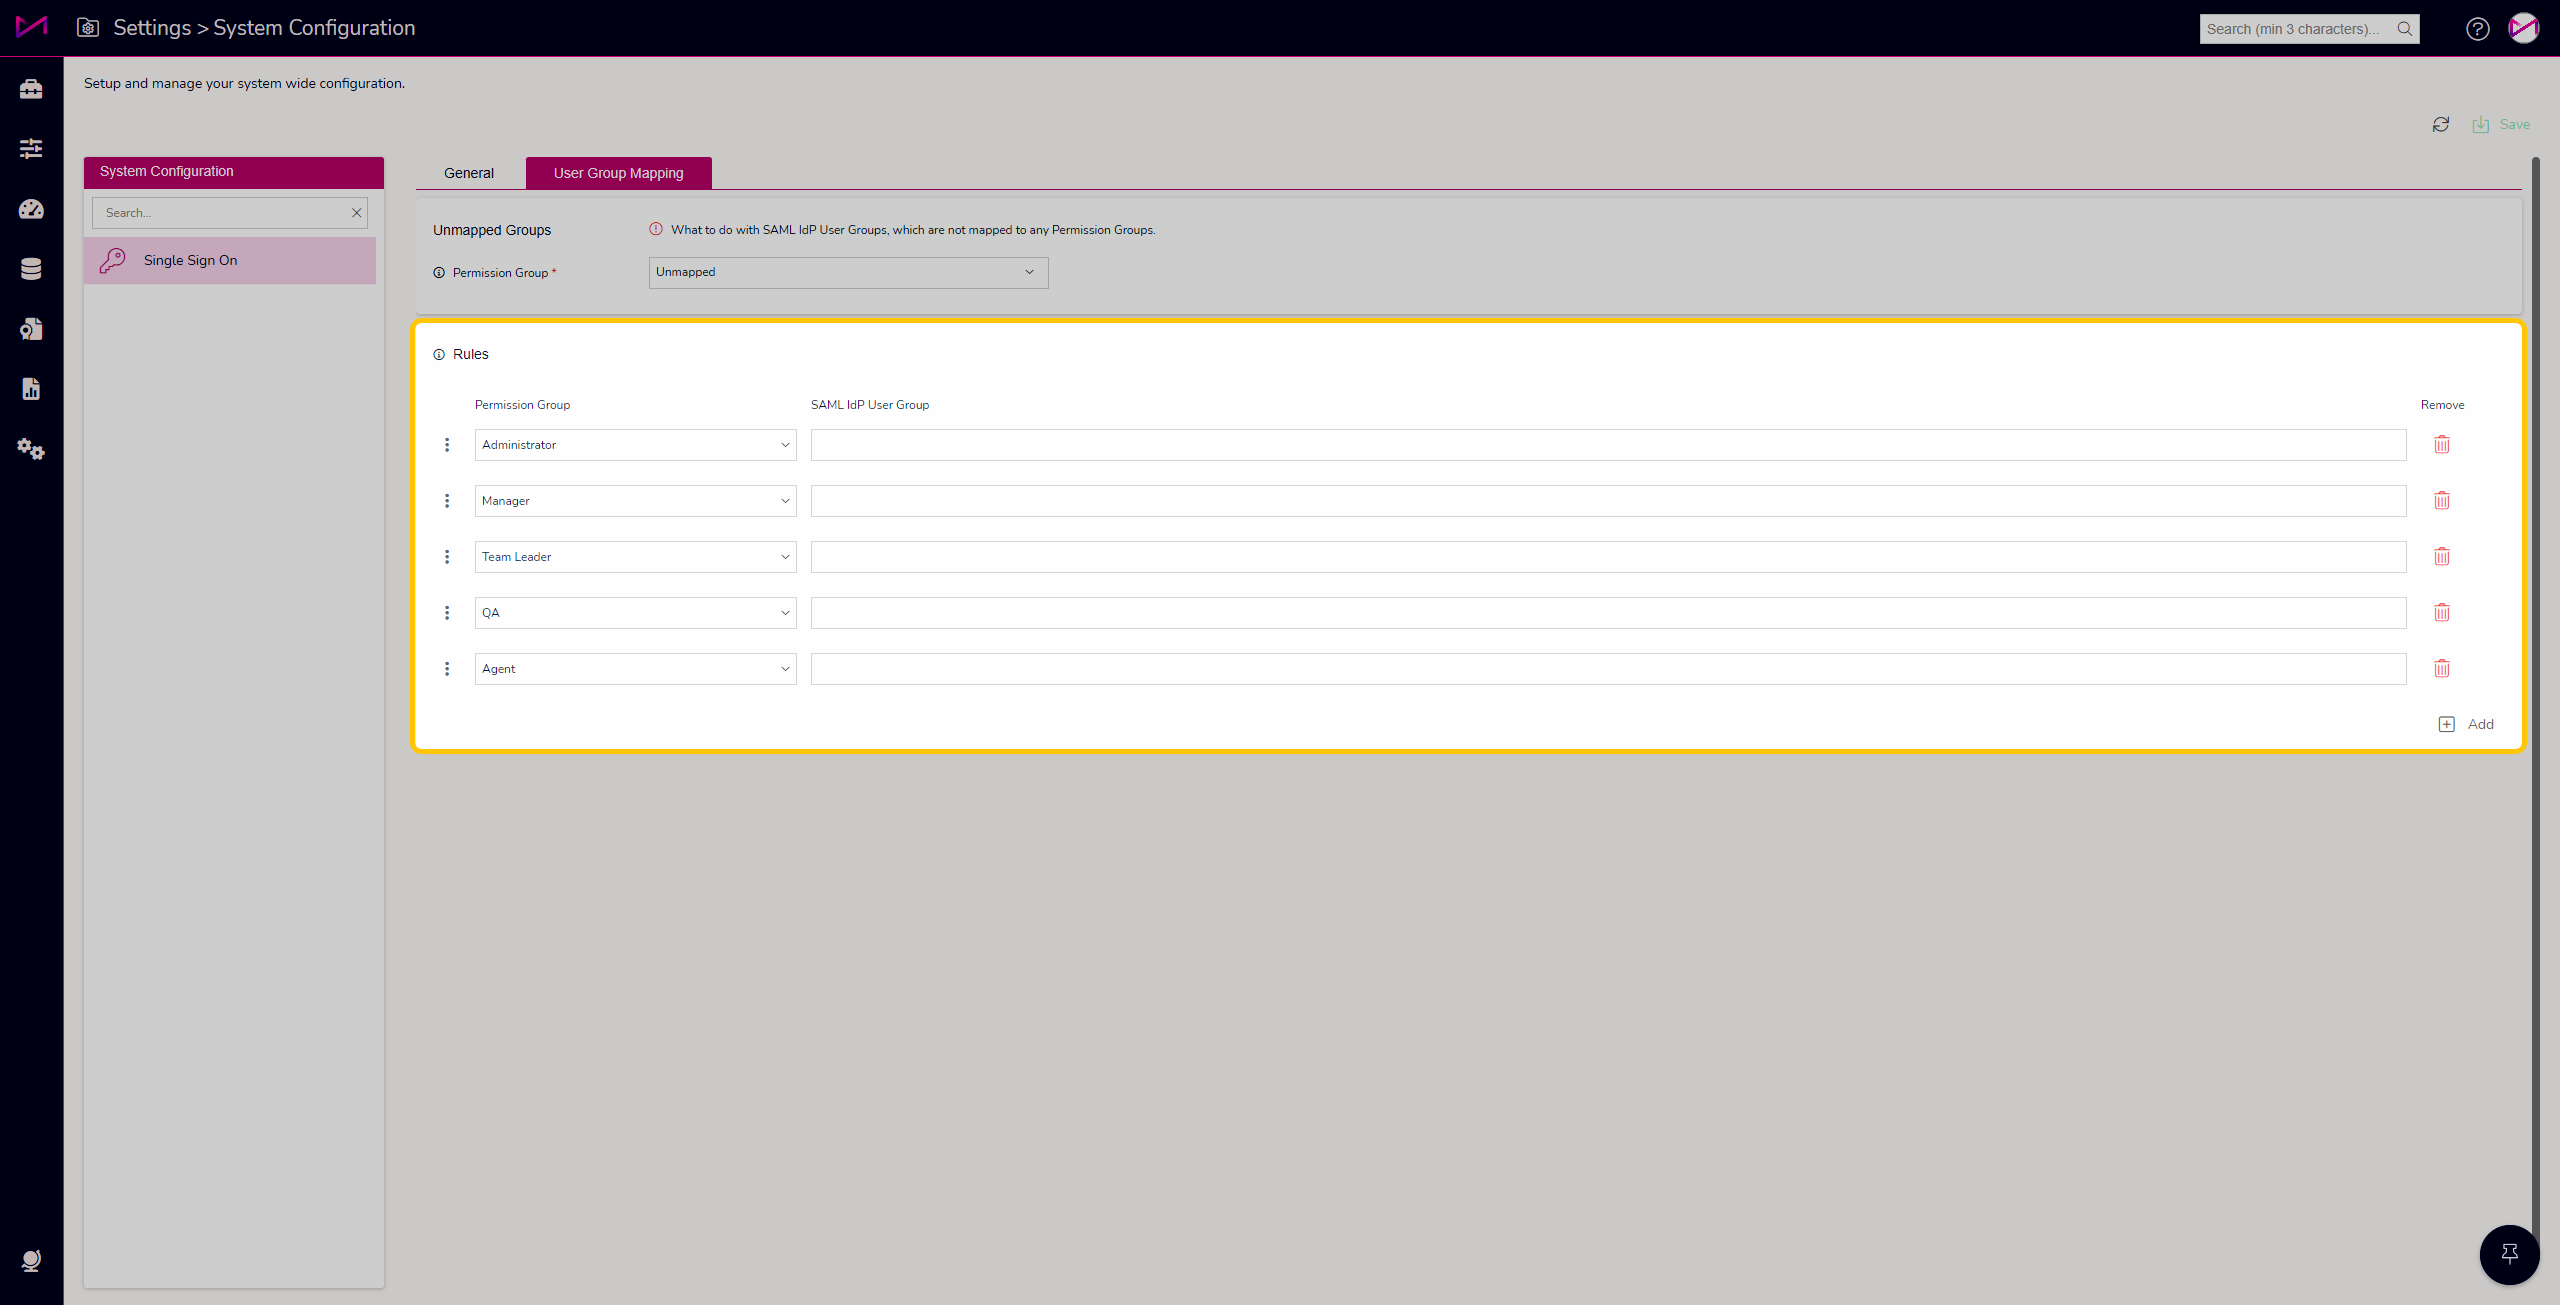
Finally, paste in the IdP user groups from your active directory to the corresponding Permission group. Ensure you name them something appropriate and easy for configuration.

Note - Users can be mapped to multiple Permission groups should you require. You can also order the Permission groups by dragging and dropping the 3 dots up and down the table - important if users have multiple roles, as the highest becomes their default role.
Additional Information
For any technical information required for setting this up, please contact the MaxSupport team.
Users created via your active directory will appear in the CTU and Permissions page with a yellow padlock next to their name. This means you cannot modify their team/permission group within MaxContact.