How to create a basic IVR
This guide walks through building a simple inbound IVR in MaxContact — one that checks your opening hours, plays a welcome message, routes callers to a queue, and delivers an out-of-hours message when you are closed.
To get started, navigate to Admin > Telephony > IVR.
For guidance on the IVR Builder interface — including how to create IVR pages, place elements, and connect them — see the IVR Builder article.
Note: For more complex IVR builds, MaxContact offers full training and will assist you during onboarding. Contact your account manager for details.
Elements you will need
A basic inbound IVR requires the following elements:
- Start
- Time Check
- Play (one for your welcome message, one for your out-of-hours message)
- Queue
- Hang-up
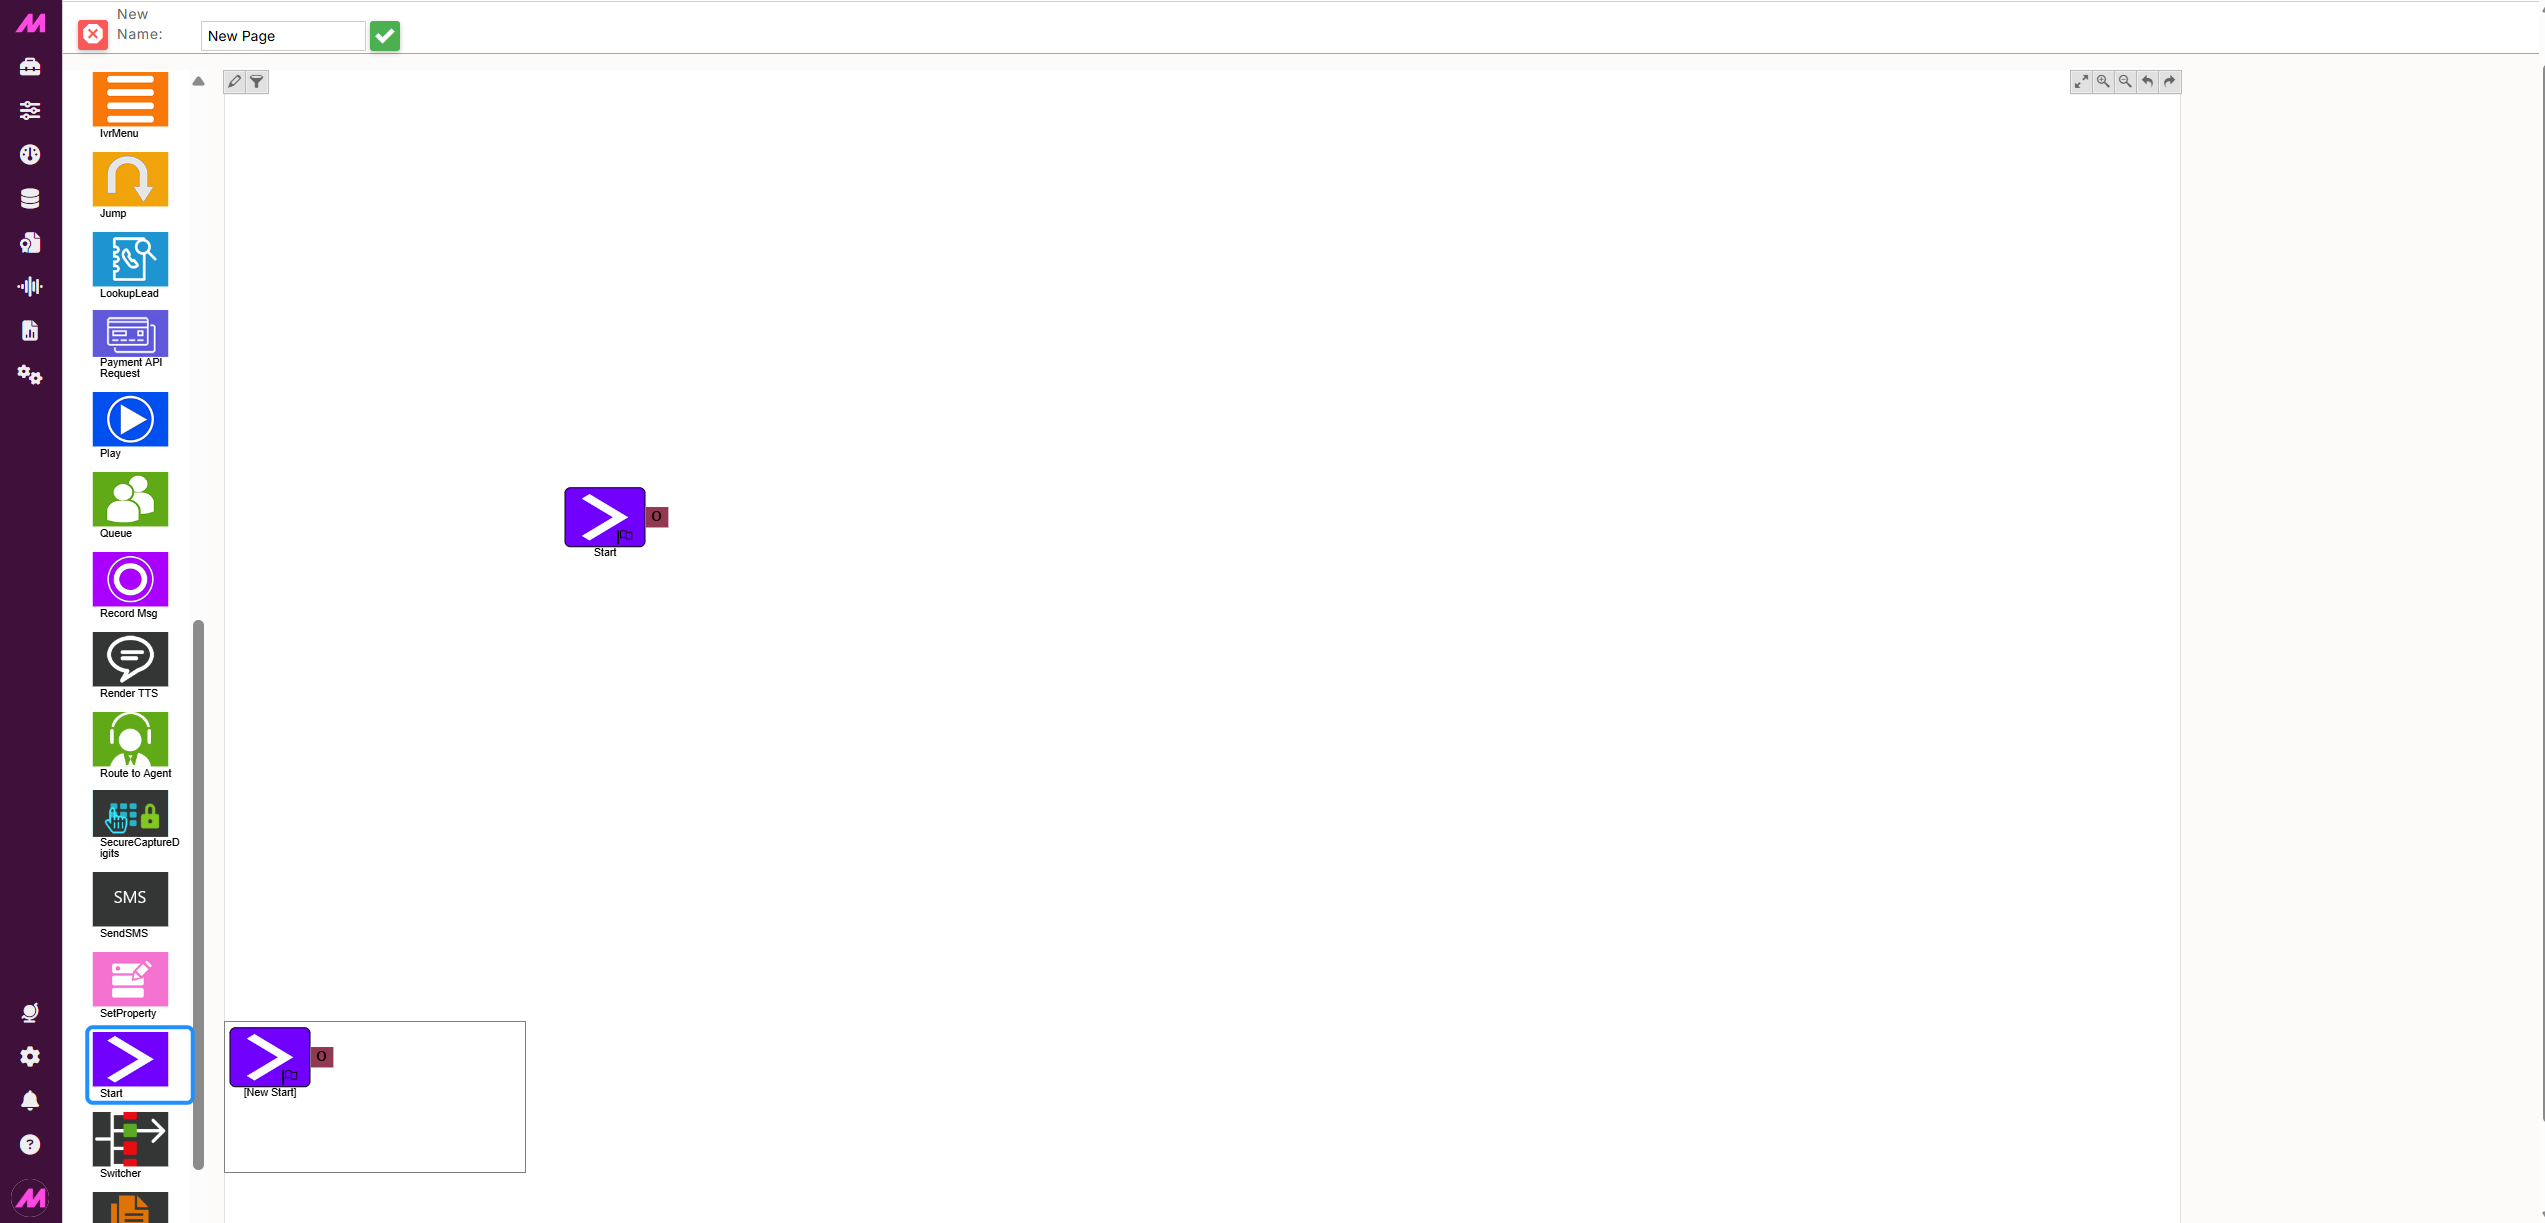
Step 1 – Add a Start element
Every IVR flow begins with a Start element. Drag it onto the canvas and give it a clear name — this name appears when assigning inbound numbers, so it should be easy to identify at a glance.
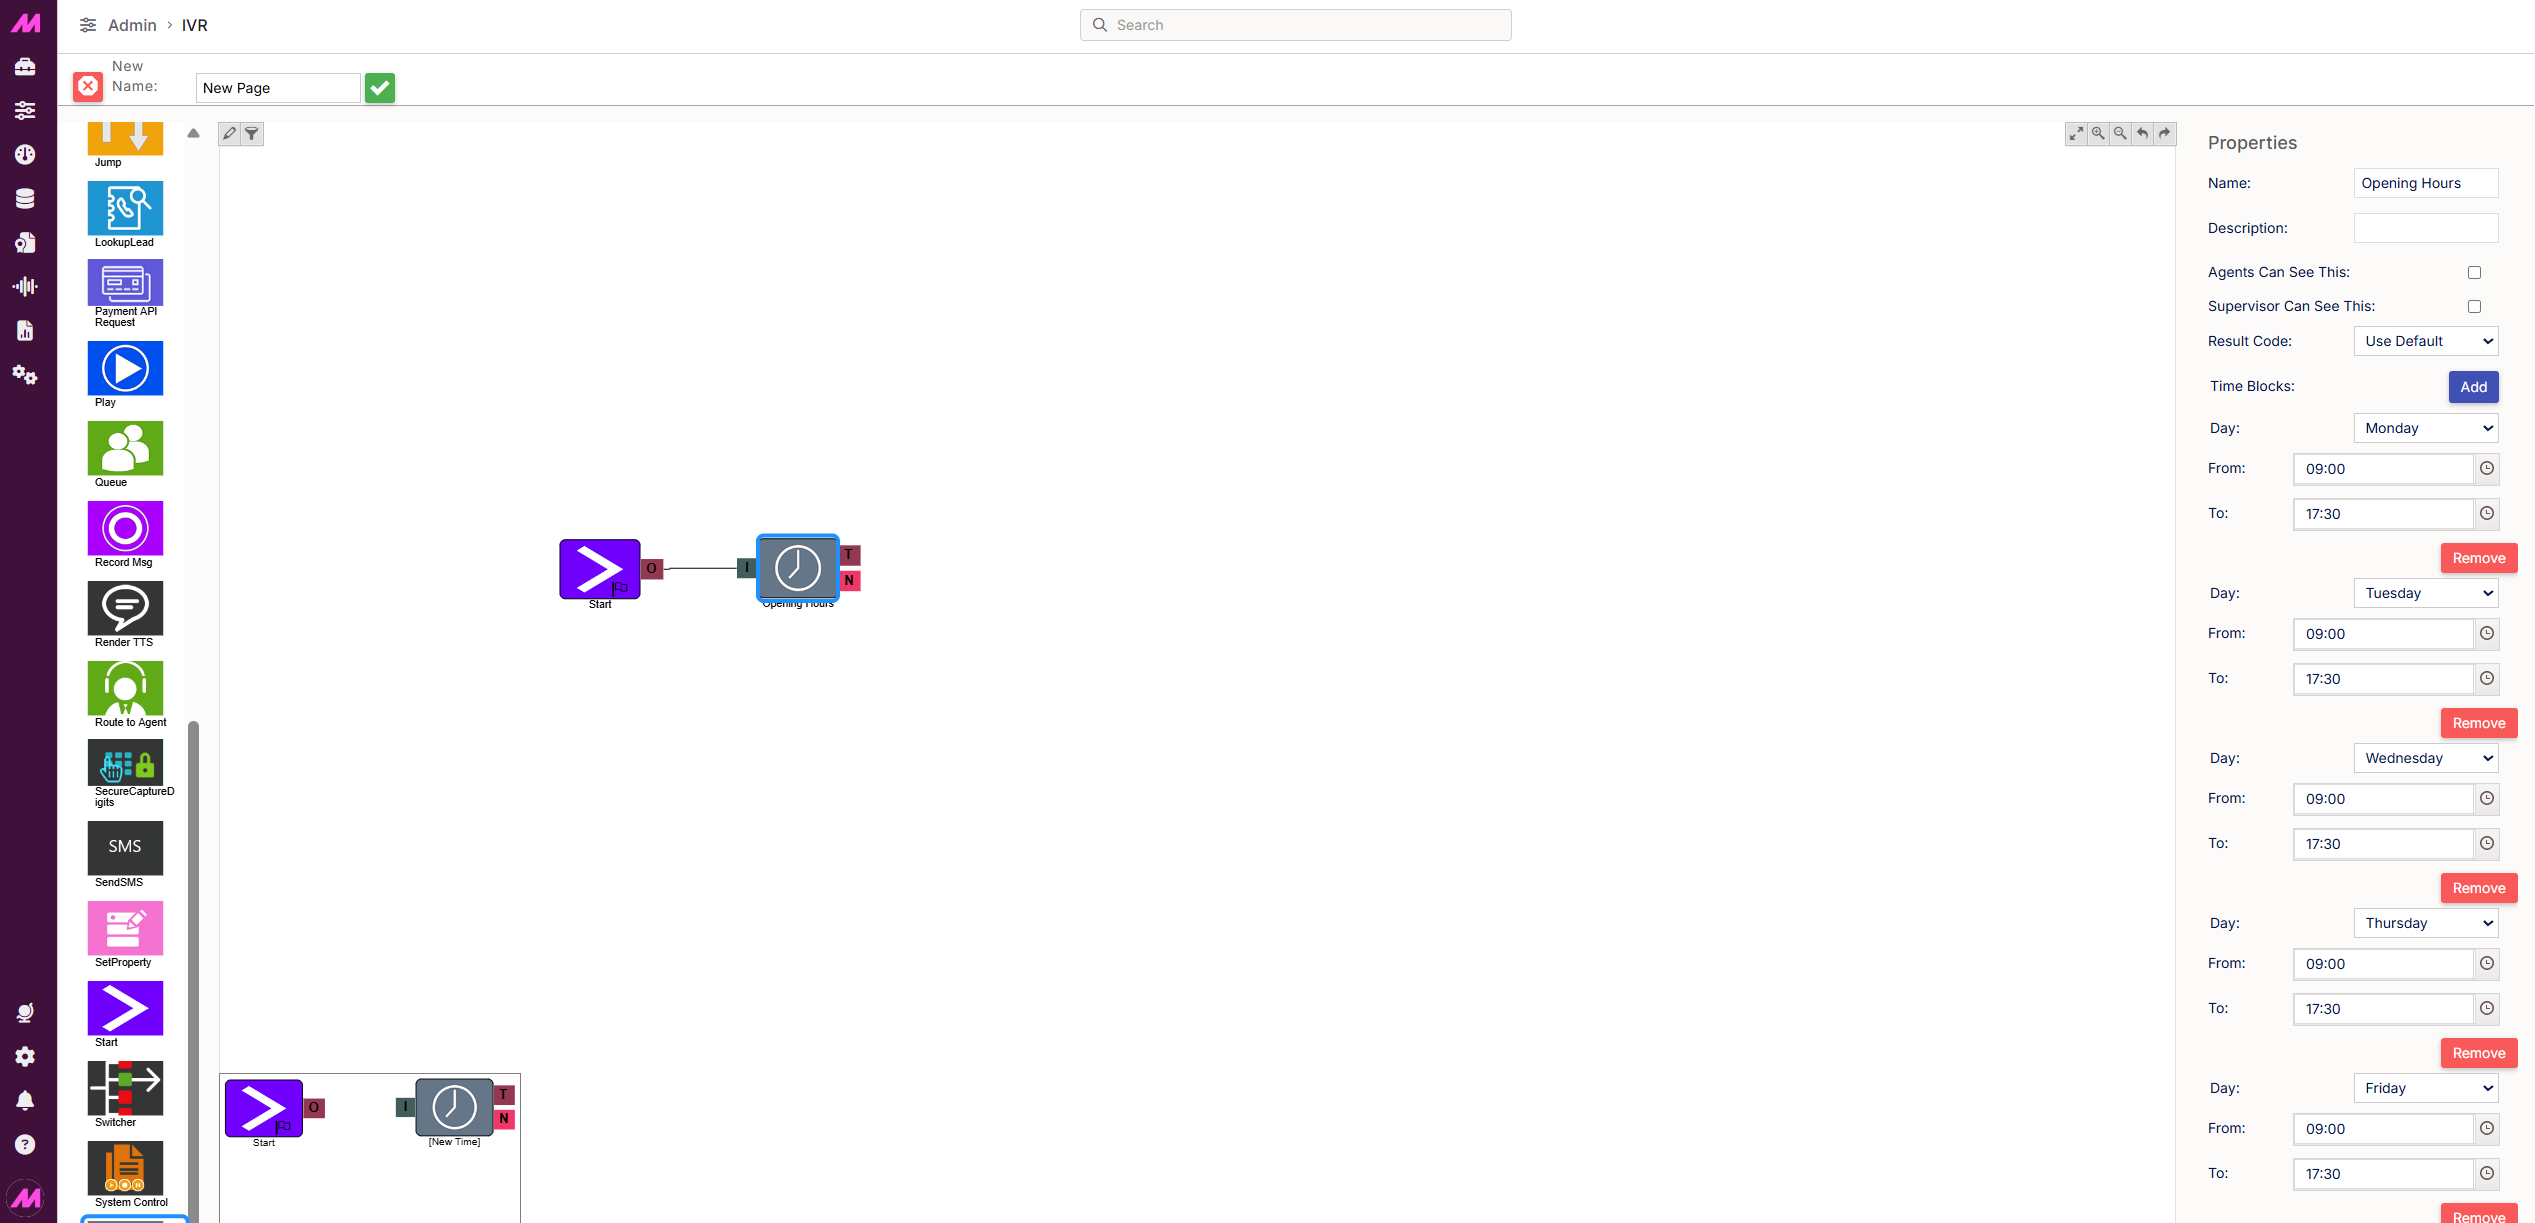
Step 2 – Add a Time Check element
The Time Check element checks whether the call is arriving within your configured opening hours and routes it accordingly. Connect the Start element's output to the Time Check element's input.
Configure your opening hours by adding time blocks for each day you are open. Leave days you are closed without a time block.
The Time Check element has two output paths:
- T (True) – the call arrives within opening hours. Connect this to your welcome message.
- N (No Match) – the call arrives outside opening hours. Connect this to your out-of-hours message.
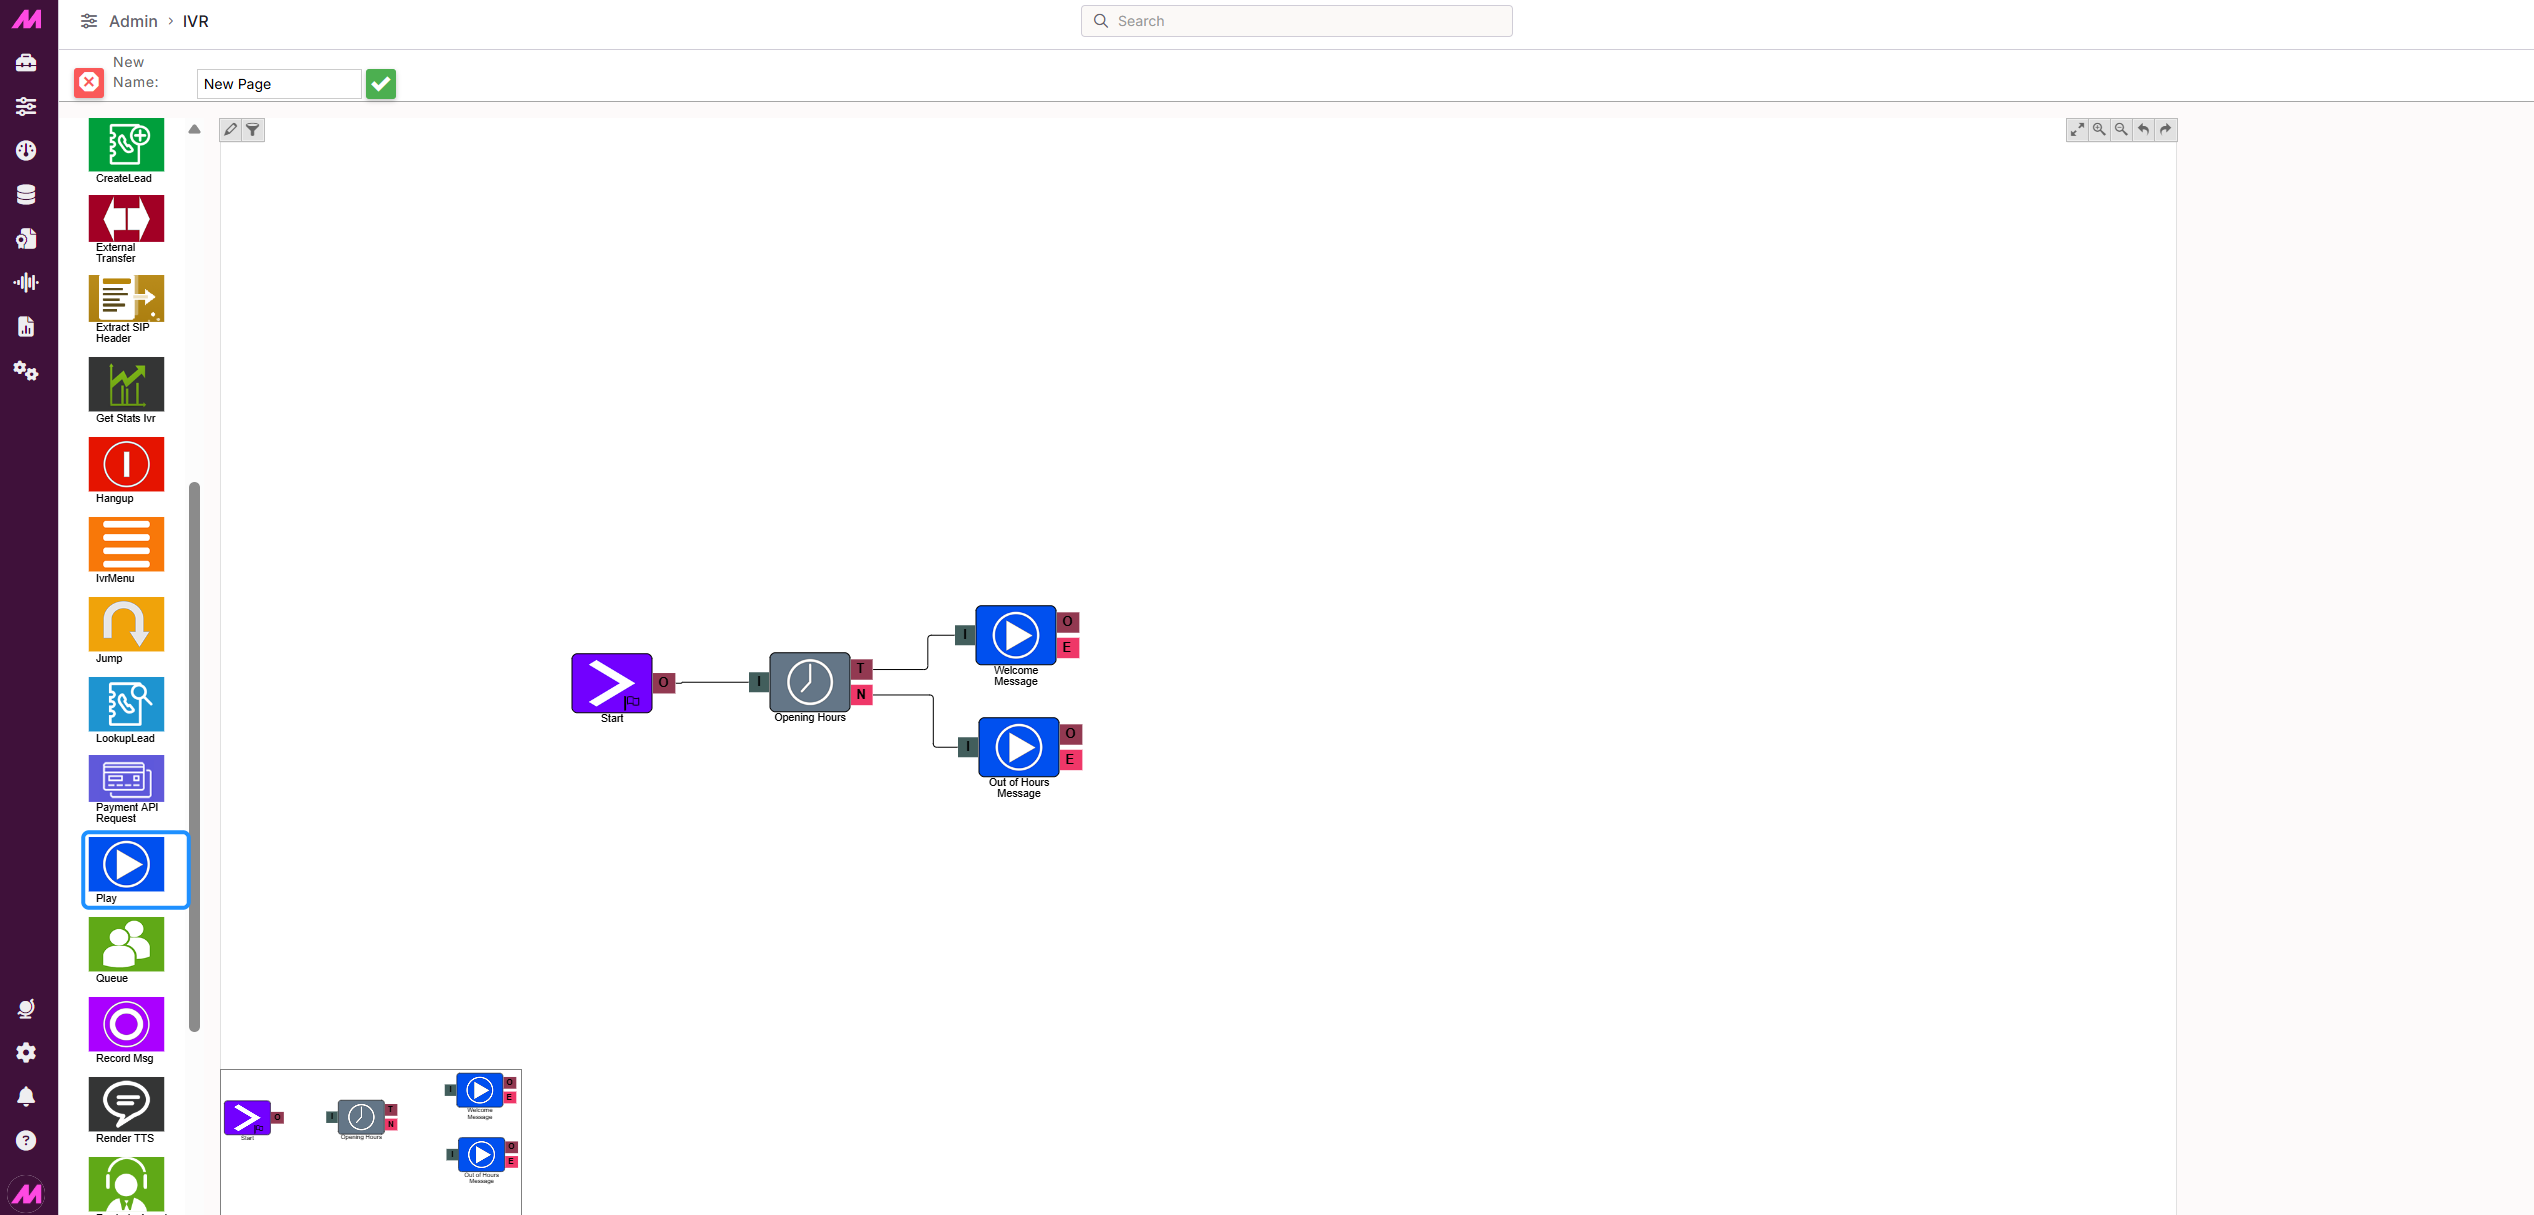
Step 3 – Add Play elements for your messages
Add two Play elements — one for your welcome message and one for your out-of-hours message. Select the appropriate audio file on each.
- Connect the True (T) path from the Time Check to your welcome message Play element.
- Connect the No Match (N) path from the Time Check to your out-of-hours Play element.
Note: For best audio quality, upload audio files in WAV format, 16-bit, 8kHz, mono. Alternatively, you can use a Text to Speech element in place of a Play element if you do not have a pre-recorded file.
Step 4 – Add a Queue element
The Queue element places the caller in a queue to wait for an available agent. Connect the output of your welcome message Play element to the Queue element's input, then select the queue you want callers routed into.
Make sure you connect the Queue element's output paths — at a minimum the No Staff (N) and Timeout (T) paths should be connected to a message or a Hang-up element so callers are not left in silence.

Step 5 – Add Hang-up elements
Add a Hang-up element at the end of each path where the call should end — after the out-of-hours message, and after any no-staff or timeout routes from the Queue element.
Step 6 – Save and assign
Once you are happy with the flow, click Save. To route inbound calls through this IVR, assign it to the relevant inbound number via Admin > Telephony > Inbound Numbers.

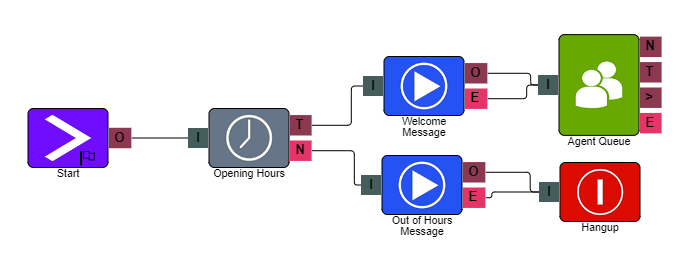
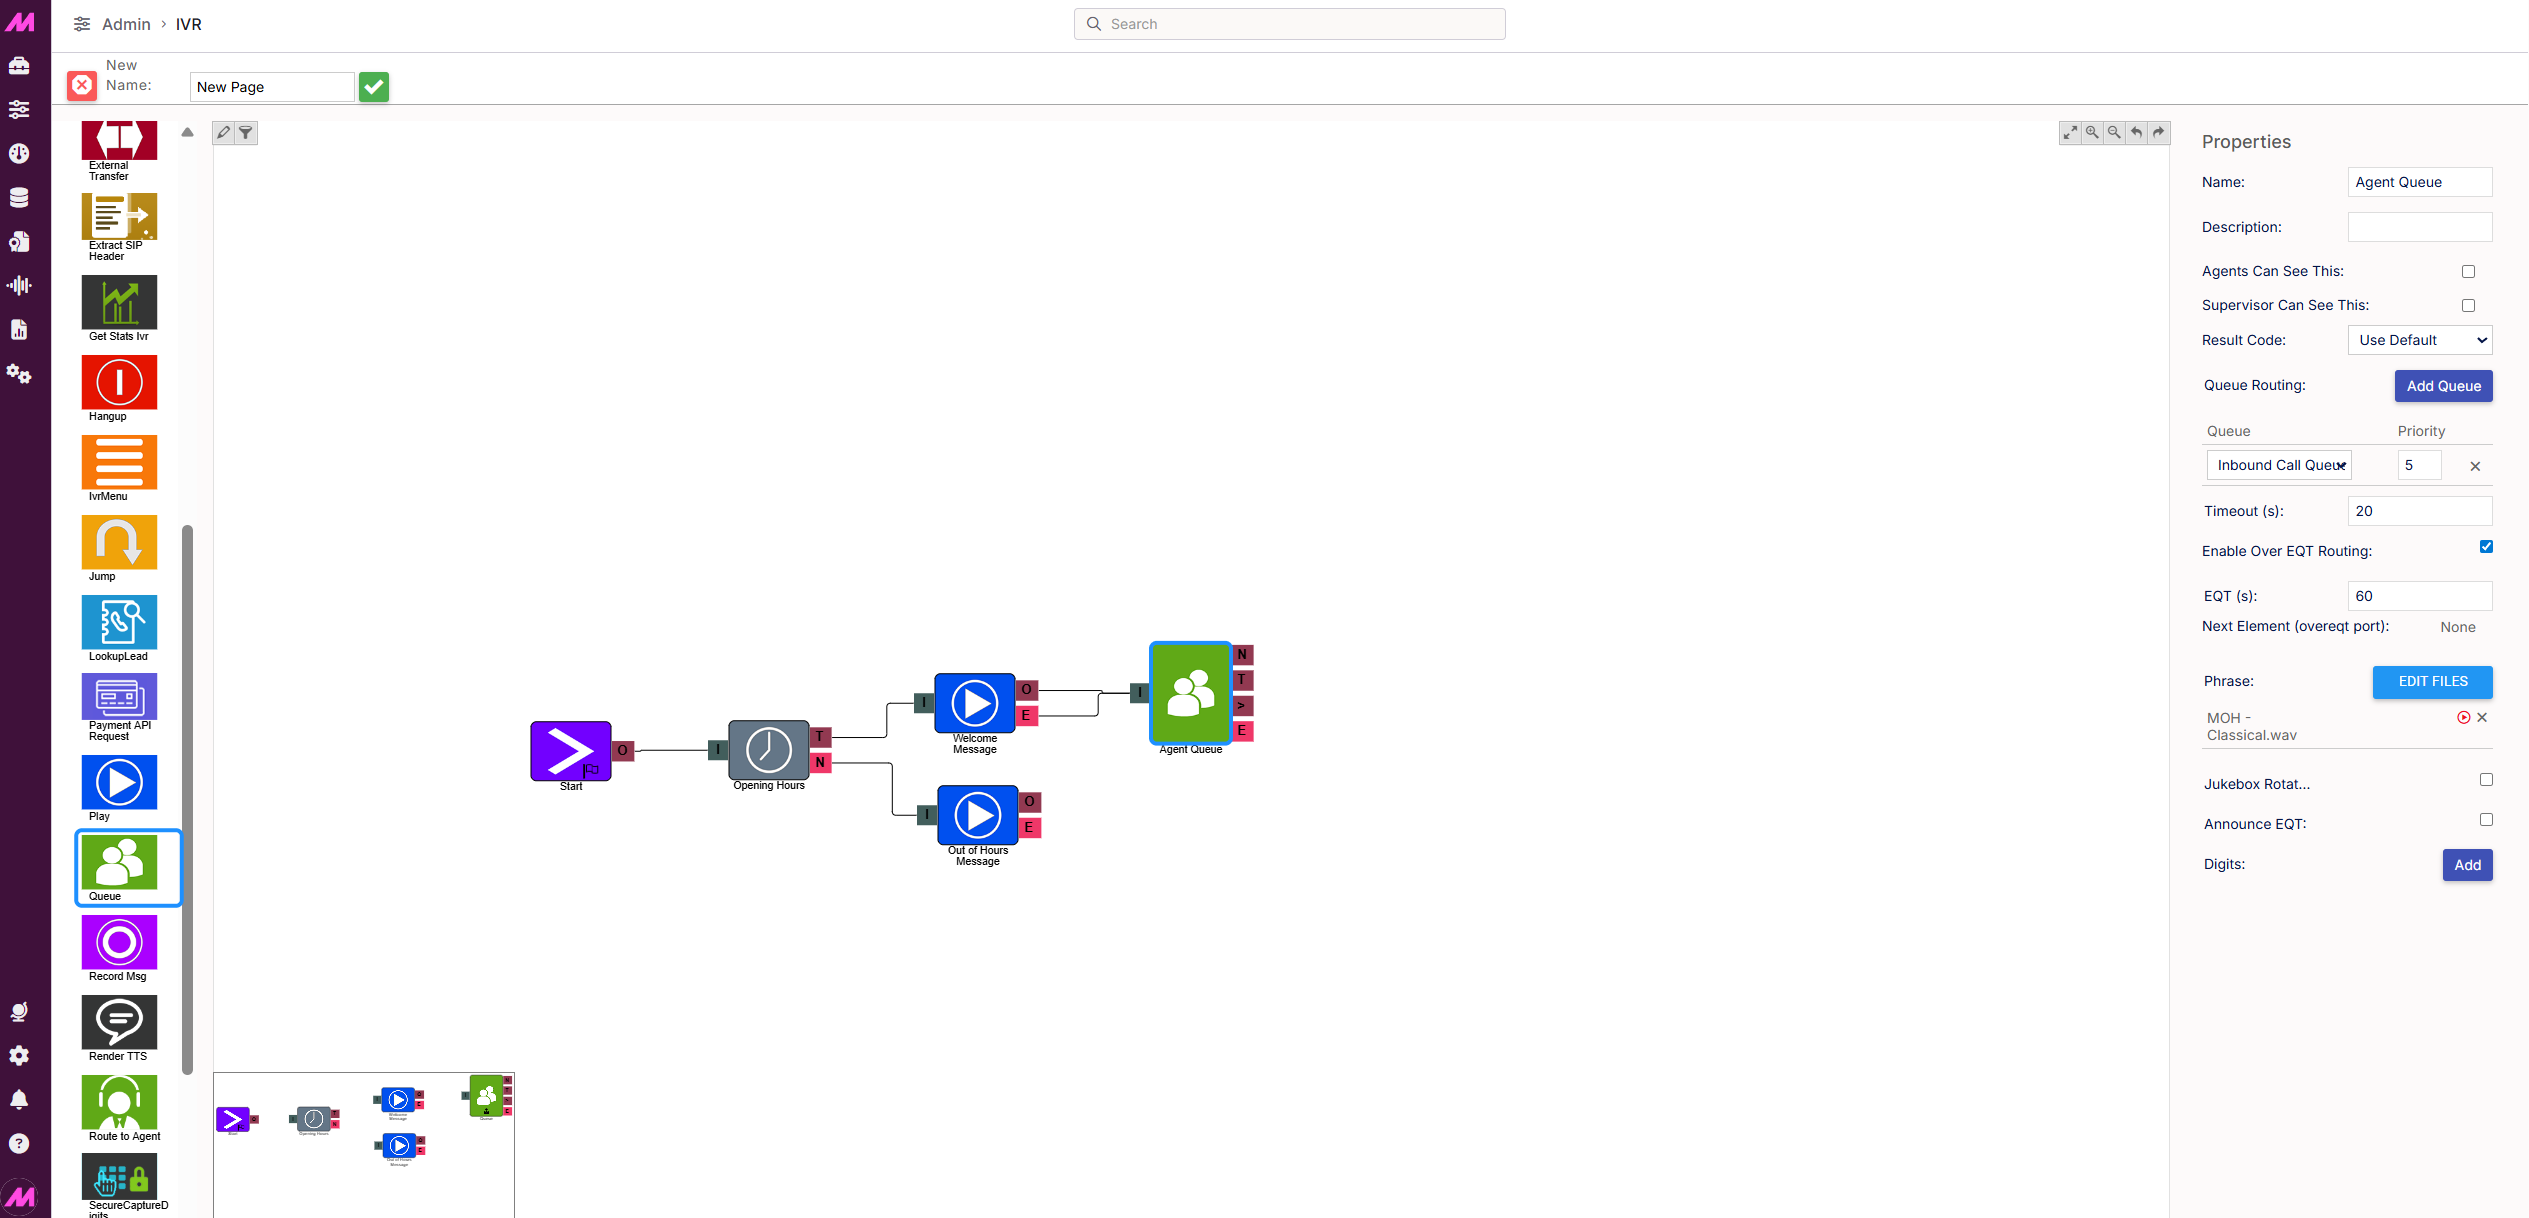
Example flow
In the example above, a basic inbound IVR is configured with a Start element connected to a Time Check. Within opening hours, callers hear a welcome message and are placed in the Sales queue. Outside of opening hours, callers hear an out-of-hours message before the call ends.