Advanced Scripting — Rules
Rules let you control how a script behaves based on IF / ELSE logic. You can use rules to show or hide fields, set field values, navigate to different pages, and more — all triggered automatically by what an agent enters or selects during a call.
To open the Rules Editor, select the Rules button (Hammer Icon) in the Script Editor toolbar.
Creating a rule
- In the Rules Editor, select Add Rule. A new rule row appears.
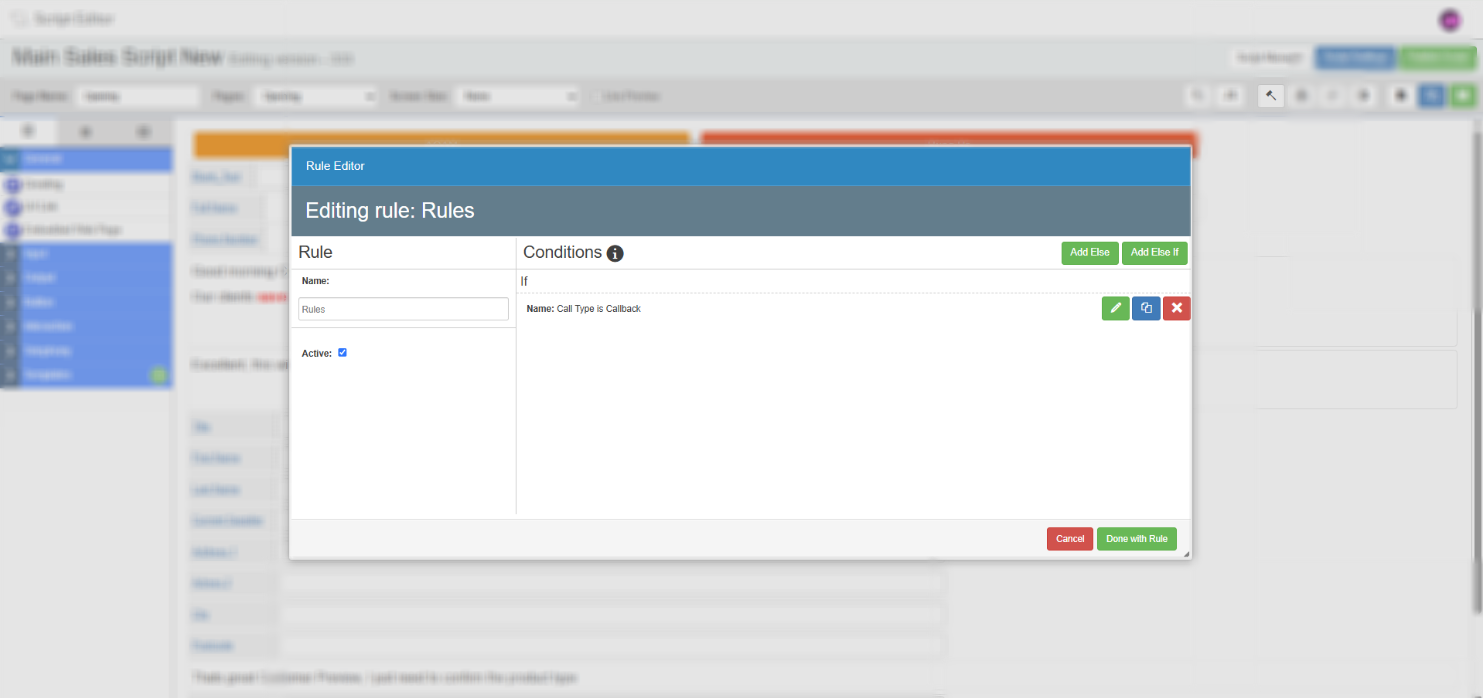
- Select the green Edit Rule button on the right of the row to open the rule editing screen.
- In the left-hand panel, give the rule a name and set it to active.
- In the right-hand panel, an IF rule row is displayed by default. Select the green edit button on that row to open the condition editor.
- Name the condition using the left-hand panel.
- In the middle panel, select the Magniying Glass icon to open a preview of the script and choose the field that will trigger the condition.
- Once a field is selected, use the Select an option dropdown to choose the parameter — for example, equals, contains, or is empty. If you selected a dropdown field, its options will appear for you to choose from. If you selected an input field, type the value you want the rule to match against.
- In the right-hand panel, choose what should happen when the condition is met. Select either Field (to act on a single field) or Group (to act on multiple fields at once). Then choose the behaviour — for example, set invisible, set visible, or set a field value.
- Select Done with group, then Done with rule, then Done to return to the script editor.
IF / ELSE logic
Each rule can contain an IF condition and one or more ELSE or ELSE IF conditions. These work in the same way as standard programming logic — if the IF condition is not met, the system evaluates the ELSE IF conditions in order, and falls back to the ELSE condition if none are met.
You can also choose a page as the subject of a condition rather than a field, allowing you to trigger behaviour based on which page the agent is currently viewing.
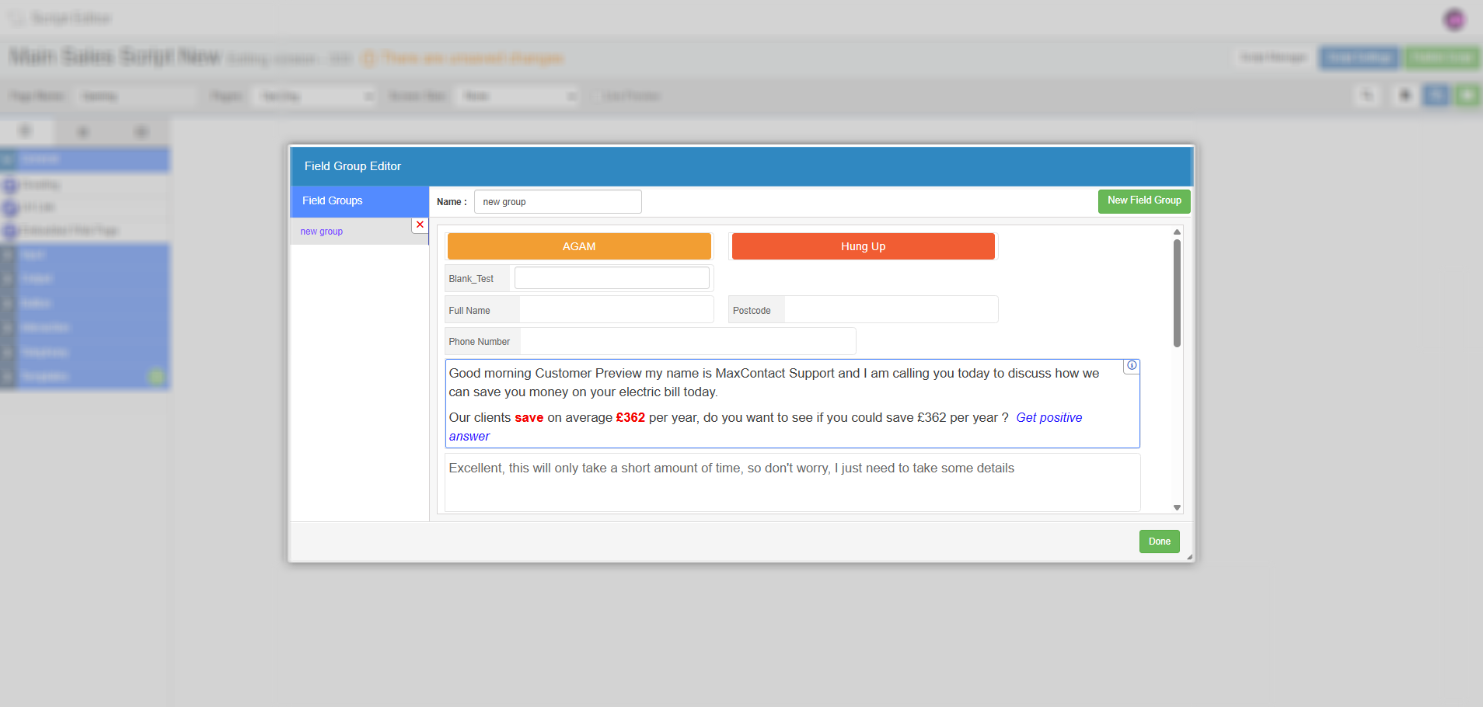
Field groups
A field group is a named collection of fields that can be targeted by a rule in a single step. Rather than creating a separate rule for every field you want to show or hide, you can group them together and apply the action to all of them at once.
Field groups only support two actions: Visible and Invisible. They cannot be used for actions such as setting a value.
Creating a field group
- In the condition editor, select Group in the THEN panel.
- Select Edit field groups.
- Select New field group.
- Give the group a name, then select the fields to include.
- Select Done to save the group and return to the condition editor.
- The new group is now available to select in the THEN panel of any condition on that page.
Rules Editor options
| Option | Description |
|---|---|
| Add rule | Adds a new rule row to the editor. You can add as many rules as needed for the page. |
| Clone rule | Creates a copy of an existing rule. Useful when building similar rules that share most of the same logic. |
| Delete rule | Removes the rule from the page. |
| Active / Inactive | Enables or disables a rule without deleting it. Useful for testing or temporarily suspending a rule. |
| Add ELSE / ELSE IF | Available within the rule editing screen. Adds additional conditions to be evaluated if the IF condition is not met. |