TABLE OF CONTENTS
- Setting an emergency route
- Enabling/disabling Emergency Routing via the Portal
- Enabling Emergency Routing via a Phone Call
In the event of an emergency situation, you can tell the MaxContact system to route inbound calls to a specific IVR.
Use case example
Users are in the office and have to evacuate the building due to an emergency/there is a major outage and inbound customers need to be informed.
There is no need to repoint each inbound number to an emergency/out of hours message. All inbound calls can be quickly routed to an emergency message by a member of the team (with access to the inbound numbers page).
The emergency routing option is a one click feature to activate and can be switched off again by one click on the inbound numbers page.
You can create different emergency routes for each of your inbound numbers E.g. A customer with multiple campaigns may want to route their calls to specific emergency messages for each campaign. "Thankyou for calling about PRODUCT A, unfortunately..." "You've reached PRODUCT B customer services, unfortunately..."
In order to activate emergency routing, you will need to have an emergency route set up for your inbound numbers.
This is done by creating an Emergency IVR (or multiple depending on your requirements). These IVRs must have a start and hang-up element but the content of the IVR can be different based on your requirements.
Examples include,
- Relay a message to the customer via a 'Text to Speech element' or a pre recorded message via a 'Play element'.
- You could create an IVR which allows the customer to leave a voicemail.
- The virtual queue option could be given to the customer so they can leave their number in the queue and have someone ring them back once users are back on the system.
- If you have multiple sites and only one has an emergency, you could always route the customer to a different queue.
- Its also possible to have the emergency route transfer the customer to another number outside of the MaxContact system.
Setting an emergency route
To set an emergency route, simply select your prebuilt IVR for emergencies in the 'I.C.E. Route' column dropdown.

Fig 1. Select an emergency route for your inbound number.
Enabling/disabling Emergency Routing via the Portal.
There are 2 ways to enable emergency routing via the portal.
- Enable on individual inbound numbers.
- Enable on all inbound numbers.
Enable on individual numbers.
To enable on individual inbound routes, simply toggle the Emergency Enable option on for the required lines.
|
|
 Fig 2. No inbound routes set to emergency routes.
 Fig 3. Inbound route set to emergency.
Enable on all numbers.
If all inbound numbers need to be pointed at their emergency route, rather than switching them on individually, you can switch them all with one click.
 | In the top left of the inbound numbers page there is button which will switch all routes to their emergency route. |
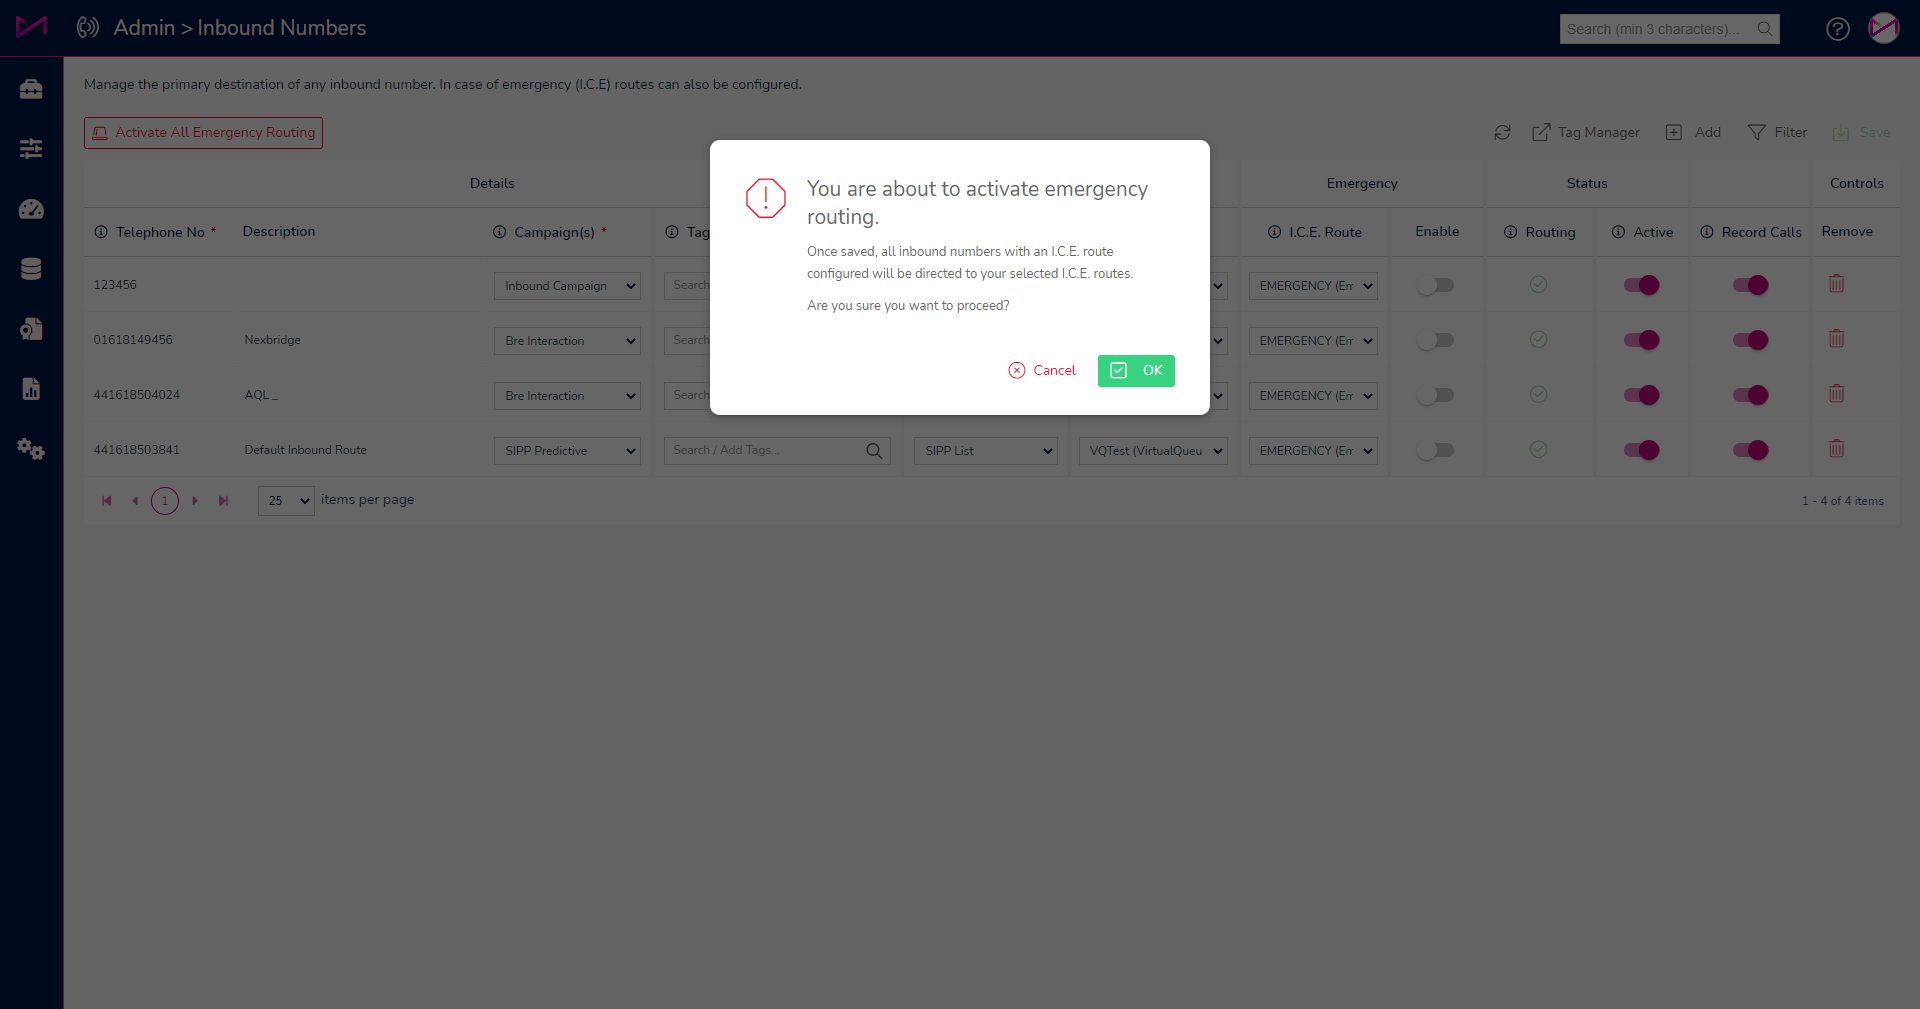 | Upon selecting the button, you will be presented with a dialog box to confirm if you would like to activate emergency routing or not. Click the OK button and all routes will switch to their emergency route. |
 | Once confirmed, the buttons state will change to show as fully red, indicating emergency routing has been activated. |
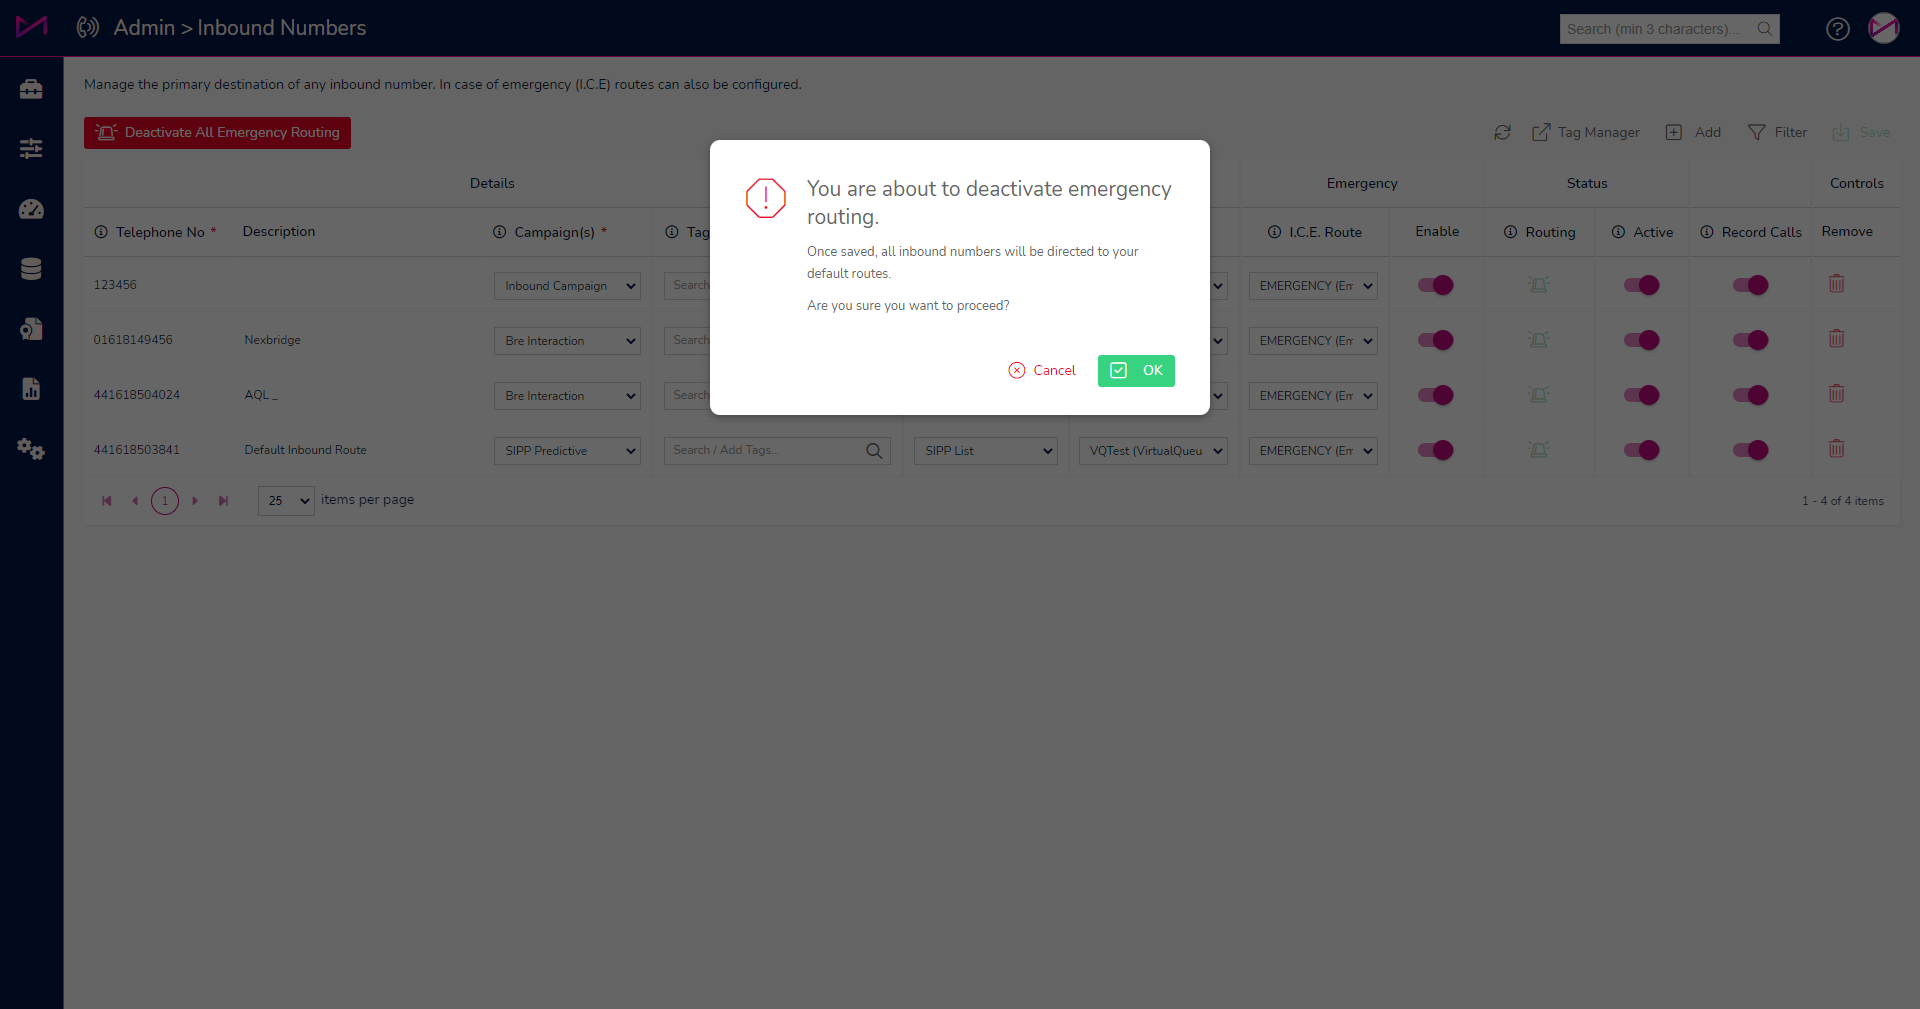 | To switch emergency routing off, simply click the button again. This will then give a dialog box to confirm the action. Upon clicking OK, emergency routing will be switched off for all routes. |
Note. If you activate emergency routing on all numbers then deactivate one of the numbers individually, the button will revert back to its original state, as not all inbound routes are set as emergency routes anymore (Essentially its like you manually set each as emergency except one).
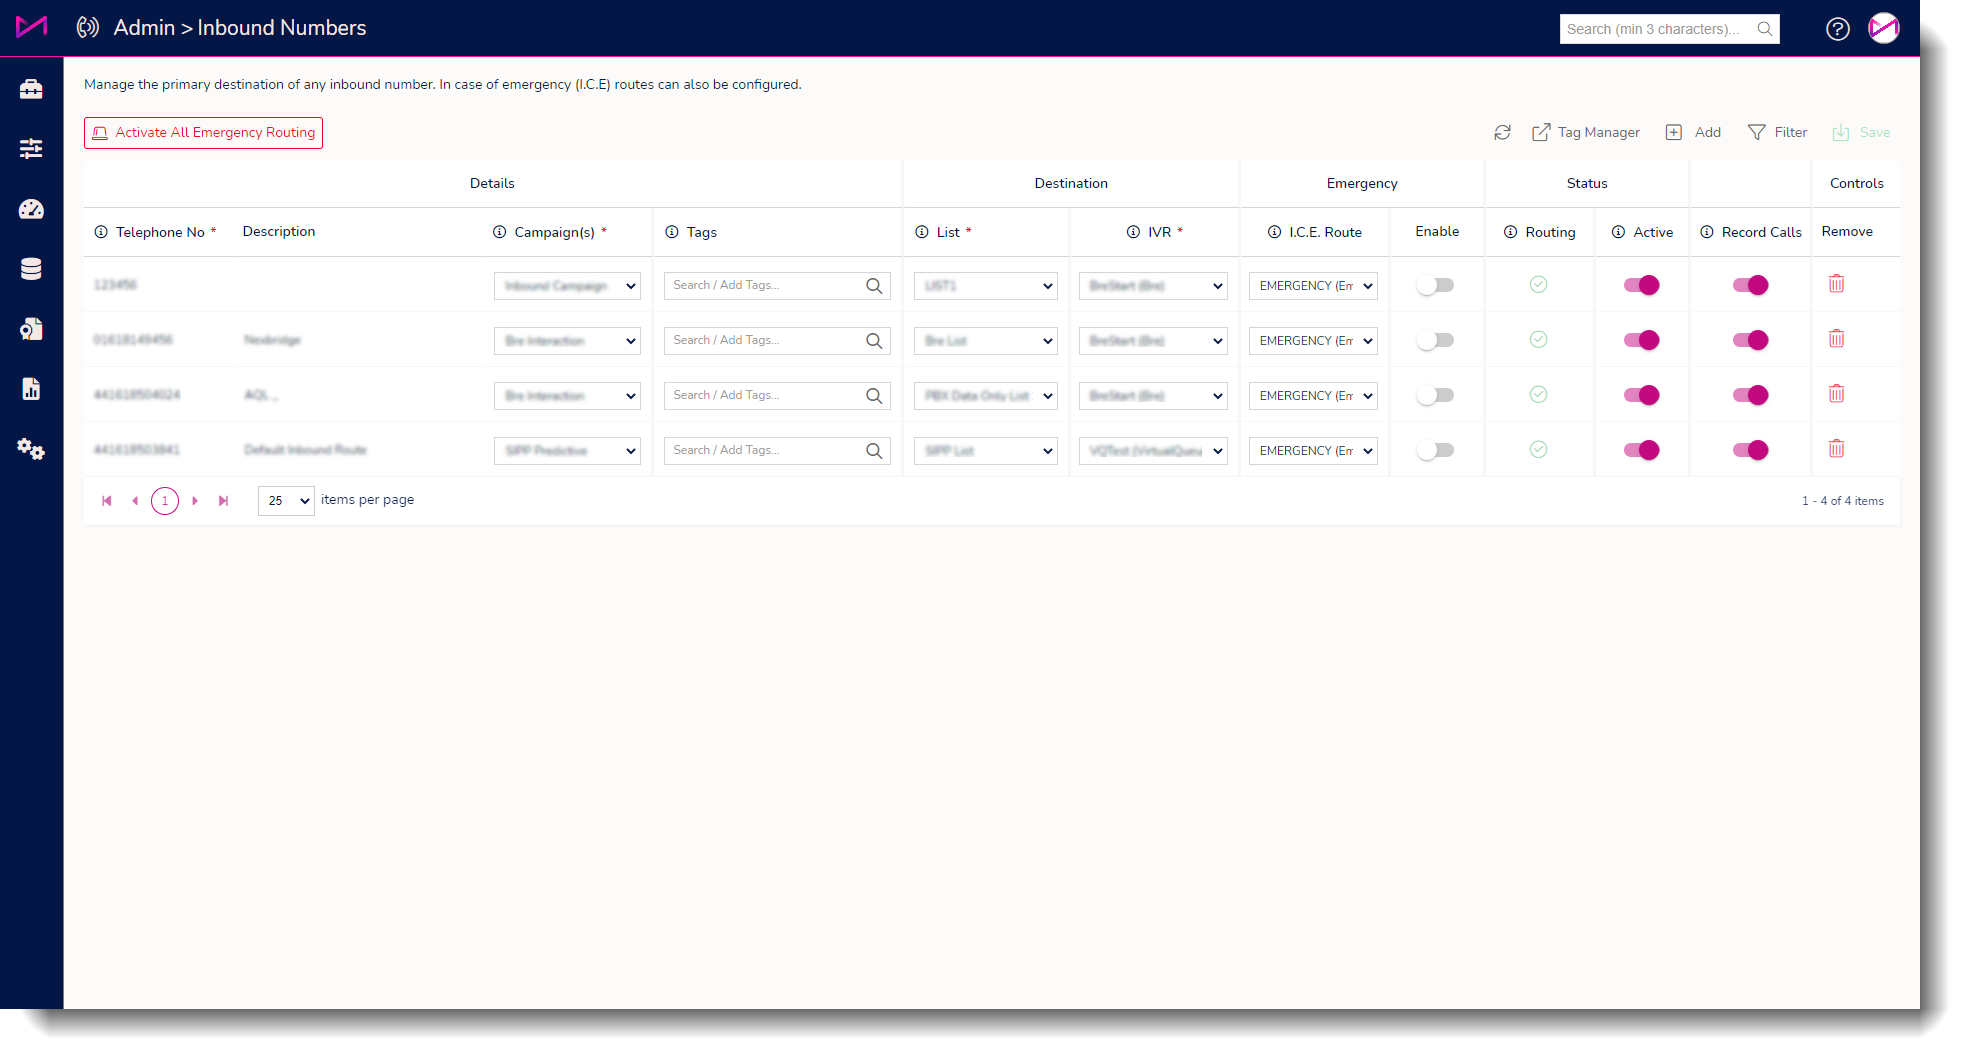 Fig 4. All emergency routing off. Fig 4. All emergency routing off. |  Fig 5. All emergency routing on. Fig 5. All emergency routing on. |
Status > Routing column icons
 | You will see an alarm icon appear when emergency routing is switched on for an inbound route. |
 | Denotes route is active and has an emergency route configured. |
 | Denotes the inbound route is active but there is no emergency route configured. |
 | Denotes the inbound route is inactive. |
Enabling Emergency Routing via a Phone Call
Its possible to activate emergency routing by calling into your system. To do this, you must have the following setup on the system;
- An IVR built specifically for this purpose.
- A dedicated inbound number to call to activate emergency routing.
Building an IVR
Head to the IVR page and create a new page to house your activate emergency routing IVR.
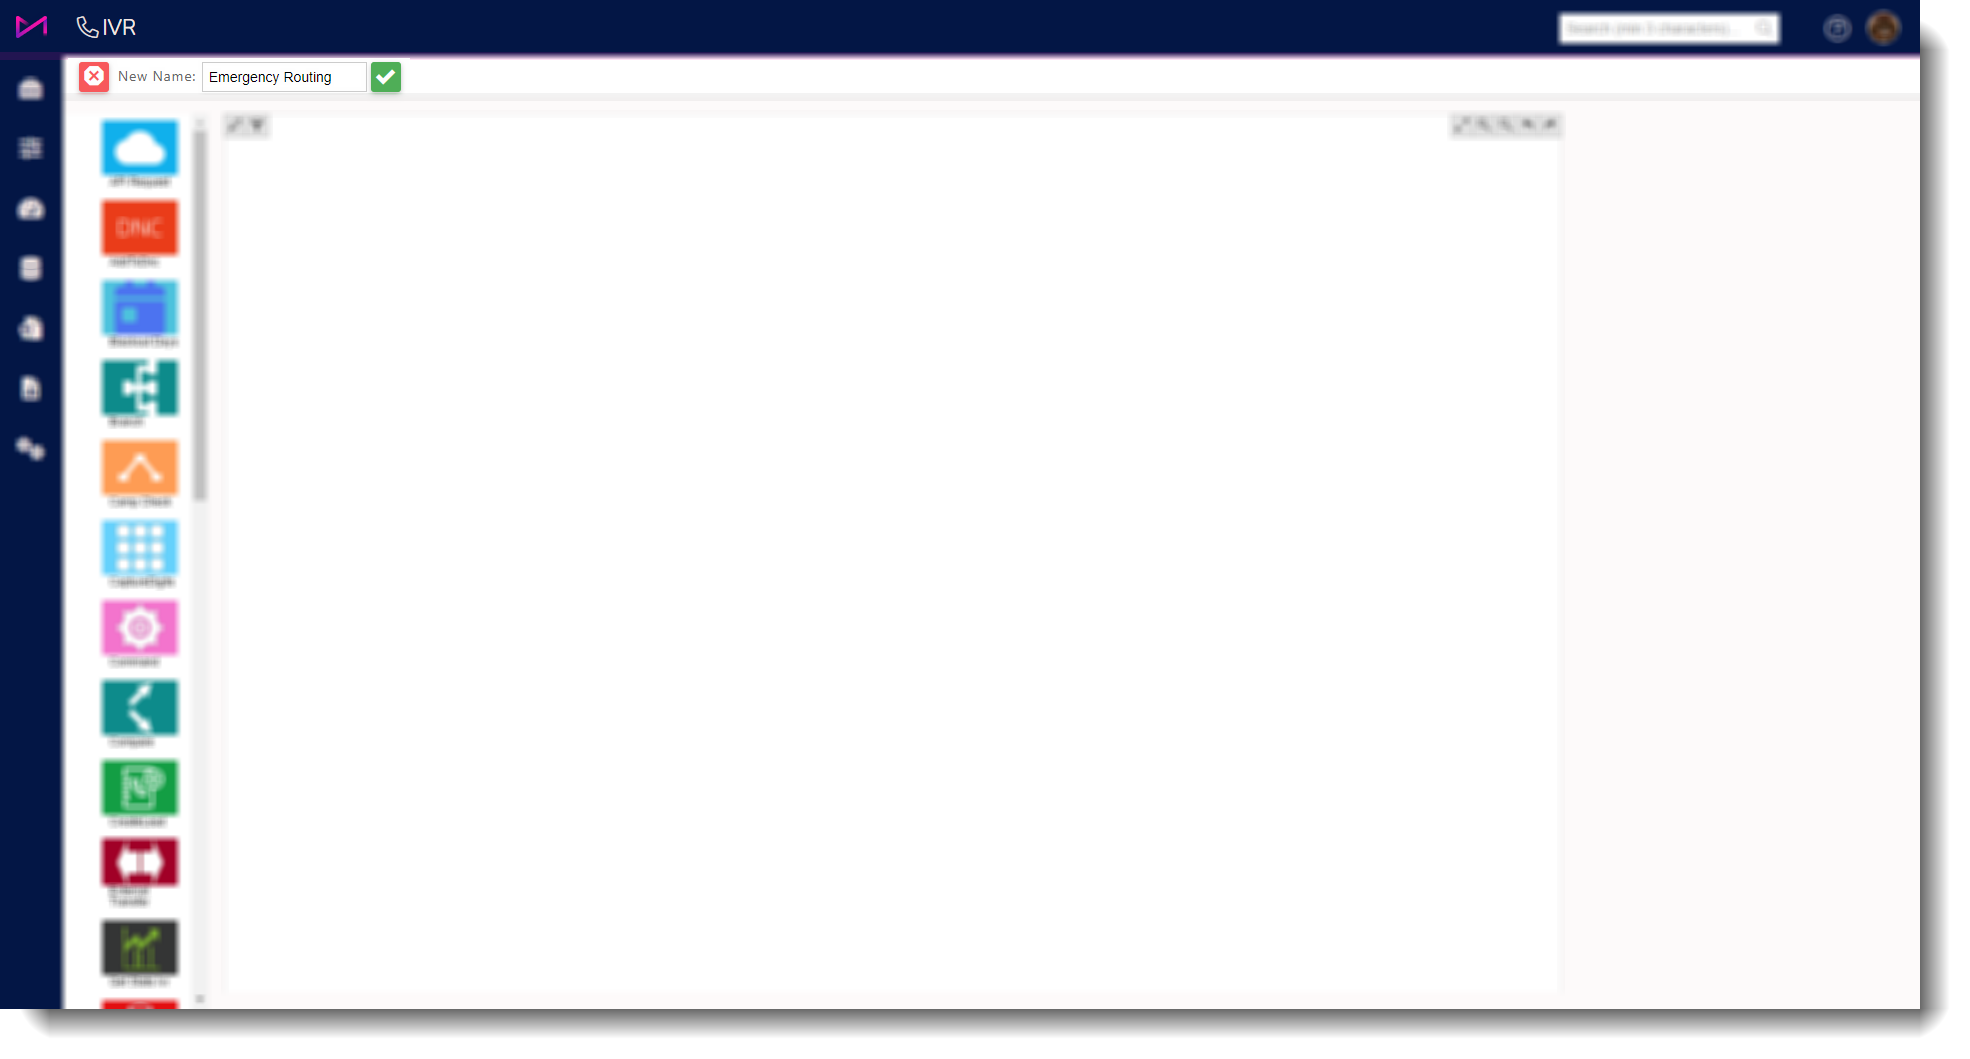
Fig 6. Create a new page via the blue button in the top left. Name it then hit the green tick to save.
Create the following IVR
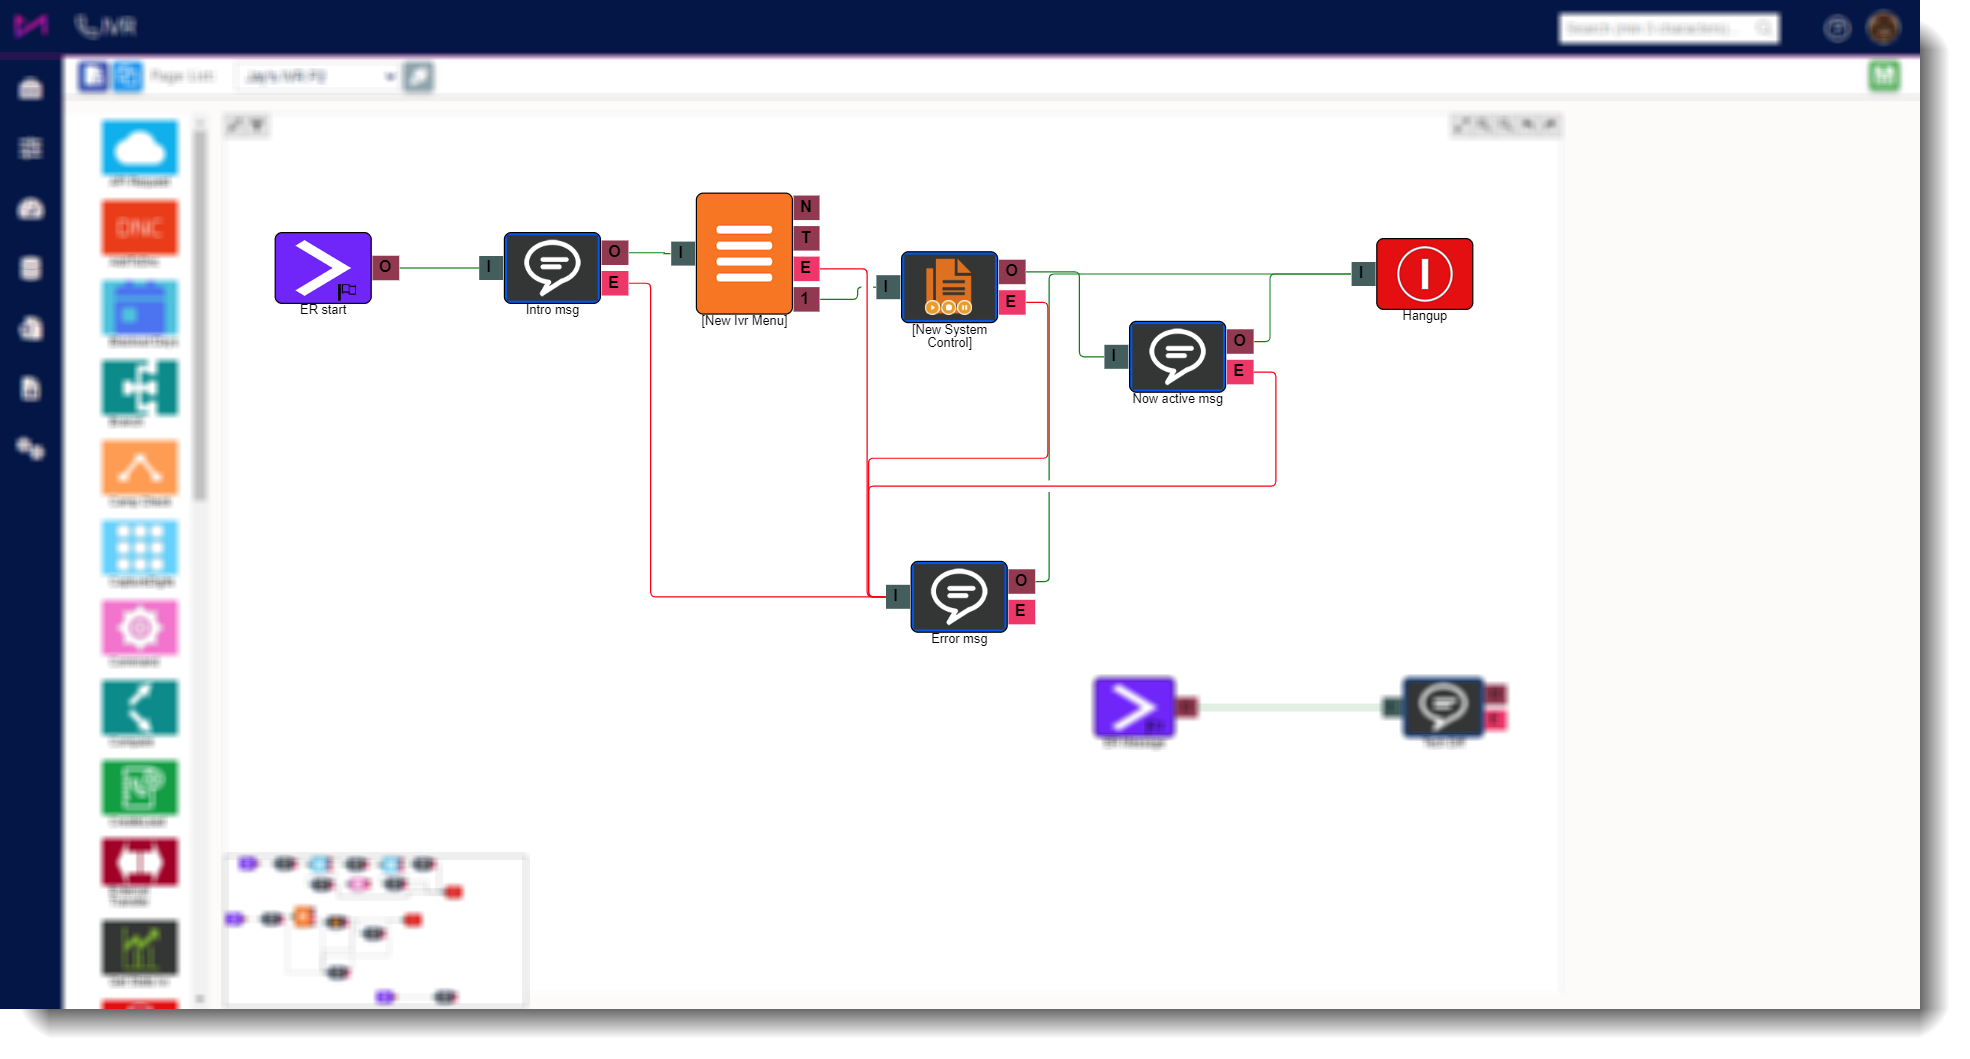
Fig 7. You can use our Text To Speech elements or record the messages and add Play elements in place of the TTS elements above.
 | Start element | Required to assign to the inbound number you will use. |
 | TTS element (could use a play element) | Give the caller a brief message and instruction. E.g. "This is the Emergency Activation Line. To Activate the Emergency Lines, Please press 1 after the beep." |
 | IVR menu element | Allows you to place an option 1 and allows you to assign a 'beep' file. |
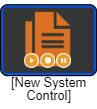 | System control element | The settings for this need to have the 'Control action' set to 'Global emergency'. |
 | TTS element (could use a play element) | Gives the caller confirmation that the emergency routing has been activated. E.g. "Emergency route now activated." |
 | Hang-up element | Once activated, the IVR will hang-up with this in place |
| Optional | ||
 | TTS element (could use a play element) | You may wish to add an error message to relay to the caller in case it doesn't work at any point, prompting them to try again. |
Add a dedicated number for enabling emergency routes via a phone call
Ensure you have a number ordered and added to the system via the inbound numbers page.
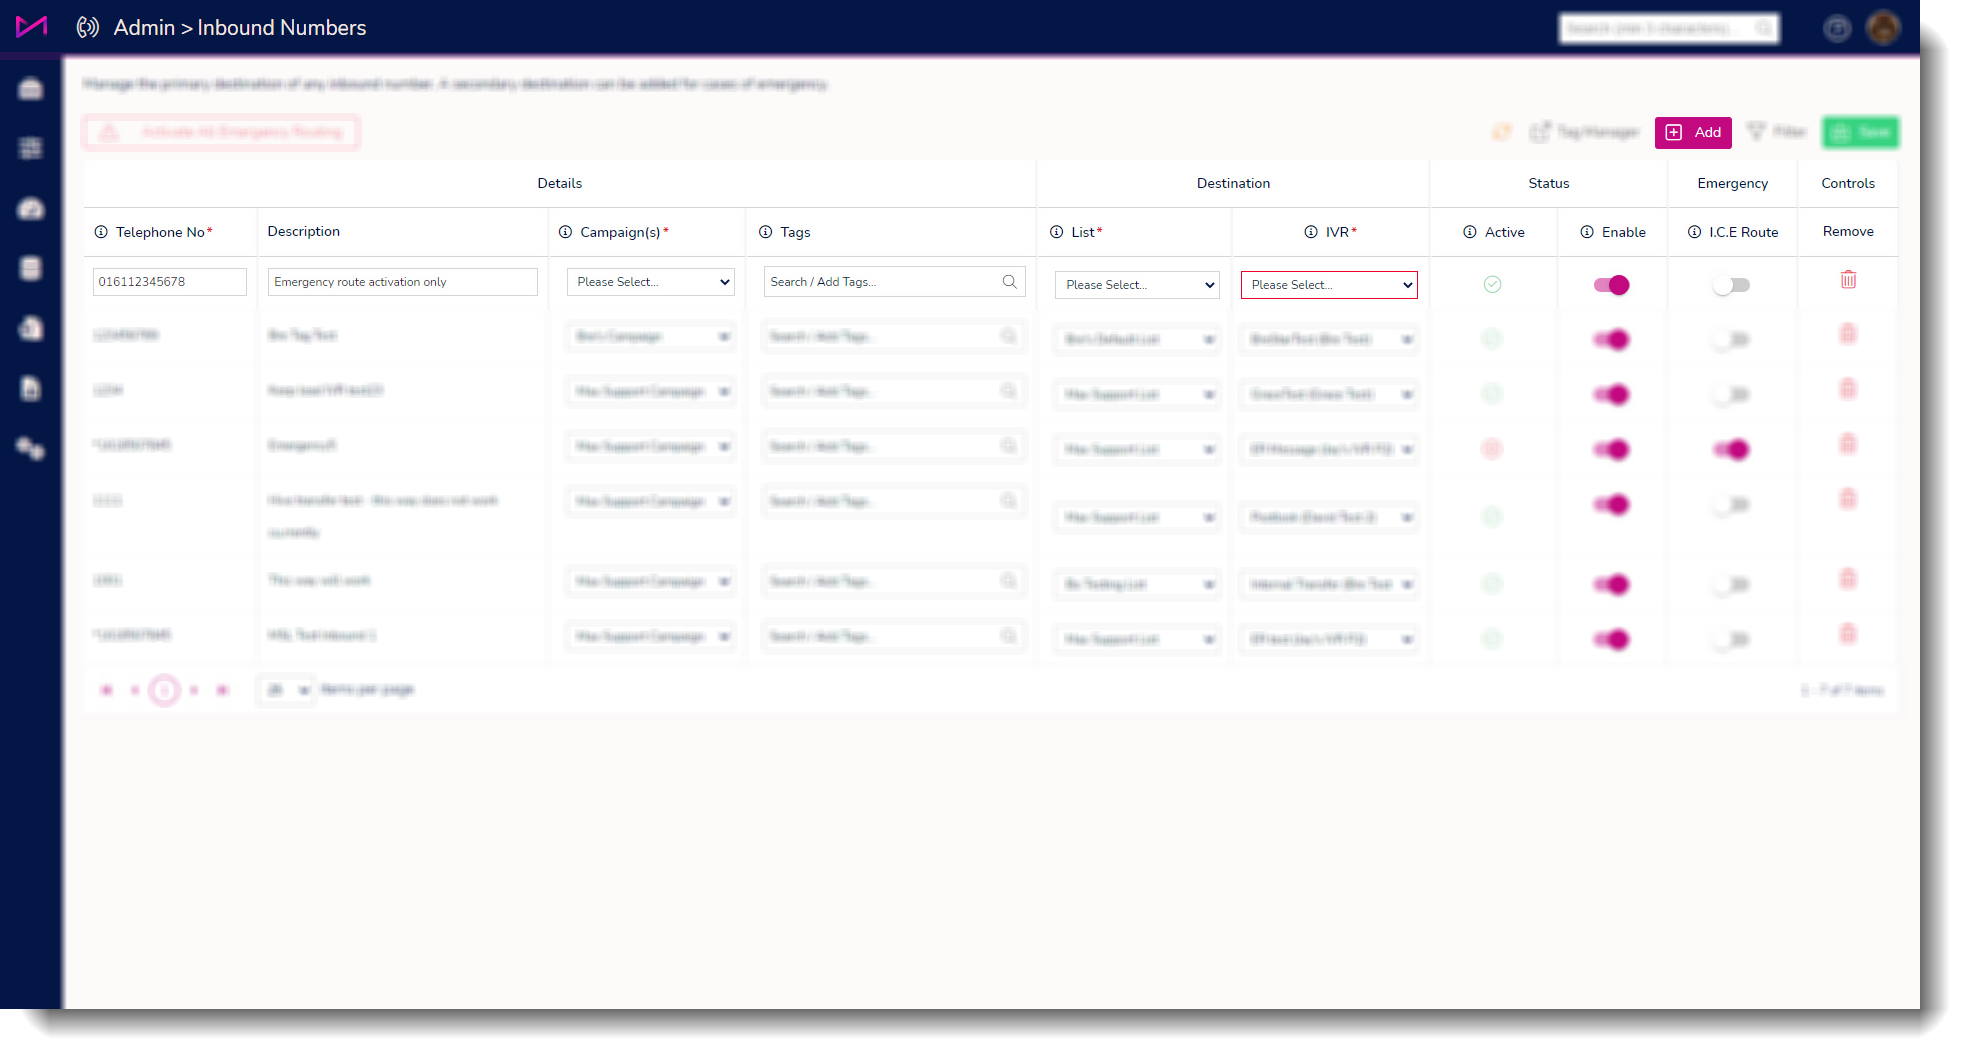
Fig 8. The Inbound Numbers page. Ensure you have a number setup and 'pointing' at the IVR.
Add a suitable description so other users don't mistakenly use the number elsewhere or edit/delete its settings and ensure that it points to the newly created IVR by selecting the start element of your IVR in the drop down.
Its worth creating a separate campaign to sit in the system and assign this here although you can use any. This will affect reporting and Record History if its a campaign you actually use for calls, so a separate one means you can report on your other campaigns without these, hopefully very few and far between, affecting the reports.
Likewise, the list you select should be a test list or a list you can create just for this number. If its a list being used in calling campaigns in the system, you might get a call from an agent one day!
To switch off emergency routing, you must go to the Inbound numbers page and use the button, this cannot be achieved by calling back in.