Custom Data Fetching (CDF) is a feature that allows you to extend the fetching strategy of the MaxContact system to fetch certain leads based on customizable rules using your data.
Use case examples
There are numerous examples of how businesses might want to filter their data, here are some very basic ones.
1. I can filter my data to dial certain postcodes as my sales team are working in specific areas this week and I want to book their appointments in those areas.
2. We are running a campaign on life insurance and want to target customers of a specified age range.
3. As a debt collector, I only want to contact those customers who's outstanding balance is above our threshold for contact.
4. Some of my B2B customers utility contracts are due for renewal and need to be contacted. I want to filter out all those leads who's contract doesn't expire next month.
The video below covers all aspects of the feature and the guide breaks down all topics covered in there too.
CDF video walk-through
1:12 Campaign Manager with CDF
4:00 Plans page - Create/edit filters
5:04 Fetching sort order explained
7:17 Enabling data filters & adding queries
12:28 Applying new filters to a list
15:03 Multiple queries
18:13 Filter data via result codes & the lead table in general
20:35 Limits to CDF plans and rules
22:02 Sort Data vs Filter Data
CDF details
‘Fetching’ is the process of getting leads that we want to call from the database. A fetch strategy consists of:
- Filters – what type of leads we want
- Ordering – which leads do we want to call first
- Limits – how much we want to get
There are fundamental rules from the original fetch strategy that are always used, CDF builds on top of these rules.
The fundamental rules are:
- Leads that do not have a final code set
- Leads that have not already been fetched
- Leads that currently have a valid timezone for the calling plan.
- Leads that have a LeadPhone that:
- Can be called
- Can be called now
- The one with highest priority and least attempts is chosen if there are multiple.
In CDF, any leads marked as high priority or with a public call-back are prioritised before any filtering or custom sort order.
These rules determine what is eligible to be called and is used when calculating eligibility of the lists.
Setup.
Permissions. You need to give required users the permission ‘Can Access Custom Data Fetching’ under ‘Page Level Admin Permissions’ to the required user roles via the 'Permissions page'.
Users will need to log out and back in for the permission to take effect.
Users without this permission will still be allowed to see the eligibility stats in Campaign Management when the feature is enabled, but they will not be able to perform any modifications to filters.
Data Filter Plan
CDF works by creating a Data Filter Plan in the 'Plans page' and assigning it to a list in 'List Admin' or on the 'Campaign Management' screen.
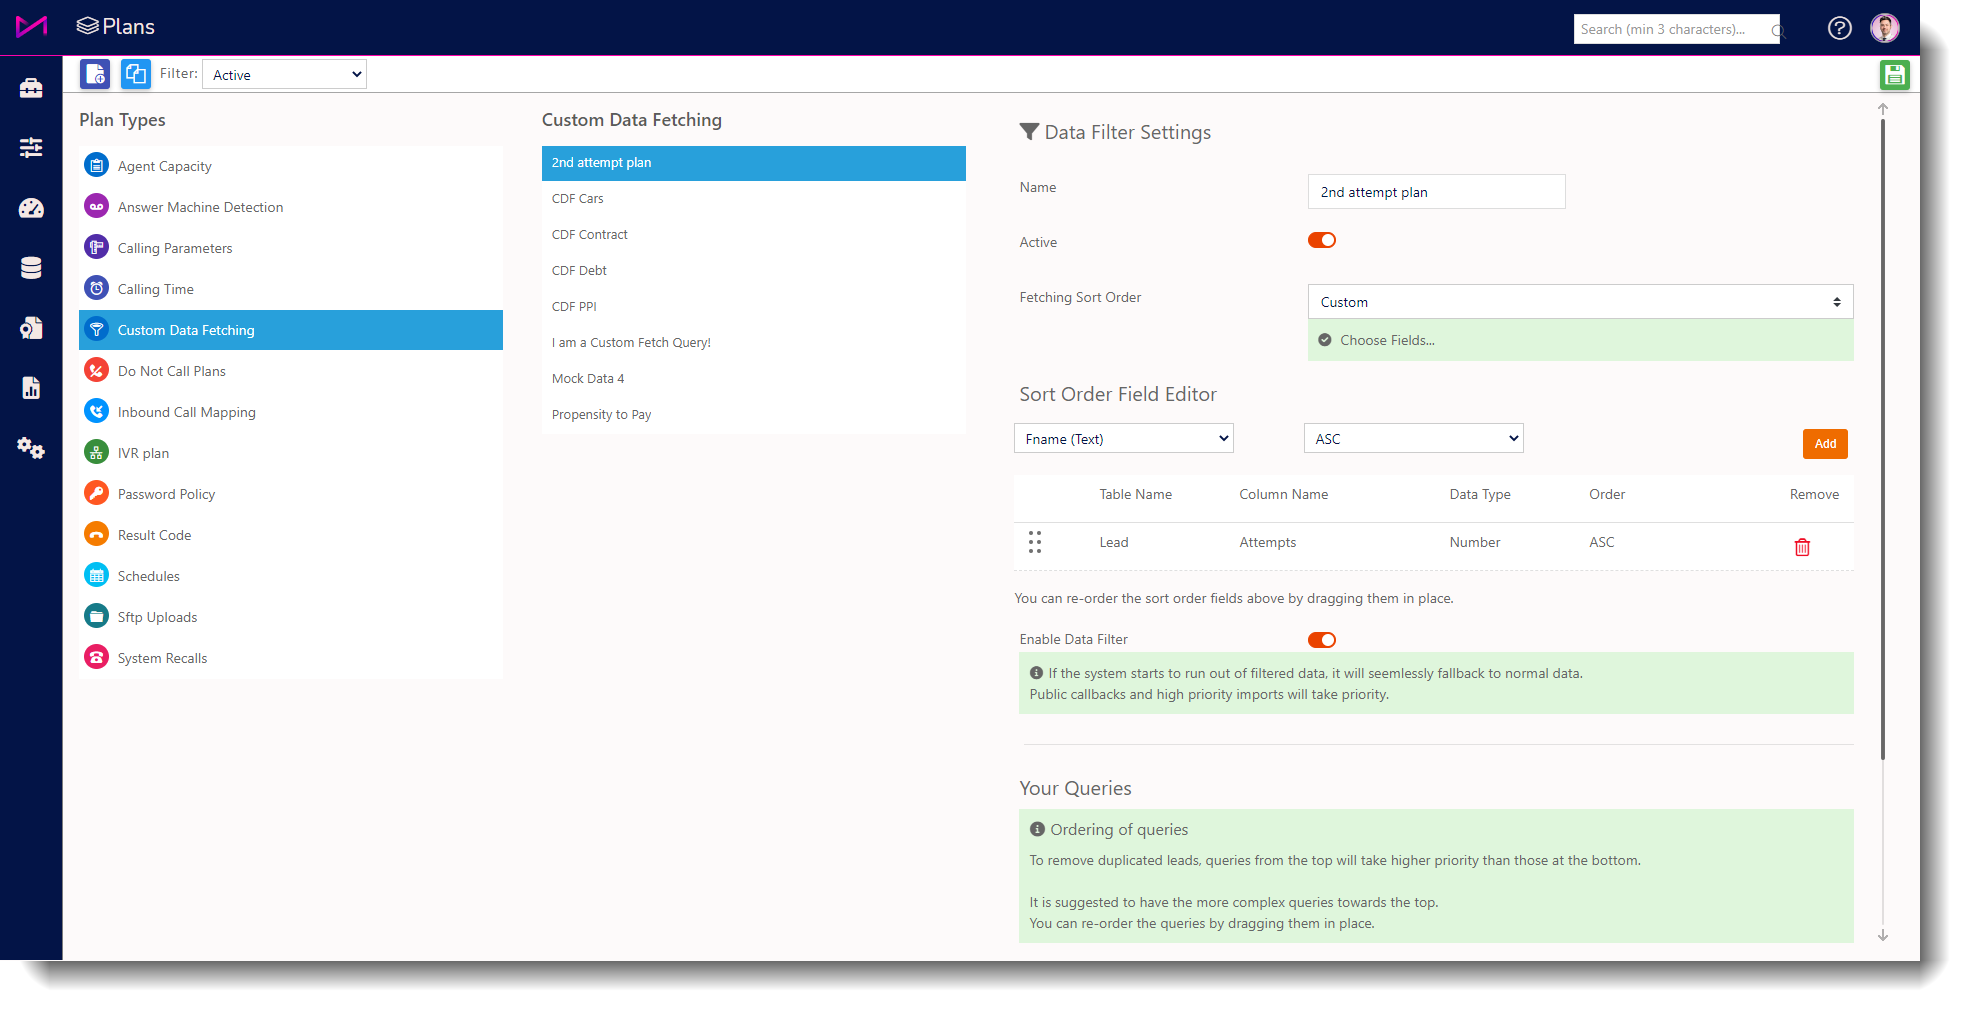
Settings
Name. Name of the plan.
Active. Enabled/disable the plan as a whole.
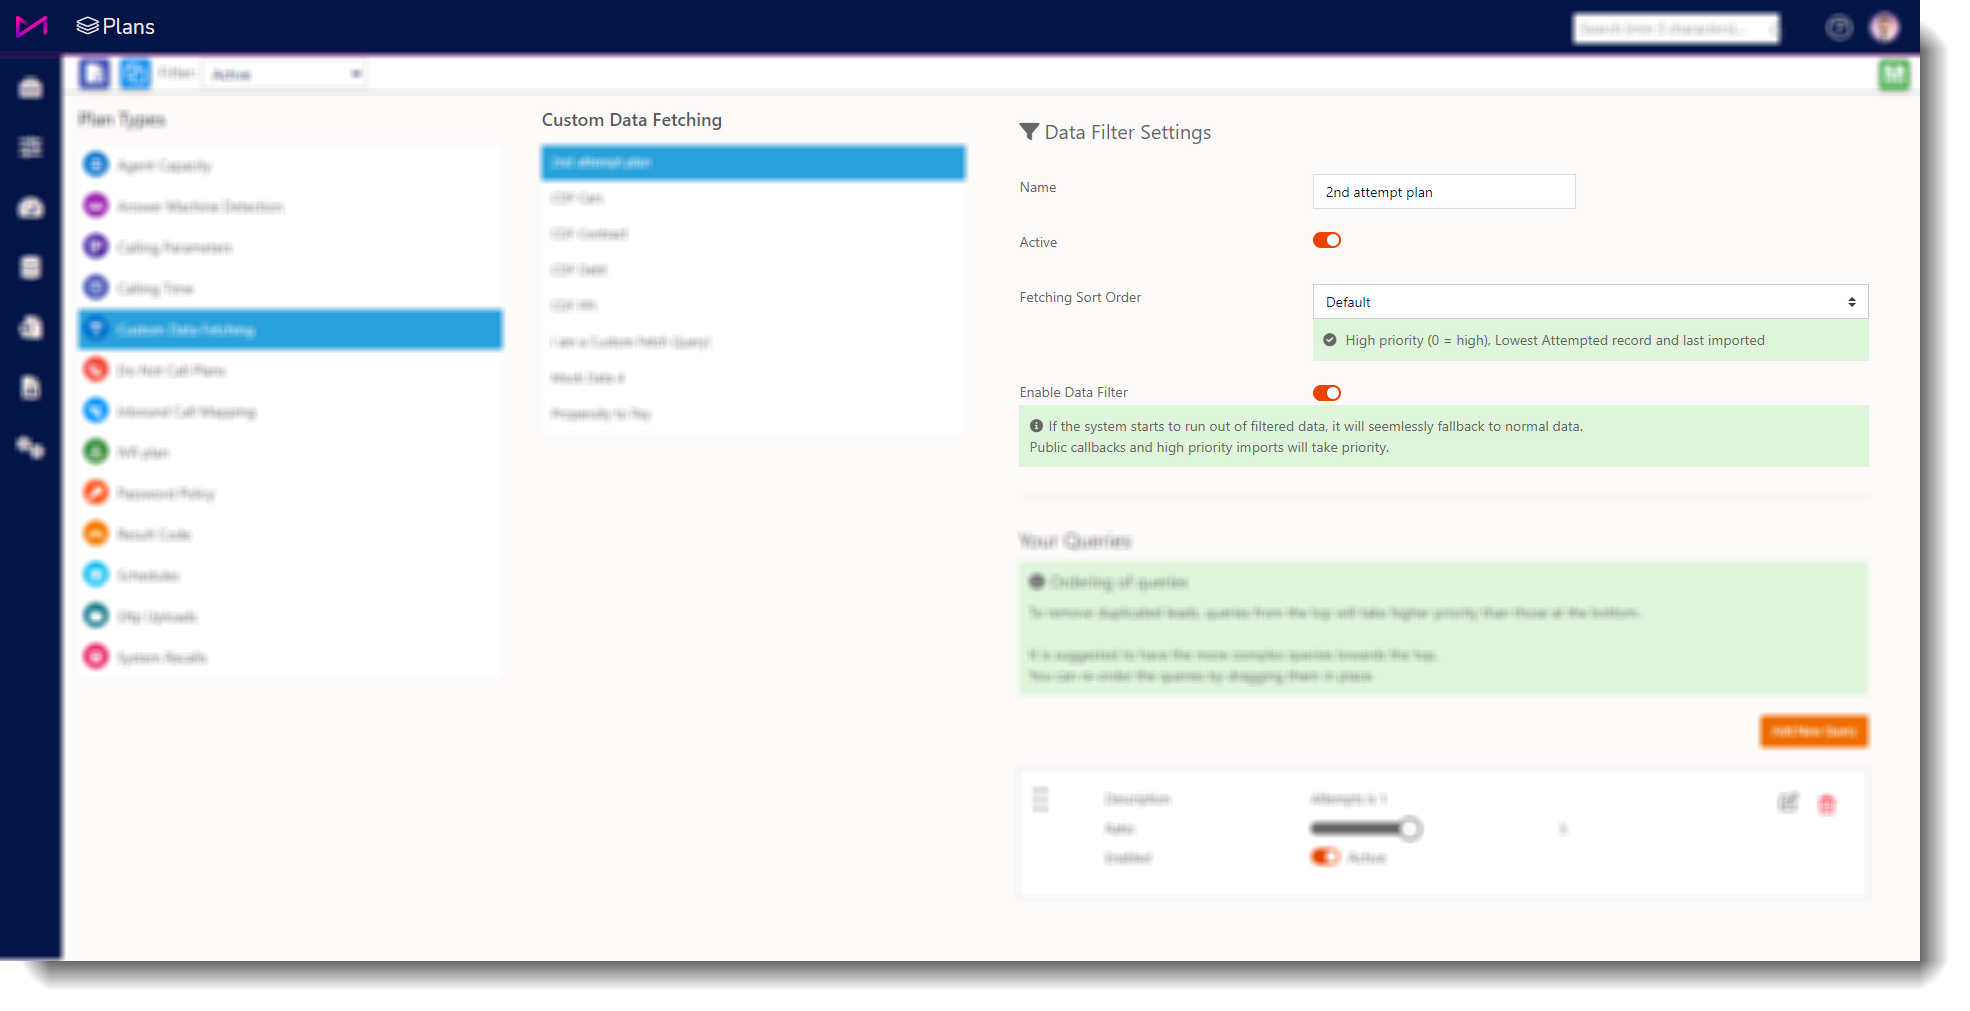
Fetching Sort Order. 3 defined orders and a ‘Custom’ order that allows you to create your own ordering.
- Default - Newest Leads, Least attempts.
If two leads have the same attempts, the most recently-loaded will be called.
- Reverse - Sorts leads in reverse to the default order.
- Custom - Allows you to define the sort order (see below).
Enable Data Filter. Enables/disables the filtering part only.
If the system starts to run out of filtered date, it will seamlessly fallback to normal data. Public callbacks and high priority imports will take priority.
Custom Sort order
With the Fetching Sort Order set to ‘Custom’ you will see the below view;
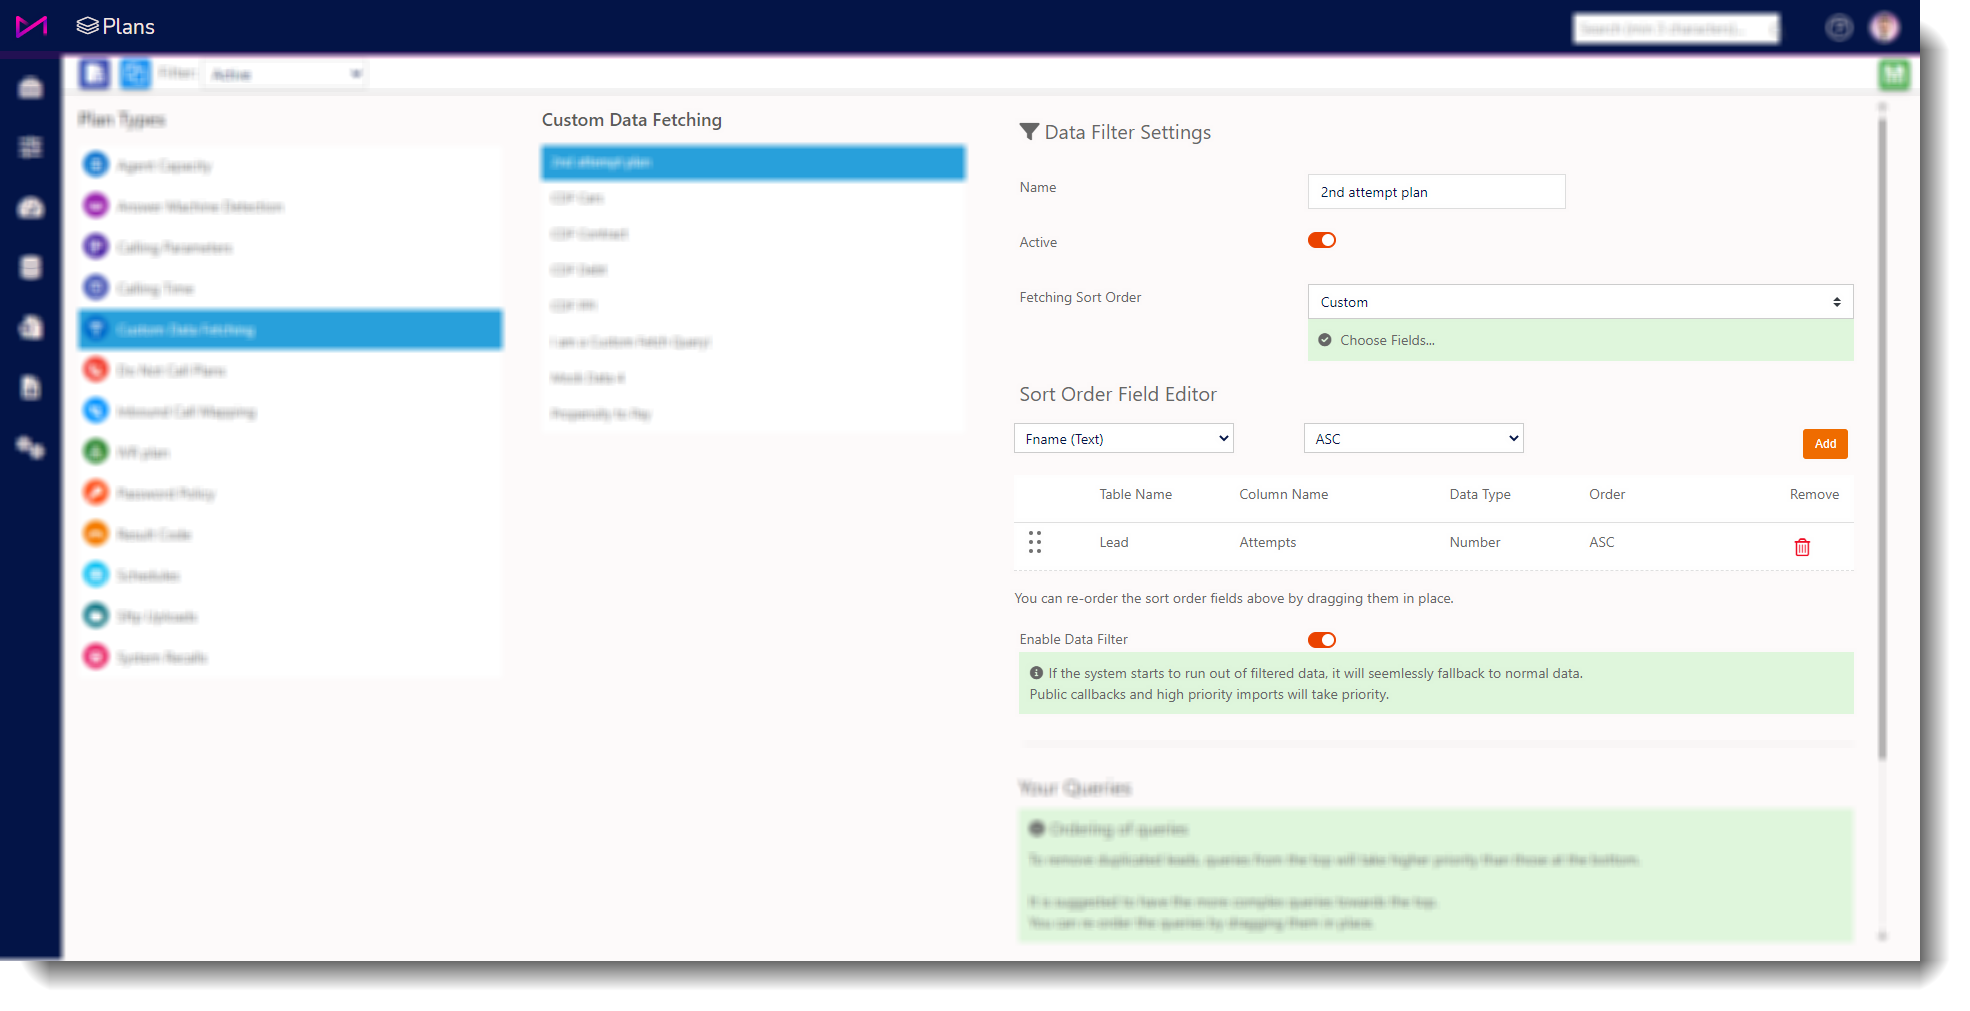
You will be able to add up to 5 options in a custom sort order, you can order these by dragging them using the '6 dots' on the left (Highest option being the 1st).
The ‘Lead Phone – Phone Type’ is unique in that it allows you to specify the order of which phone type to come first, Home, Work or Mobile.
Sorting by Phone Type is not to be confused with filtering as this does not guarantee one type before another as leads may not all have the same volume of phone numbers and type when they were imported into the system.
Queries
When the ‘Enable Data Filter’ setting is switched on you can create the different queries that filter the data.
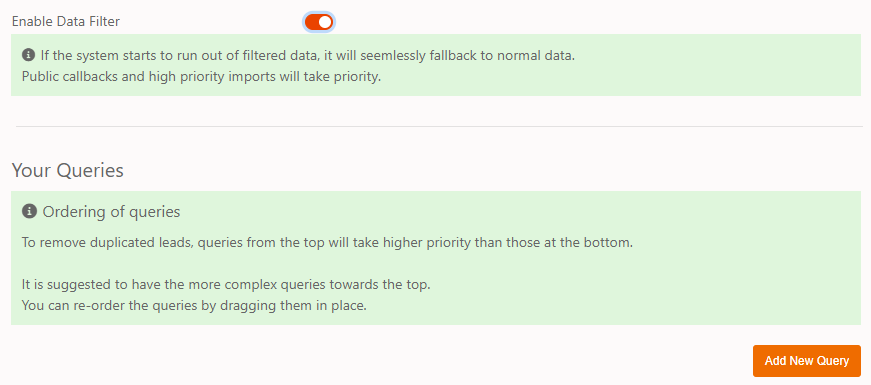
The plan can contain up to 5 queries. These can be ordered and have ratios applied to them and are also sorted by dragging them with the '6 dots' on the left hand side.
The ordering is important as it is possible to create multiple queries that could potentially fetch the same lead. The ordering prevents this duplication and the query that is highest in the list will be looked at first. If the different queries are focussing on different sets of data (different data tables) then the order isn’t an issue, only when you use the same data table or no data table at all.
The ratio between them acts the same as the fetch balance between lists (on the 'Manage Campaigns' screen or in 'List Admin', advanced tab).
Building a query.
Each query can contain up to 5 rules that build a profile of the type of lead being requested from the database. To start building the query, press the edit button on a query.
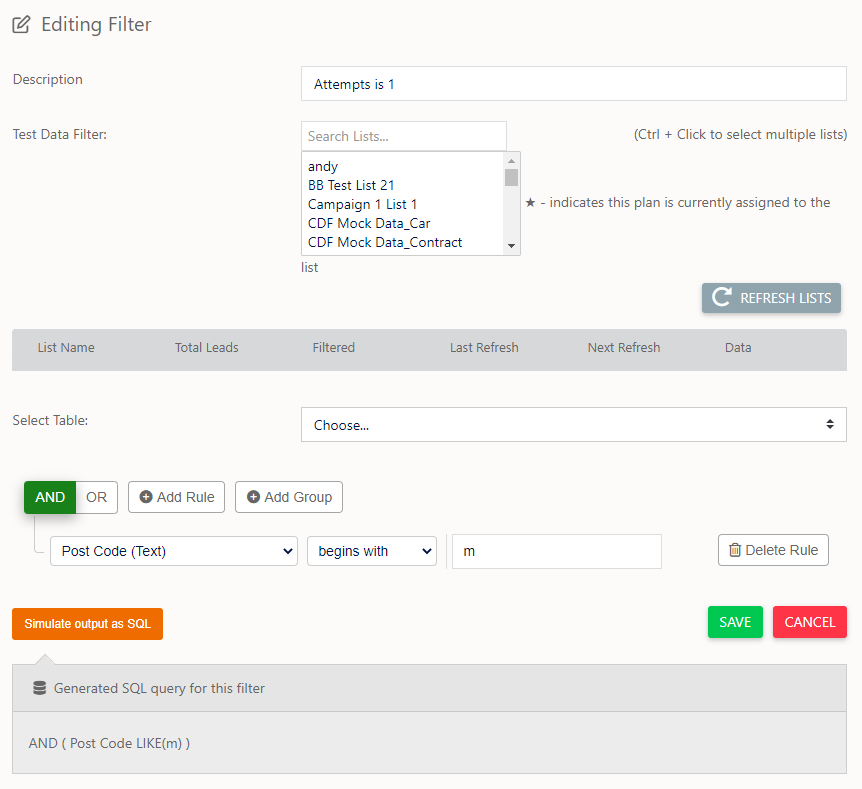
This rule designer allows you to build rules based on Lead, Lead Phone and Data Tables.
When you are done with building the query, press save in the query at the bottom (Not the top save button) as you will lose progress.

When there is an empty/invalid rule and you change the Data Table, you need to clear any empty/invalid rules before the available options are presented in the drop-down.

Minor changes to the customer field rules, such as tweaking a value, will take effect on the next fetch.

Major changes to the customer fields, such as adding a new customer field to the query, will require up to 5 minutes for the data to be prepared before use.
Using multiple Data Tables in a query
You can combine multiple Data Tables, however you should use the ‘ OR ‘ between them as you will not get a lead that has data for [Customer Table A] AND [Customer table B], example of correct usage below.
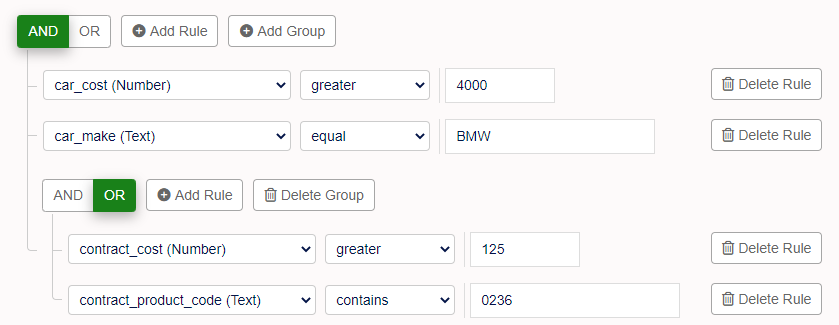
The example above uses 2 customer tables.
The first group is evaluating a [Cars] table and the second group is evaluating a [Contracts] table.
This can be expressed as… Fetch me leads that:
Have a [Car] with the name ‘bmw’ in the [Make] field and have a cost of over 4000.
OR
Have a [Contract] with a [Cost] greater than 125 and have ‘0236’ in the [ProductCode]
Testing a query
When you are finished with your query you can run a check against the database to see how many leads this would pick up.
Before testing, you must ensure the following has occurred;

The plan must be saved.
The plan must be assigned to a list (via Manage Campaigns/List Admin).

Ensure the customer fields exist on the list.

The campaign with the list must be running (for data counts).
To run checks, you must first select the lists required and the click ‘Refresh Lists’;
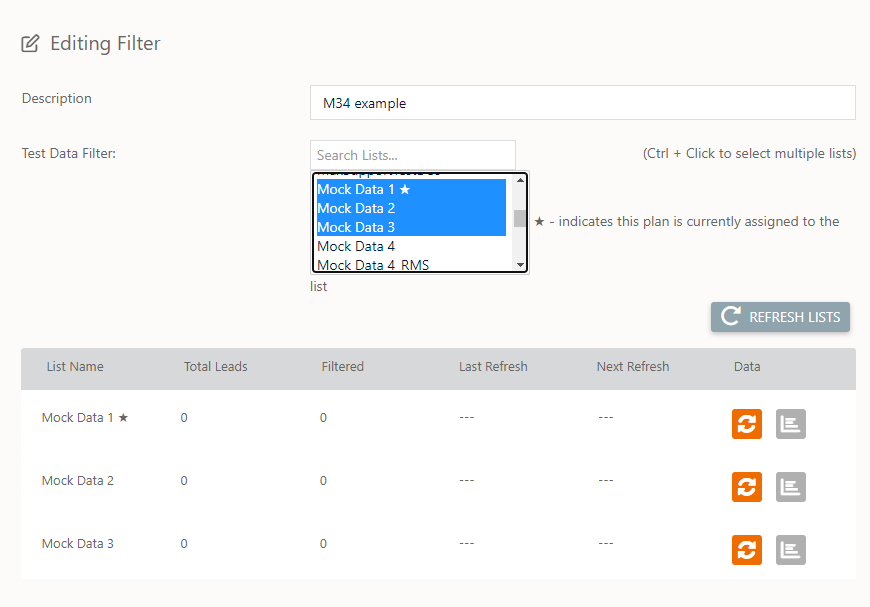
The ‘★’ icon indicates that the list is using the current plan.
You can calculate the number of leads that the query filters and get a sample of data from the database.
The sampling of the query (including the Sort Ordering) is only available under certain conditions:
- The query does not contain any data fields,
- this will allow sampling without having to save or assign to a list.
- The query does use data fields.
- This will require the plan to have been saved and assigned to the list that you want to sample.
- The list must also be running for CDF to prepare the data to be sampled
- if the list is not running then CDF will not be able to update the data, however if it has been created at least once it may still be available but will hold old data and might not be compatible with the a newer version of the plan if there has been significant changes.
- The data fields used in the plan at the time of preparing the data for the list must include all data fields being used in the plan at the time of sampling.
- e.g If you add a new field the plan hasn’t been seen before then the prepared data won’t have it too, until the plan is saved and CDF updates the prepared data for the list.
- Its okay to remove data fields when sampling, without having to save.
Sampling is used in isolation from the other queries on the plan, so the result may differ from what is fetched by the system if there is an overlap with another query.
Data buttons refers to the two buttons found in the ‘Data’ column:

The Left button refreshes the numbers for the list.
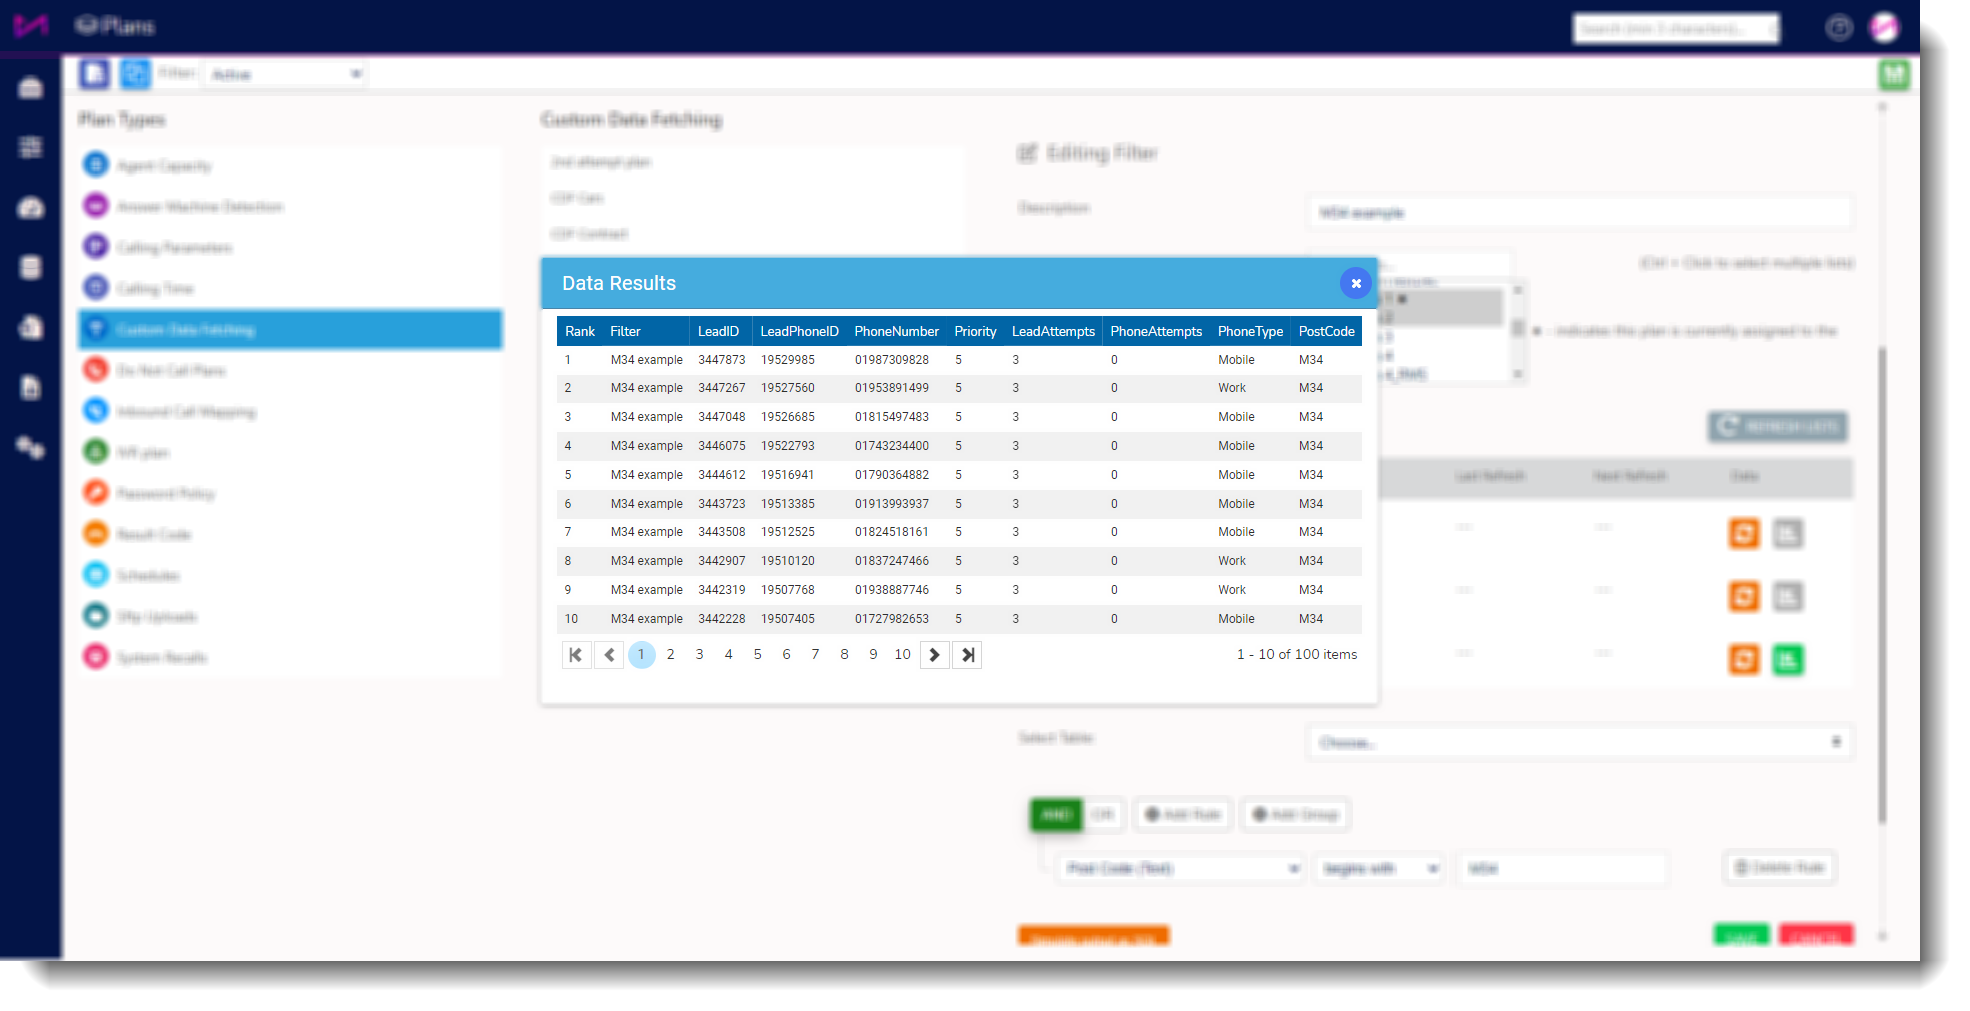
The right button shows a sample of the data in a dialogue box.
The left button is grey when there is no data to show and turns green when there is something to show.

Example of the sample data being shown in a dialogue box.
How to get custom data fetching running on a list
Custom Data Fetching is run automatically when the background services detect that a list has been assigned a data filter plan (and the feature is enabled).
Once you have your data filter plan setup, this can be done in two ways;
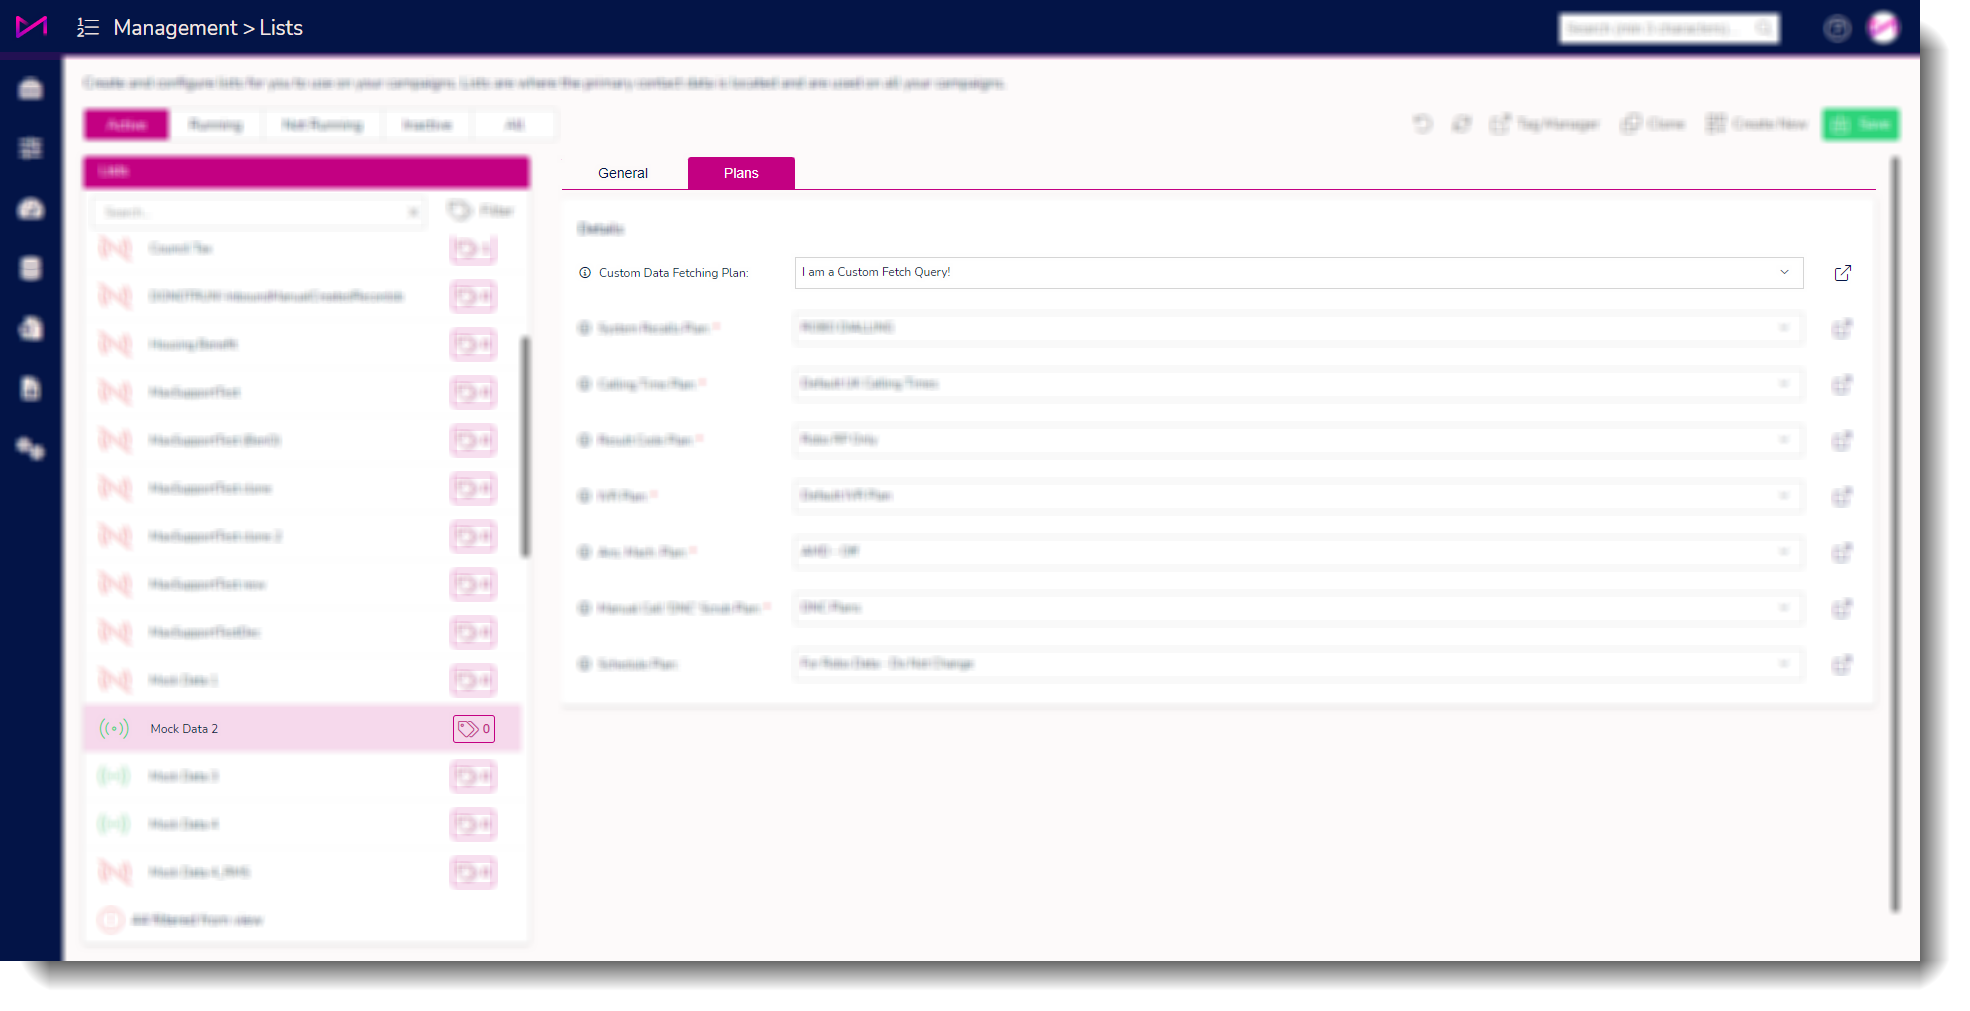
1 - List Admin
- Go to the Lists page.
- Select the List required.
- Open the Plans tab.
- Select the data filter plan name in the drop-down.
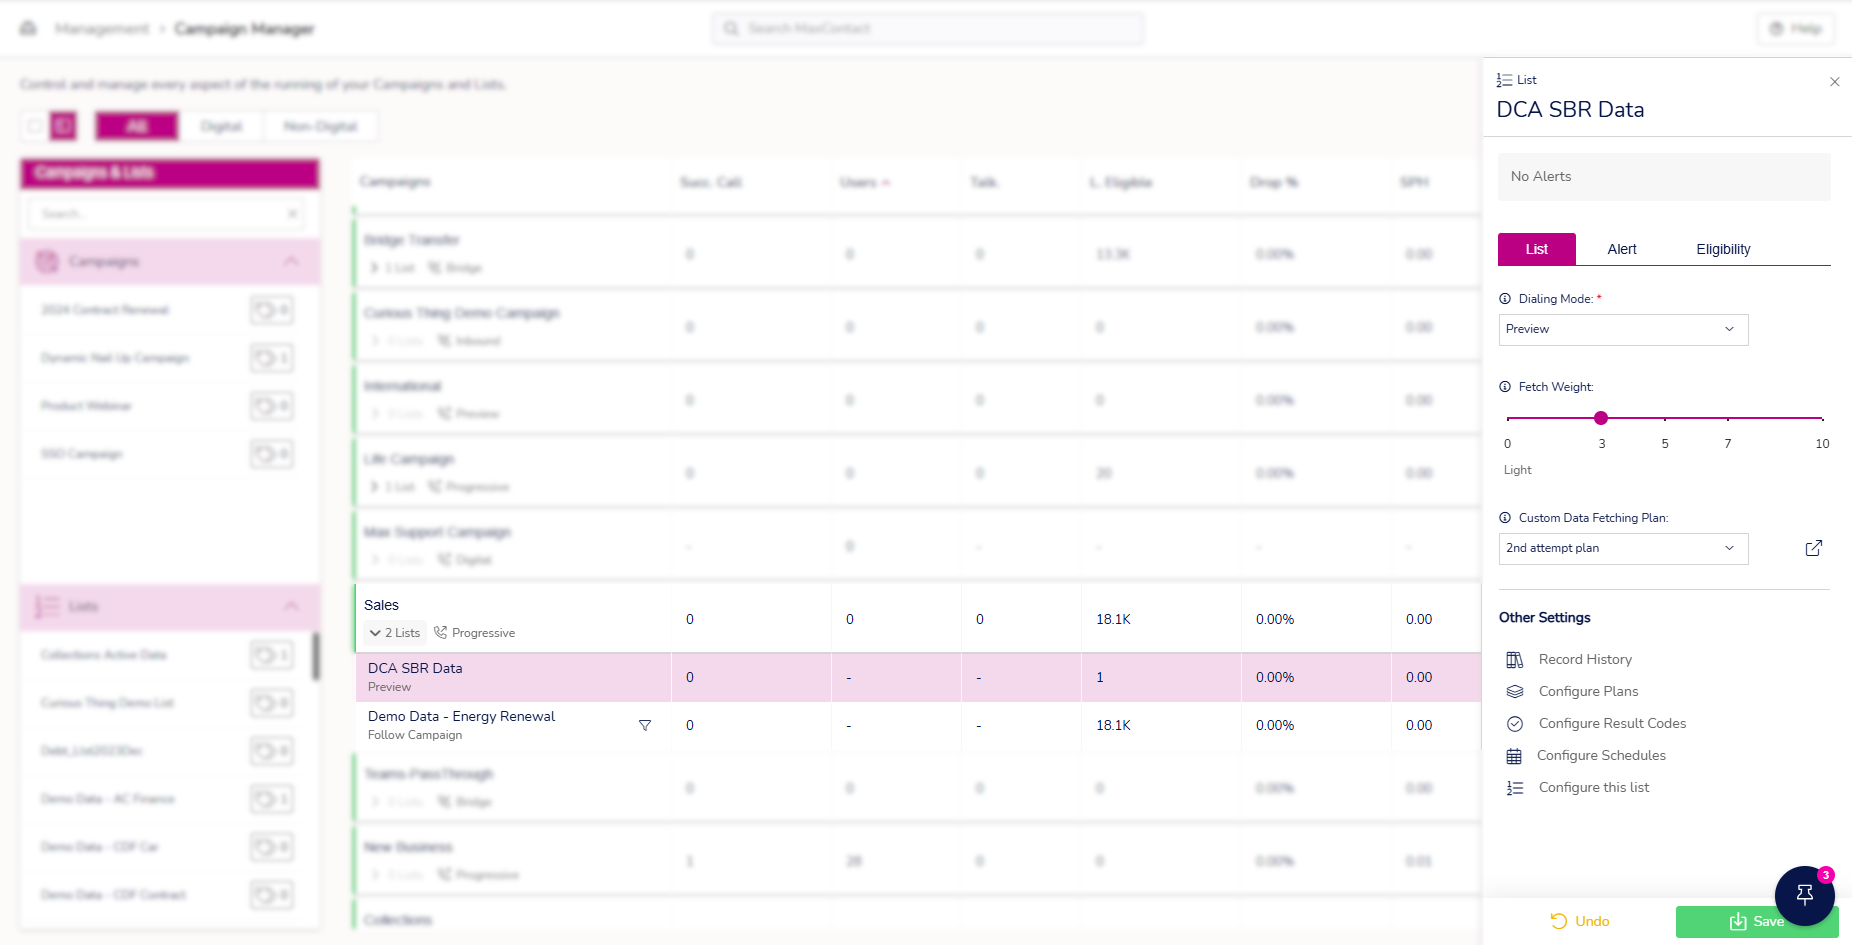
2 - Campaign Management
- Go to the Campaign Management page.
- Select the List required (Click on the name under the drop down from the campaign).
- In the drop down on the right, select the plan and click ‘Save’.
Campaign Management
In the campaign management page you can see the current number of filtered-eligible leads for each campaign and per-list.
The Data column now has two numbers, the left one showing the number of eligible and the right one showing the number of leads eligible after filtering. These numbers are visible to everyone regardless of permission.
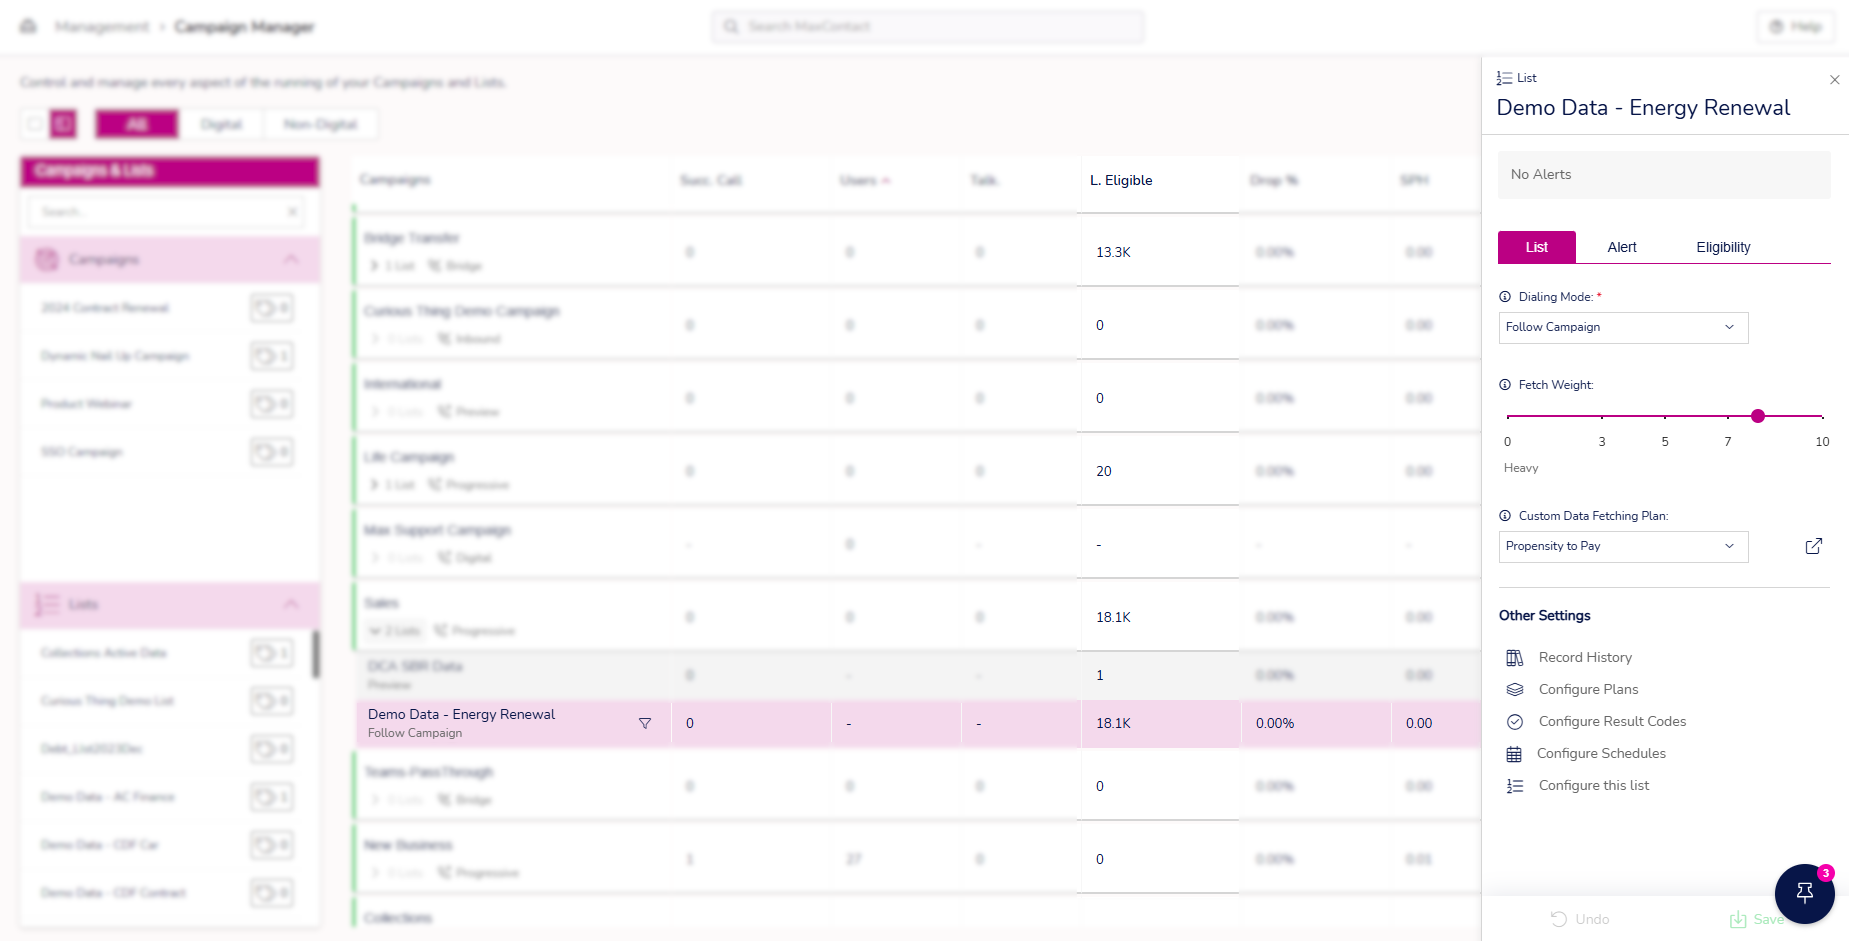
If a list does not have a filter plan assigned to it, then only one number is shown;
When hovering the mouse over the filter icon on the list, you will see a message similar to the below, which contains the query.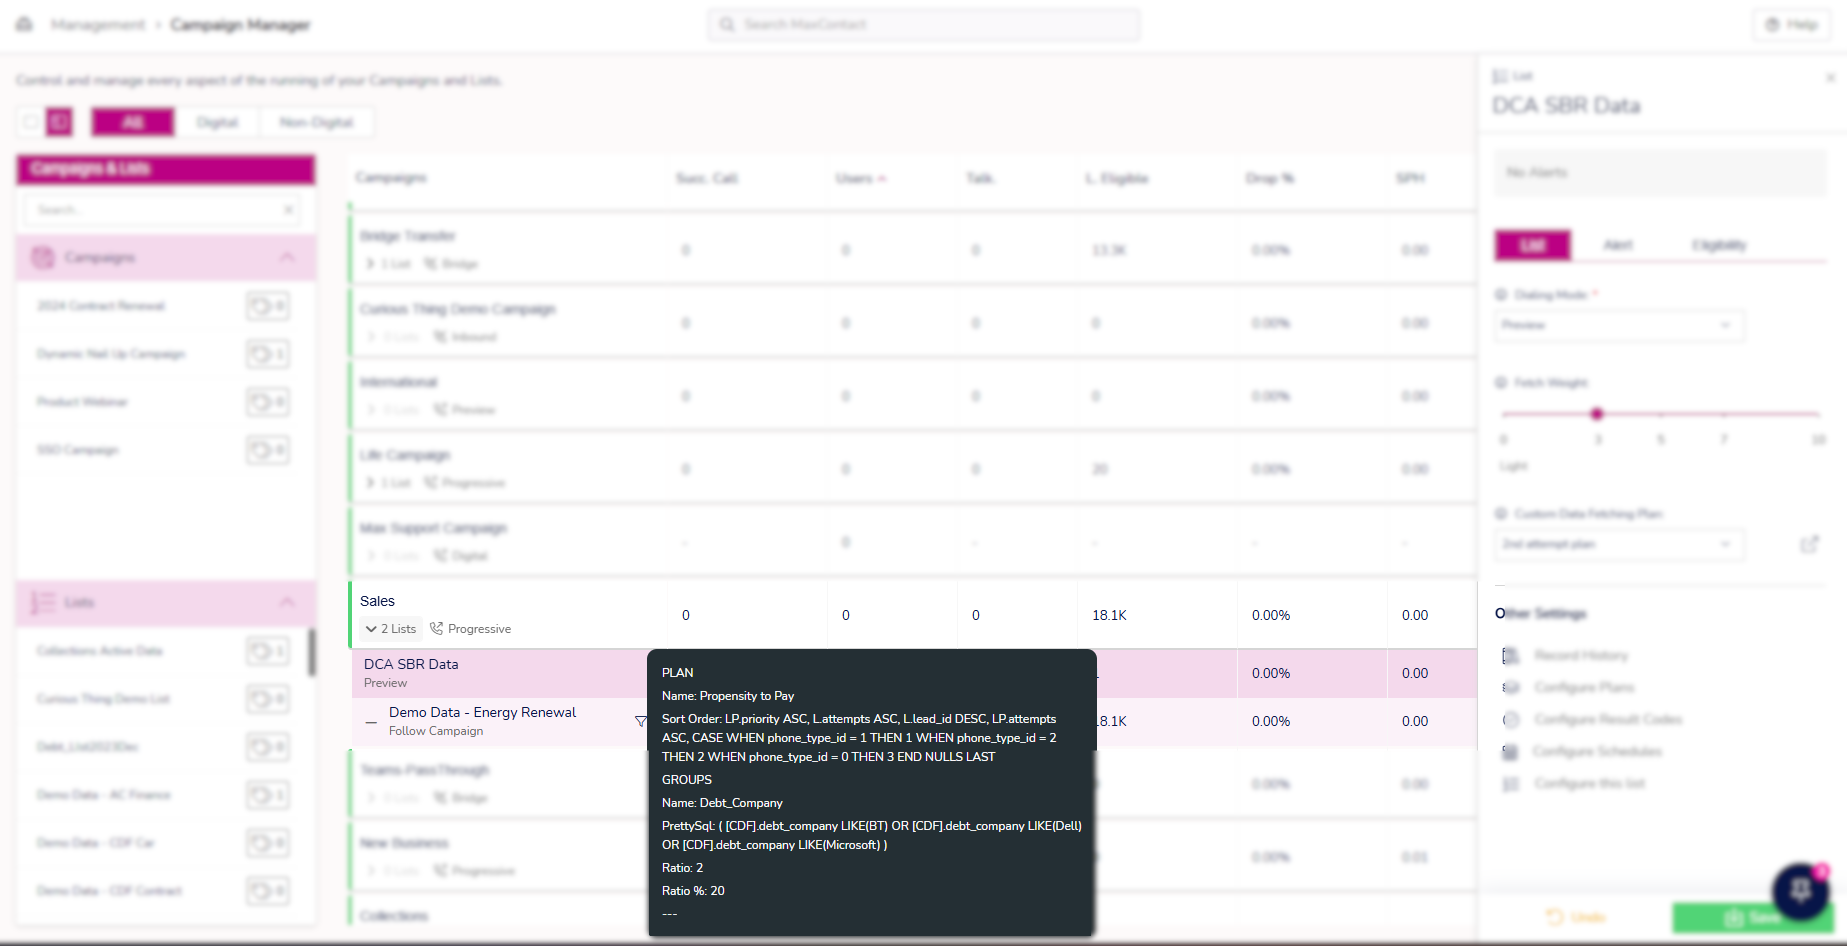
The Data Filter section inside the list settings is visible only to users that have the permission.