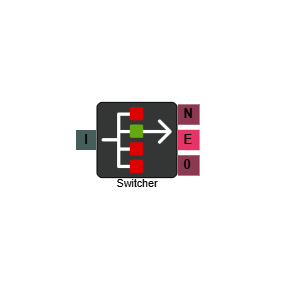
Switcher
The Switcher element allows you to quickly change the route of your IVR flows. For certain calendar events or other specific circumstances, you can change how your inbound routes handle traffic by switching between IVR paths. Only one path can be active at a time on each Switcher element.
There are two ways to change the active path — manually within the IVR editor, or automatically using a System Control element. See Automation below for details on the automated approach.
Connections
| Connection | Description |
|---|---|
| N - No Match | The path taken when no match is encountered. |
| E - Error | The path taken if the element encounters an error. |
| I – Input | The entry point for this element. Connect from the preceding element in your IVR flow. |
| 0, 1, 2… – Values | One output is created for each value you configure. The call routes down whichever path is currently set as active. |
Settings
| Field | Description |
|---|---|
| Name | Give the element a clear name so it is easy to identify within your IVR flow. If you are using multiple Switcher elements, clear naming is especially important when configuring System Control elements. |
| Description | Optional. Add a note to explain the element's purpose — useful in more complex flows. |
| Agent Can See This | When enabled, agents can transfer a live caller directly to this element via the IVR Transfer option. |
| Supervisor Can See This | When enabled, the element is visible in the IVR Transfer list for users with a Supervisor role. It remains hidden from all other users. |
| Result Code | Assign a result code to this element to track calls that pass through it. |
| Values | Click Add to create path options for the element. You can create up to 10 values (0–9), each of which becomes a separate output path. When setting up the element, select one value straight away by clicking the tick next to it — the tick turns green to indicate the active path. This is the path calls will follow until the active value is changed. |
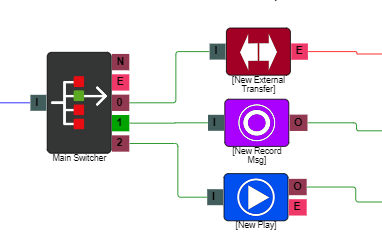
Example
In the example above, the Switcher element has three paths connected: an External Transfer element, a Record Message element, and a Play element. Path 1 is currently active (indicated by the green tick), so inbound calls route to the Record Message element. To change the active path, open the Switcher element properties and select a different value.
Automation
You can automate path switching using a System Control element. This allows you to call into your system and input the path number you want the Switcher to change to — useful when an urgent or out-of-hours change is needed and you cannot access the IVR editor directly.
To set this up, add a System Control element to your IVR flow and configure the following properties:
| Field | Description |
|---|---|
| Name | Give the element a clear name so it is easy to identify within your IVR flow. |
| Description | Optional. Add a note to explain the element's purpose. |
| Agent Can See This | When enabled, agents can transfer a live caller directly to this element via the IVR Transfer option. |
| Supervisor Can See This | When enabled, the element is visible in the IVR Transfer list for users with a Supervisor role. It remains hidden from all other users. |
| Result Code | Assign a result code to this element to track calls that pass through it. |
| Control Action | Select Switcher Update as the action. |
| Switcher Element | Select the Switcher element you want this System Control to update. If you have multiple Switcher elements on your system, make sure each one is clearly named so the correct one is easy to identify here. |
| Switcher Routes | Select the numbered path on the Switcher element that this System Control will activate when triggered. |
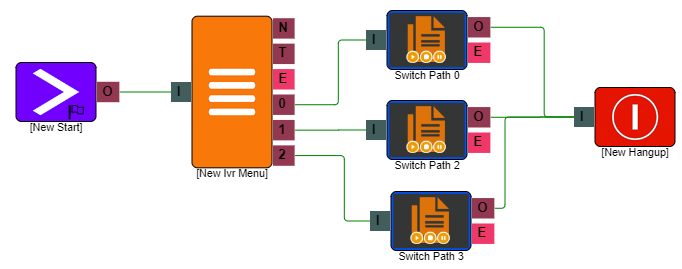
If you have multiple Switcher values to manage, you can use an IVR Menu element to present options when calling in (such as in the example above), with each menu option connected to a separate System Control element configured to activate a different path.