Overview
Live Agent Assist is a desktop application that runs alongside Contact Hub on the agent's machine. It captures agent and customer audio separately during a call, enabling real-time transcription and AI-generated call summaries.
This article covers what Live Agent Assist does, how it works, and how to install and configure it.
 Example of a Live Transcript in the Live Agent Assist app Example of a Live Transcript in the Live Agent Assist app | 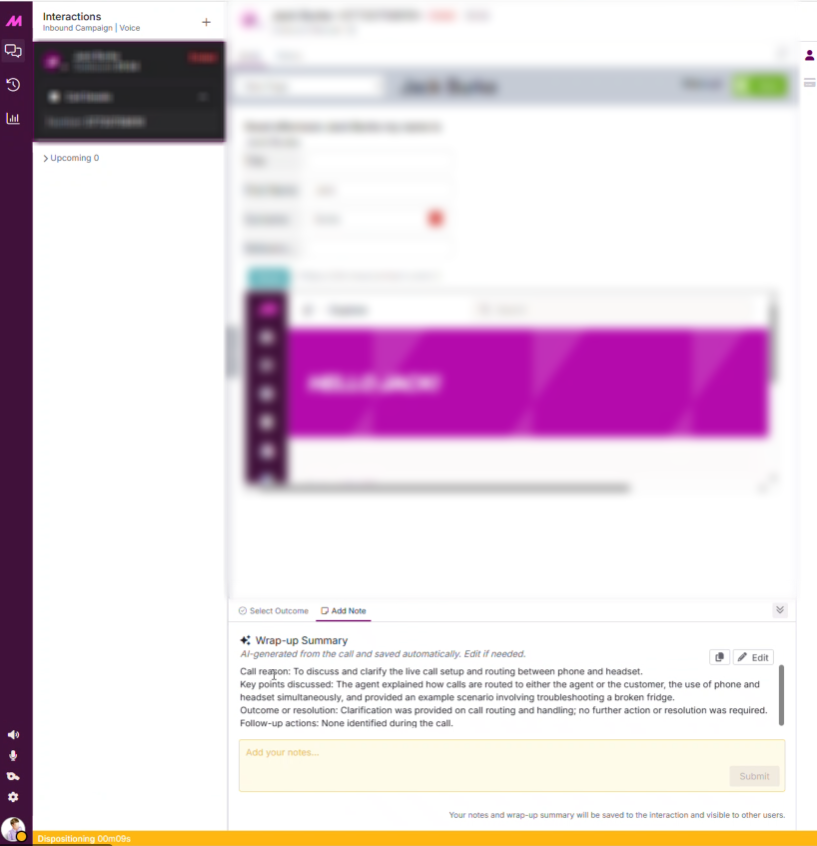 Example of an AI-generated post-call note |
How It Works
MaxContact records calls in mono audio — a single channel that merges both speakers into one waveform. This makes it difficult to attribute speech accurately to either agent or customer.
Live Agent Assist solves this by listening to two audio streams at once:
- Input Device — captures what the agent says.
- Output Device — captures what the agent hears.
This gives the system clean speaker separation, which powers accurate transcription and analysis.
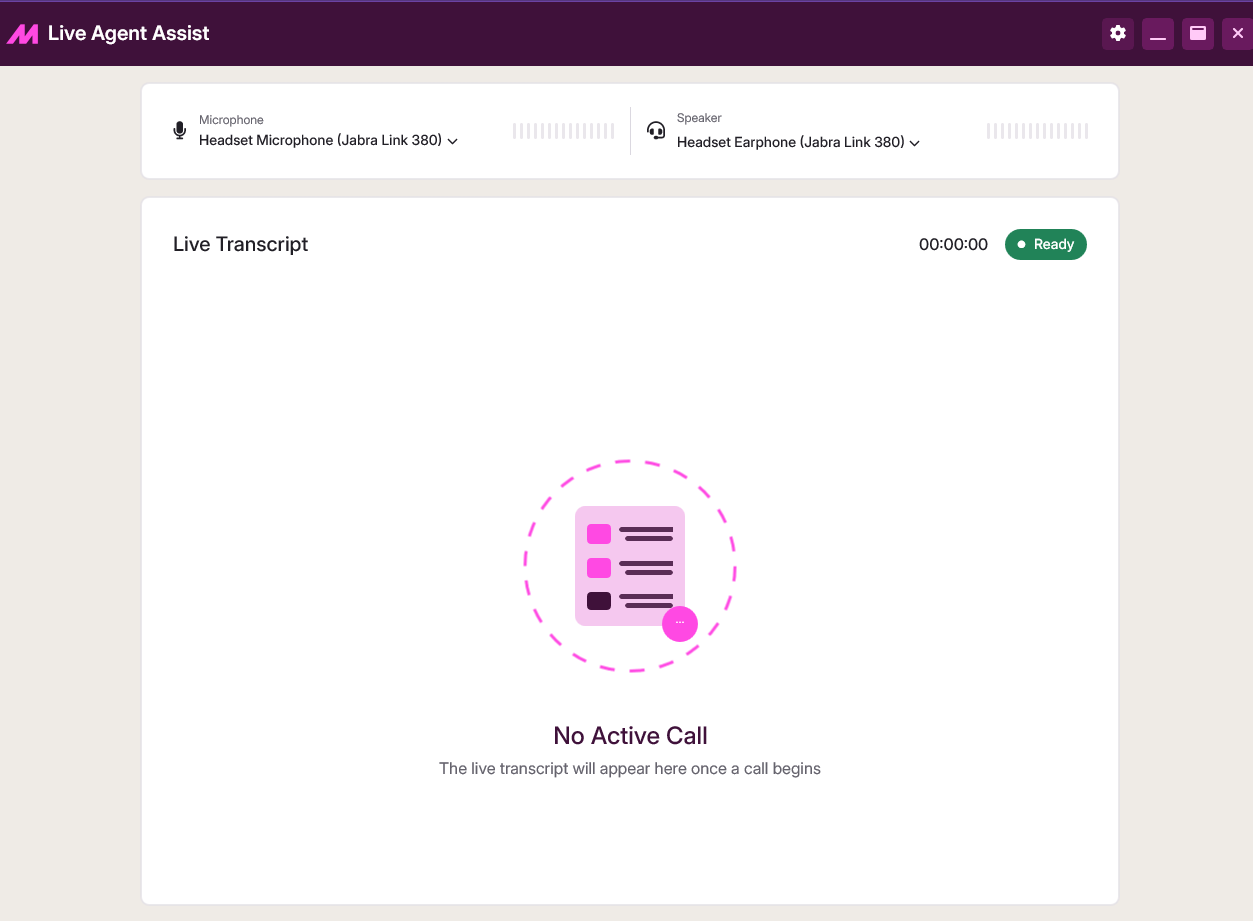
What Agents See During a Call
Once signed in and active, Live Agent Assist runs automatically when a call goes live. Agents will see:
- Live Transcript — updates in real time as the conversation progresses.
- Recording Status Indicator — shows Recording Paused if the call recording is paused, and returns to Live when it resumes.
After a Call
Shortly after the call ends, an interaction record appears in Conversation Analytics and an AI-generated wrap-up summary is displayed to the agent in Contact Hub.
The summary is based on the prompt configured in Conversation Analytics. A default prompt is applied unless a custom one has been set.
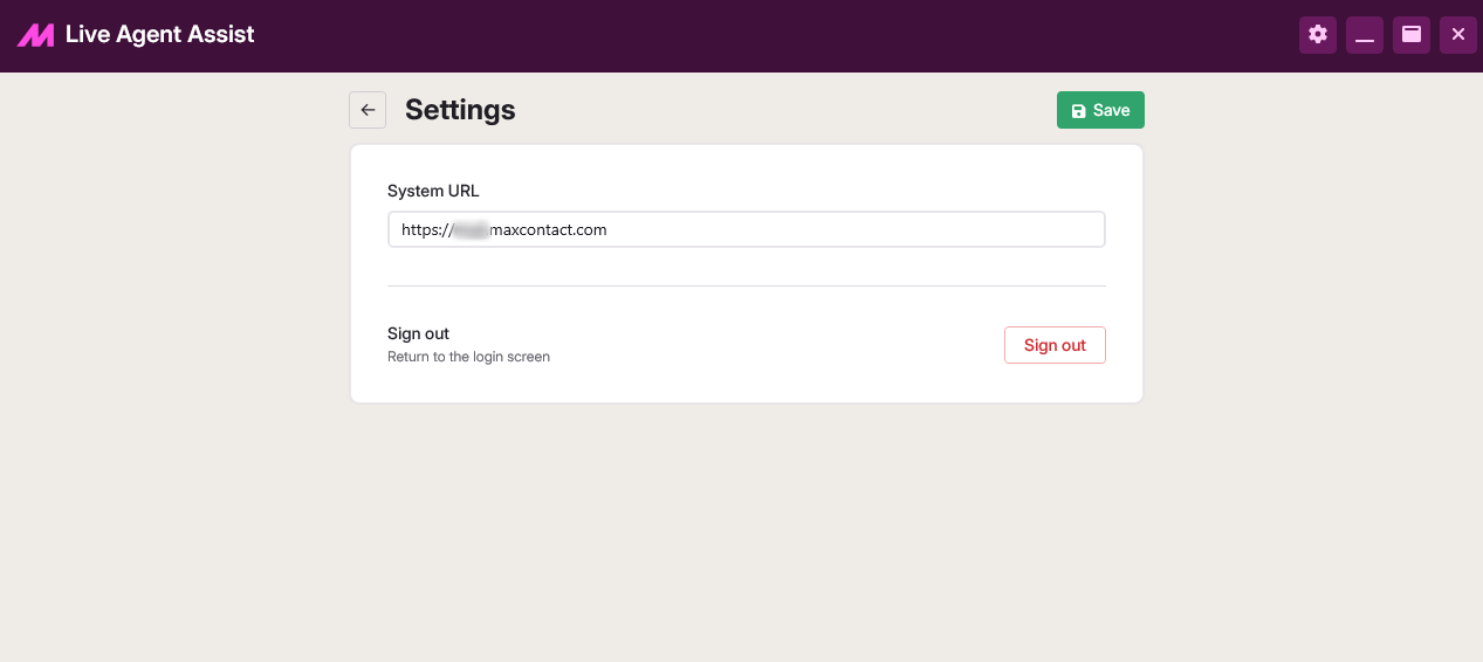
Signing In and Device Setup
Live Agent Assist loads the standard MaxContact login page within the app. It supports MFA and SSO, as authentication is handled through the built-in browser.
On first use, select the settings icon in the top-right corner and enter your System URL. This is the address of the MaxContact platform you log into, in the format https://DOMAIN.maxcontact.com
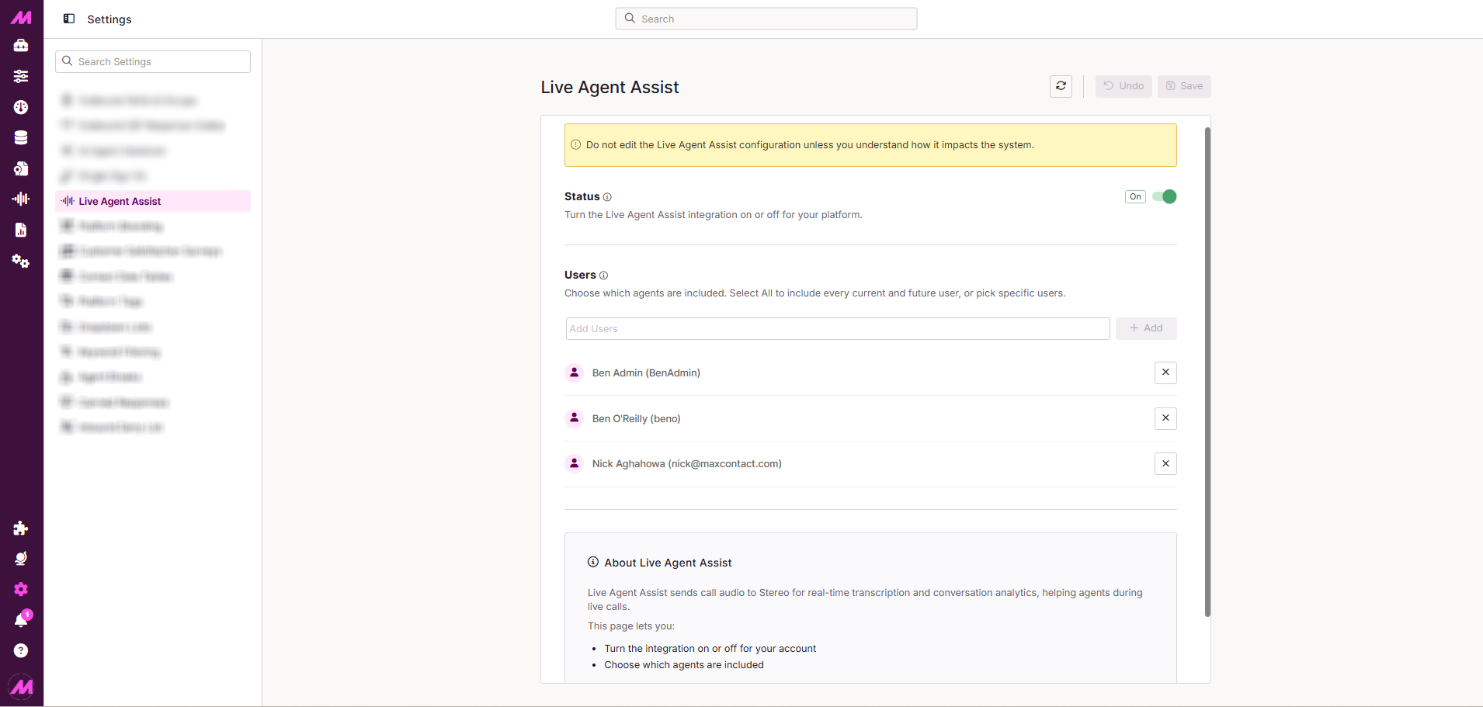
Enabling Live Agent Assist Per User
Before agents can use Live Agent Assist, it must be enabled for their account. This is done from the Live Agent Assist tab within the Centralised Settings page in the MaxContact platform.
Contact the MaxContact Support team if you require assistance.
Ad-hoc installation
If you need to install Live Agent Assist on a single machine without a centralised deployment tool, run the installer directly on the machine and proceed through the steps in the installation wizard.
To access the Installer follow this link.
Installation
Live Agent Assist is installed on agent machines via a code-signed MSI installer, deployed through your organisation's IT team using a mobile device management (MDM) tool such as Microsoft Intune.
Licence and machine requirements
Intune licensing is included in many Microsoft 365 and Office 365 SKUs. Check your organisation's licence before proceeding. Full details are available in Microsoft's licensing documentation.
Stage 1 — Convert the MSI to an Intune package
Before deploying through Intune, the MSI must be converted to an .intunewin package using Microsoft's W32 Content Prep Tool.
Prerequisites:
- Microsoft W32 Content Prep Tool (available from GitHub)
- .NET Framework 4.7.2 or later
- Live Agent Assist Installer
Steps:
- Create a folder at C:\Intune (or a name of your choice).
- Download the W32 Content Prep Tool from GitHub and extract the contents to C:\Intune.
- Download the Live Agent Assist MSI installer. (Available here)
- Right-click the MSI file, select Properties, and under Security click Unblock, then Apply and OK.
- Copy the MSI file into C:\Intune.
- Open a PowerShell window and run the following:
cd 'C:\Intune'.\IntuneWinAppUtil.exe -c 'C:\Intune' -s 'LiveAgentAssist.msi' -o 'C:\Intune'
Replace LiveAgentAssist.msi with the exact filename of the installer you downloaded. - Once complete, a .intunewin file will be created in C:\Intune. This is used in Stage 2.
Stage 2 — Create and assign the app in Intune
Before starting, confirm which users or devices should receive the app and whether installation should be required or optional. The recommended approach is to create a dedicated Azure AD group (for example, MaxContact Live Agent Assist – Install Required) and assign users to it.
- Go to admin.microsoft.com and sign in with an account that has the Intune Service Manager or Global Admin role.
- At the bottom of the screen, select Show all, then under Admin Centers choose Endpoint Manager.
- In the left navigation, select Apps, then under By Platform select Windows.
- Click Add.
- For app type, select Windows app (Win32), then click Select.
- On the Add App screen, click Select app package file, browse to the .intunewin file created in Stage 1, and click OK.
- Review the app information, complete any required fields, then click Next.
- Review the install and uninstall commands. Test these on a workstation before deploying to a wider group. Click Next.
- Complete any system requirements on the following screen, then click Next.
- On the Detection rules screen, click Addand configure as follows:
- Rule type: MSI
- MSI Product Code (should populate automatically)
- Choose whether to check the version or only confirm the product ID is present
- Click OK, then Next
- Add any dependencies if required, then click Next.
- On the Assignments screen, under Required select Add group, search for and select your deployment group, then click Next.
- Review all settings and click Create.