
How to set up a Virtual Queue
A virtual queue lets callers leave their number and hang up rather than waiting on hold. The system holds their place in the queue and calls them back when an agent becomes available. This reduces wait times and gives customers a better experience without tying up the line.
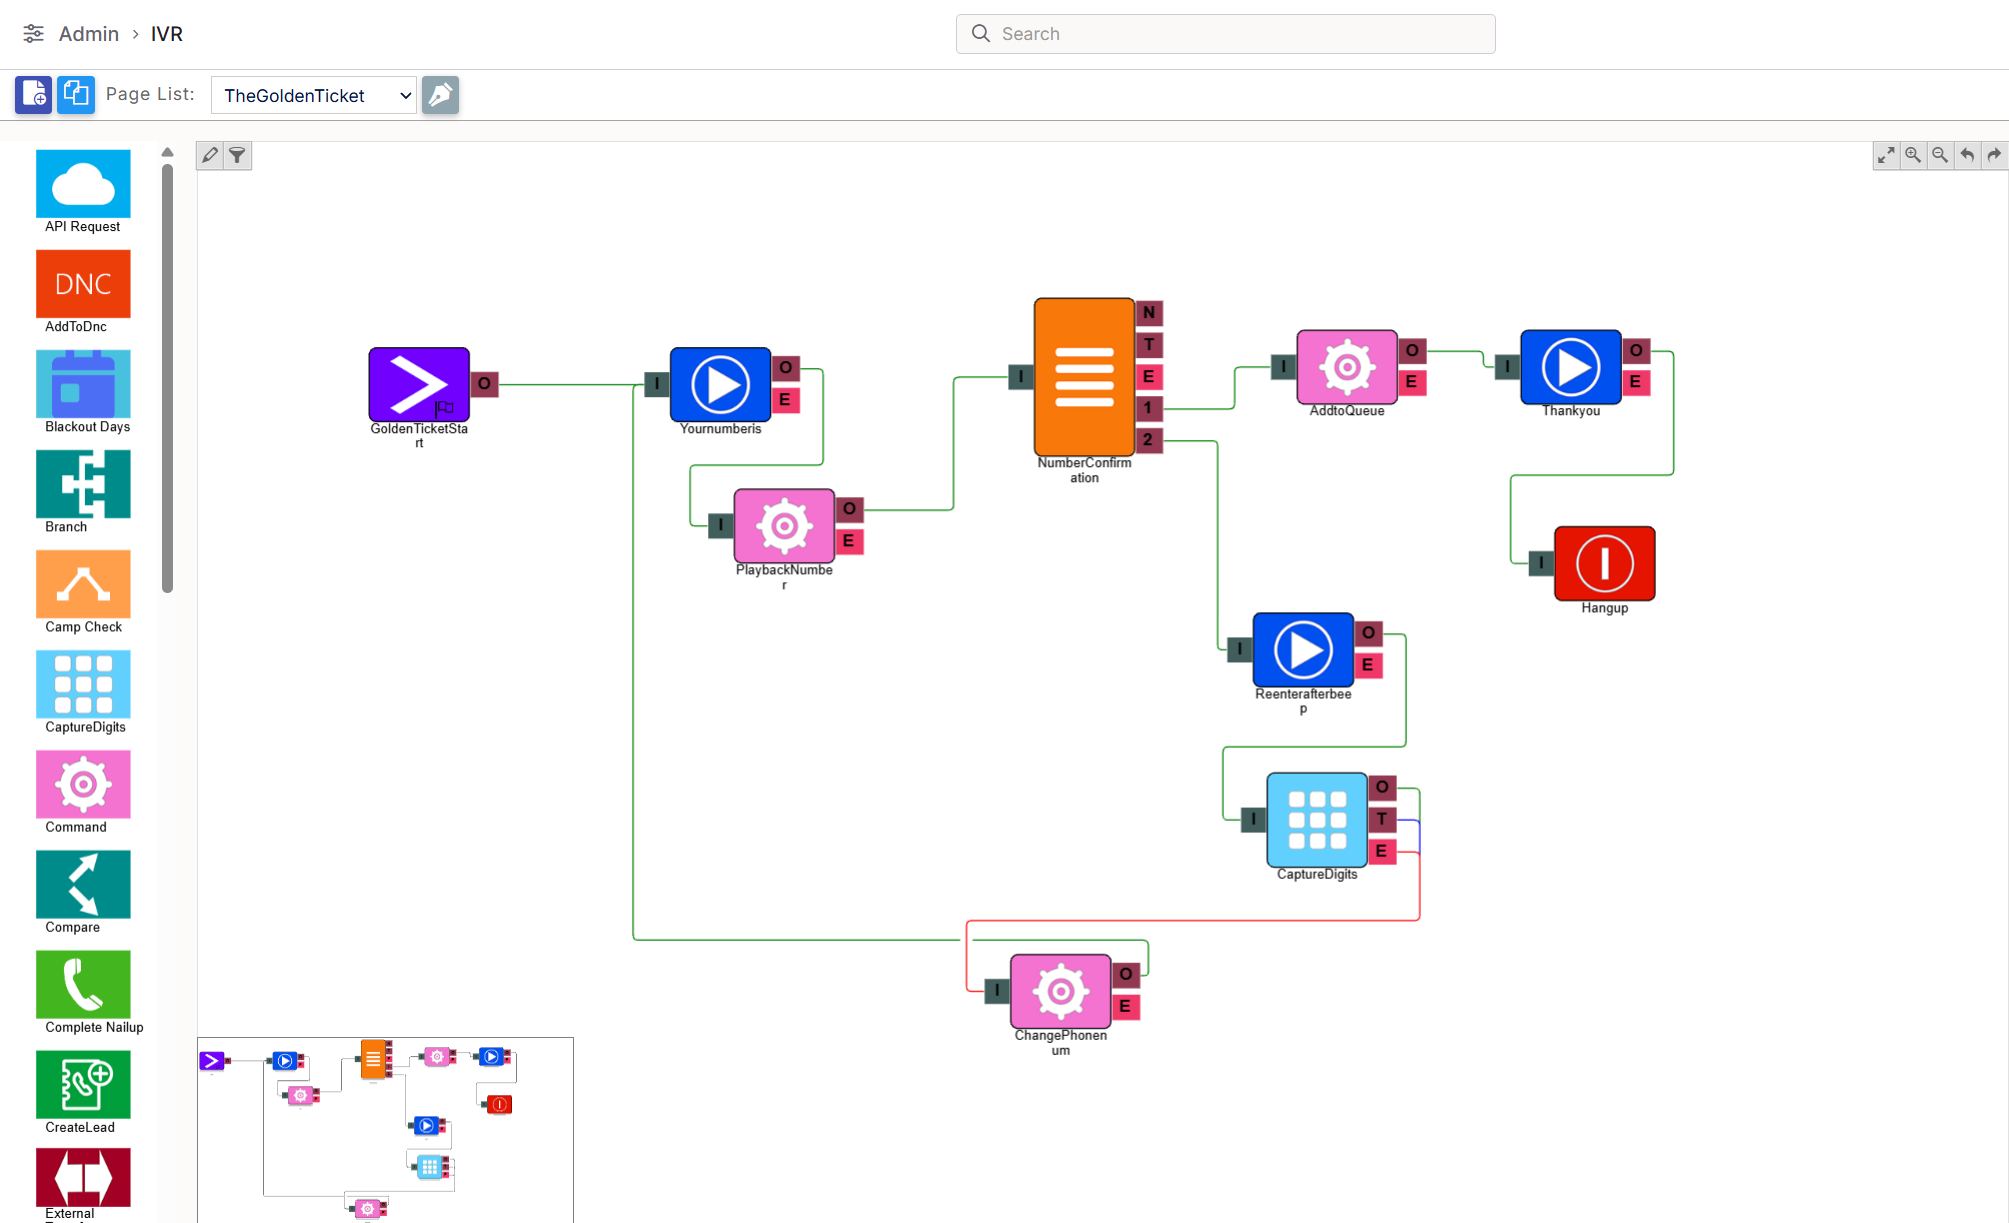
All MaxContact systems include a default virtual queue IVR routine called The Golden Ticket, accessible via Admin > General > IVR. The steps below walk you through connecting it to your inbound route and configuring each stage of the flow.
Overview
A complete virtual queue IVR routine consists of four steps.
- Let callers know the virtual queue option is available.
- Verify the phone number the system has for them.
- Capture and update a new number if required.
- Confirm the caller has been added to the queue and disconnect.
Step 1 — Let callers know the virtual queue option is available
Callers waiting in a queue won't know the virtual queue option exists unless you tell them. Add a message to your inbound route's Queue element phrases to let them know they can press a digit to join the virtual queue instead of waiting.
You may want to include this at the start of the queue message and repeat it at intervals. Example phrases:
- "Thank you for calling. Your call will be answered as soon as possible. If you'd prefer not to wait, press 1 to join our virtual queue. You can hang up and keep your place in the queue — we'll call you back when an agent is available."
- "To keep your place in the queue and receive a call back, press 1 and follow the instructions."
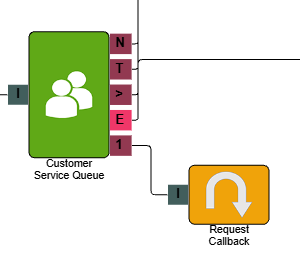
Add a digit to your Queue element
- Select the Queue element on your inbound route.
- In the properties panel on the right, select Add at the bottom. This adds a digit option (default value is 0).
- Change the digit to your preferred number.
Add a Jump element
- Drag a Jump element from the left-hand panel onto the IVR canvas.
- Connect the digit to the Jump element by selecting the digit and dragging it to the input (I) on the Jump element.
- Select the Jump element and configure the properties panel. Set the Jump to route to The Golden Ticket IVR, with the start element set to Golden Ticket Start.
Step 2 — Verify the phone number
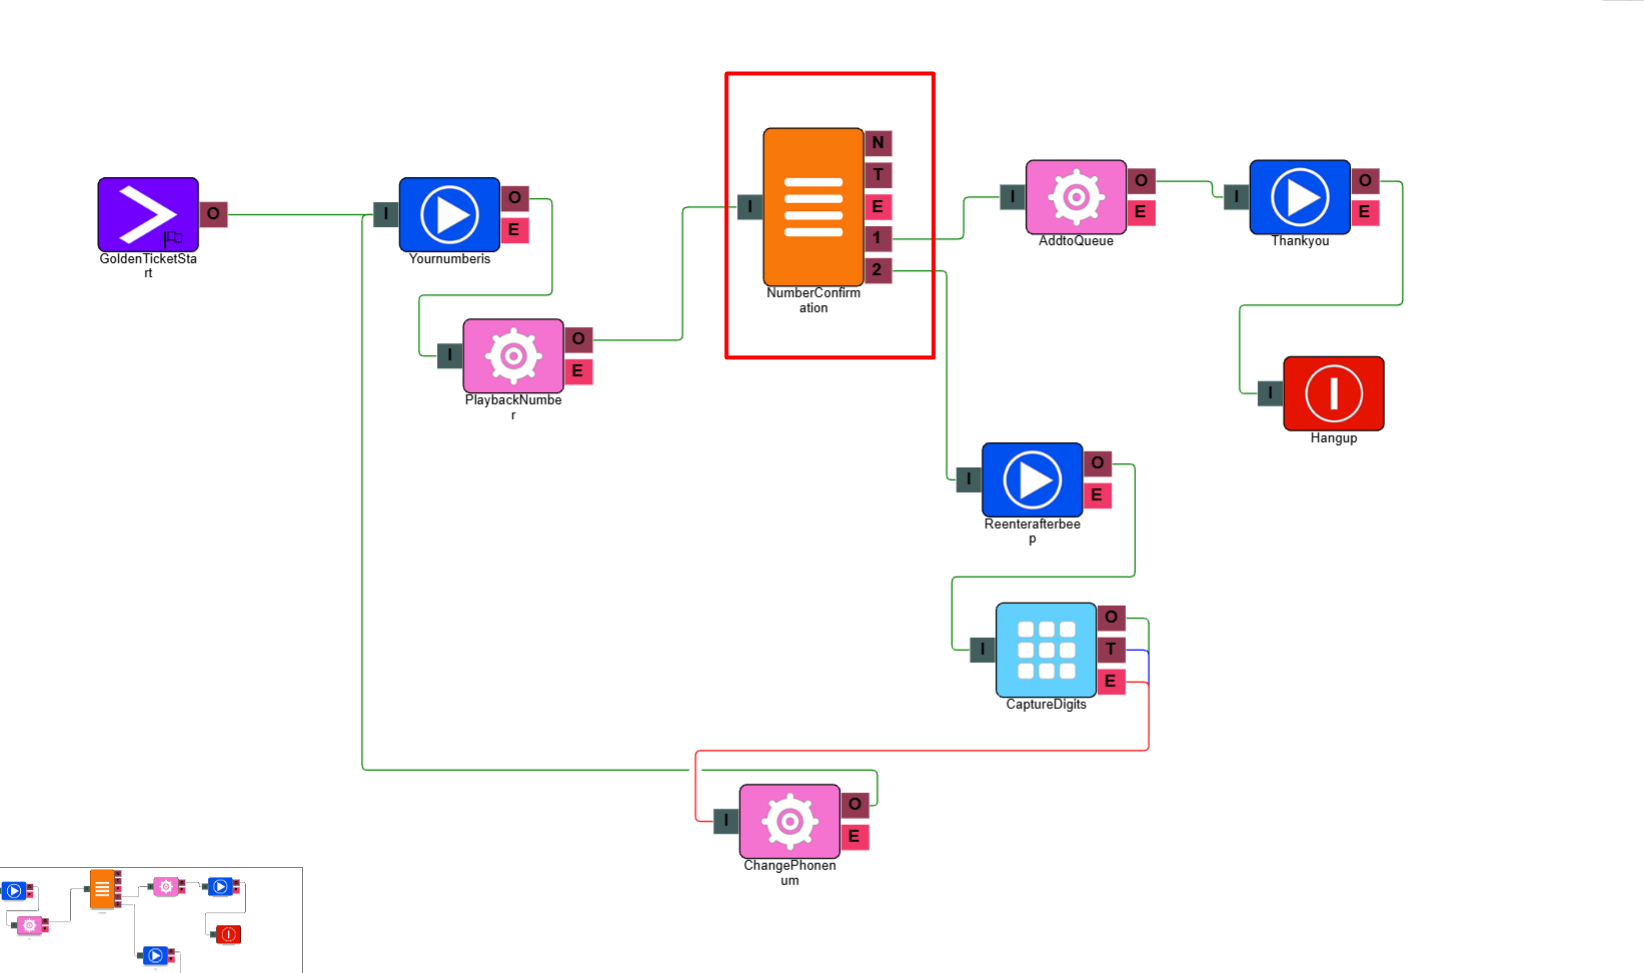
Before adding a caller to the virtual queue, you need to confirm the number the system has for them. The caller may have called from a number they don't want to be called back on, so you should give them the option to confirm or change it.
You can handle this using either a Text to Speech (TTS) element or a Play element combined with a Command element. The Play element approach is the default used by The Golden Ticket.
Option A — Play element setup (default)
This approach uses three elements.
| Element | Configuration |
|---|---|
| Play | Set the phrase to introduce the number, for example: "We have your phone number as…" |
| Command | Set Command to Play Digits. Set Value to call.phonenum. The system will substitute this with the caller's actual number. Do not use Play Number — this reads the number as a full integer rather than individual digits. |
| IVR Menu | Set the phrase to prompt confirmation, for example: "If this is correct, press 1. To use an alternate number, press 2." The digit 2 should link to the routine in Step 3. |
Option B — TTS element setup
This approach uses two elements.
| Element | Configuration |
|---|---|
| TTS | Set the phrase to read out the caller's number and prompt a choice, for example: "The number we have for you is {{call.phonenum:SpellOut}}. To use this number, press 1 after the beep. To enter a new number, press 2." |
| IVR Menu | Set this to play the Beep audio file to signal the caller can make their selection. |
Step 3 — Capture and update a new phone number
If the caller selects the option to enter a different number, three elements are needed to capture it and update the call record. Any failure during this process should return the caller to the IVR Menu from Step 2. A successful capture should route back to the phone number verification step.
| Element | Configuration |
|---|---|
| Play or TTS | Prompt the caller to enter their phone number after the beep. The beep is assigned to the Capture Digits element. |
| Capture Digits | Set Min and Max Digits to the expected length of the phone number. Set a Retries limit, Terminate Digit to #, and an appropriate Timeout value. Set Digits Validation to Phone Number - UK/USA/SA. |
| Command | Set Command to Update Call Property. Set Old Value to PhoneNum. Set New Value to the name of your Capture Digits element followed by .digits — for example, if the element is named VQ Capture Phone, set the value to VQ Capture Phone.digits. |
Step 4 — Confirm and disconnect
Once the caller has been added to the virtual queue, play a confirmation message before disconnecting. Without this, callers may be unsure whether the process worked. Use a Play or TTS element to reassure them that they've kept their place in the queue and will receive a call back when an agent is available.