 | TABLE OF CONTENTS |
IVR Elements
Record Message
There are 2 uses for the 'Record Message' IVR Element;
1. It provides the ability for customers to leave recorded messages which Admin staff can then listen too.
2. Allows internal staff members to record a message and overwrite an existing wav file within the IVR. Specifically this can be used for recording/replacing welcome messages.
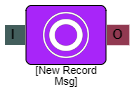
I = Input
O = Output
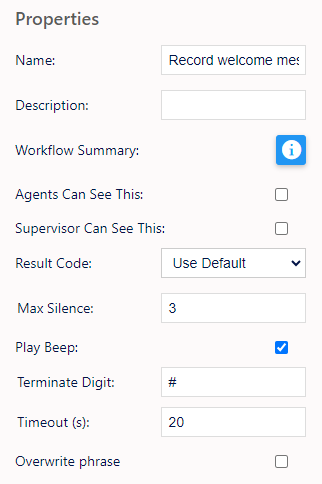
Name, Description - On each IVR element, you can add a name and a description of the element.
Workflow Summary - Allows you to see which elements are connected next.
Agent Can See This - This means that if the inbound call comes through to an agent, they can select this to transfer the caller to this IVR element.
Supervisor Can See This - Anyone with the role type set as 'supervisor' within their main role, will be able to see the option but no-one else.
Result Code - You can assign a result code to the IVR element - useful when searching for voicemails from customers in recordings playback and record history.
Max Silence - You can set the time the element will wait before moving on if the customer doesn't record anything.
Play Beep - Checking this will play a beep to signify the start of recording.
Terminate Digit - You can set the digit for the customer to press to end the recording.
Timeout (s) - You can set the time the element will wait if the customer hasn't pressed the terminate digit.
Overwrite Phrase - This checkbox gives you the ability to record a phrase over an existing message in an IVR. When you select this option, you are given the following information.
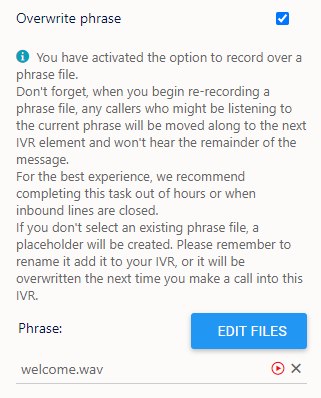
You can then choose a 'phrase'/recording you are going to record over.
Example Scenario 1 - Customer Message
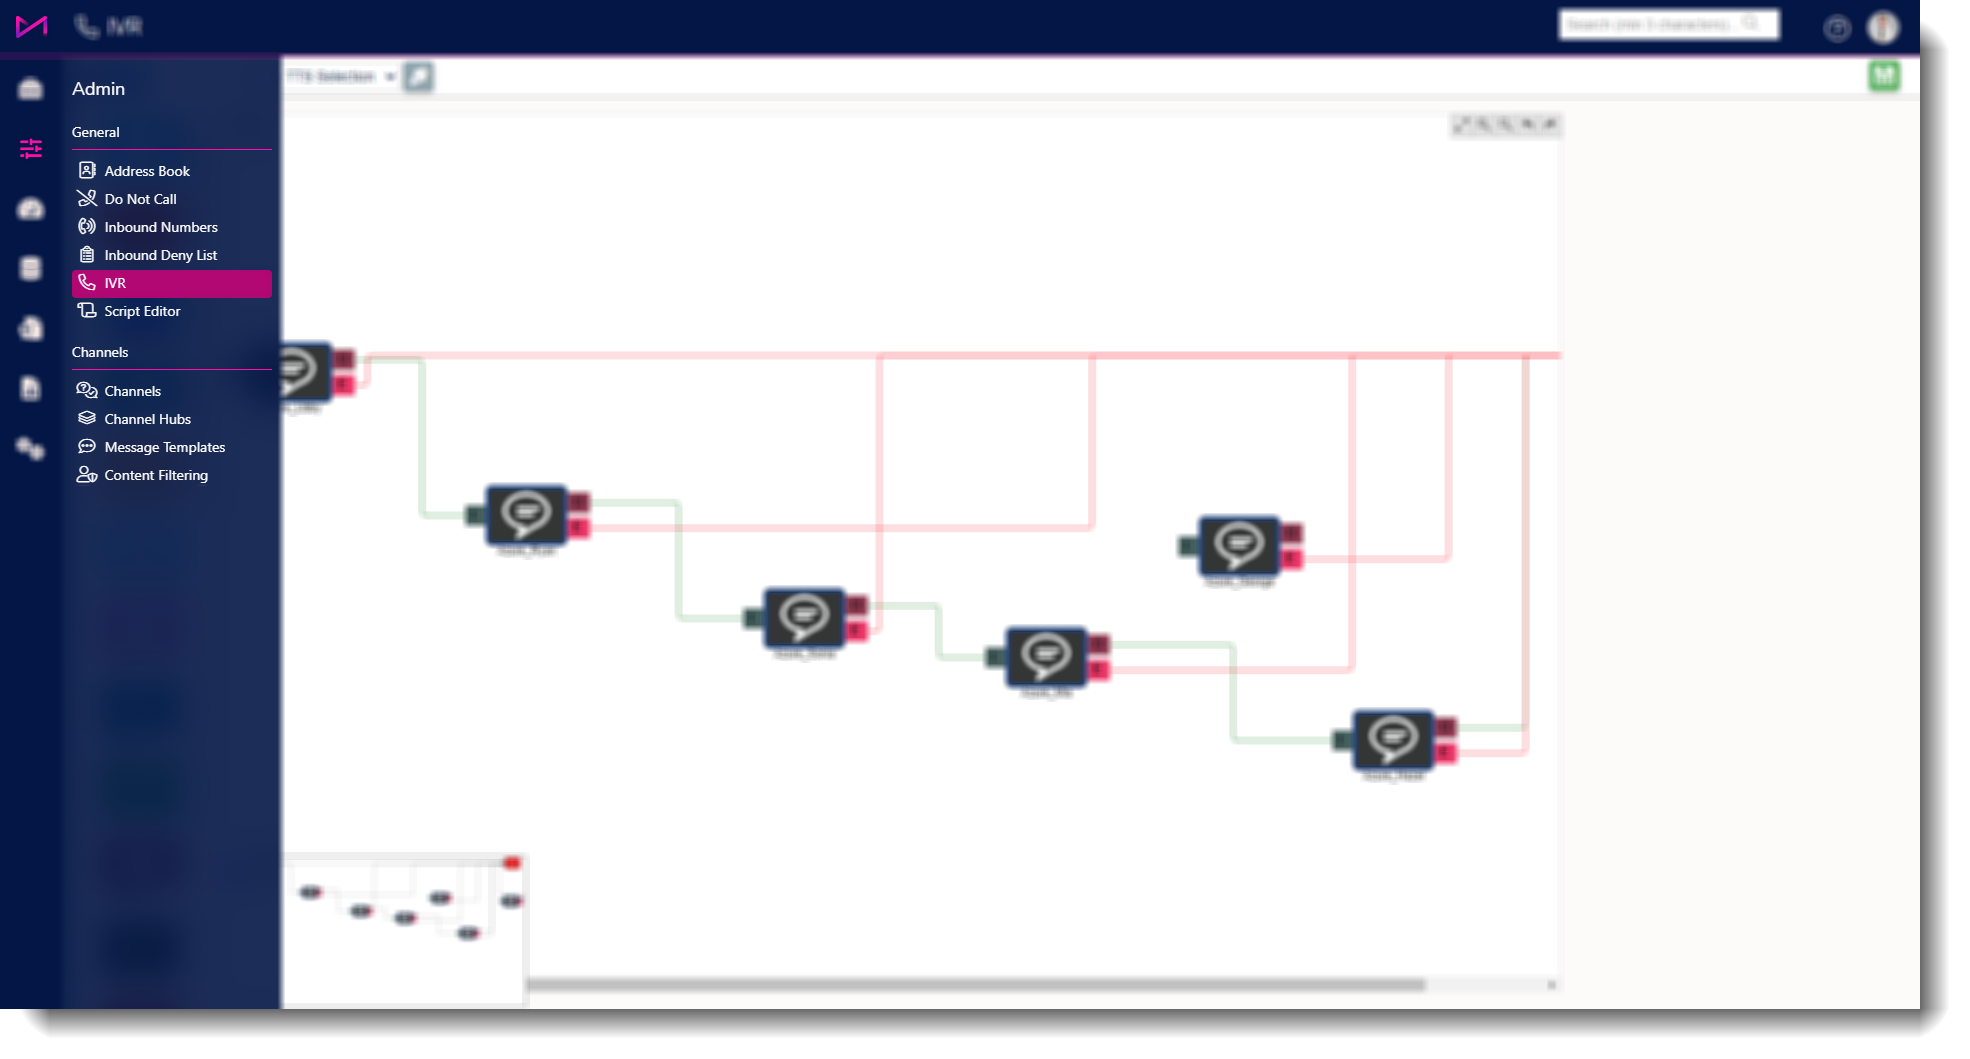
In the example below, we are using the record message element to allow the customer to leave a message if they call outside of our opening hours.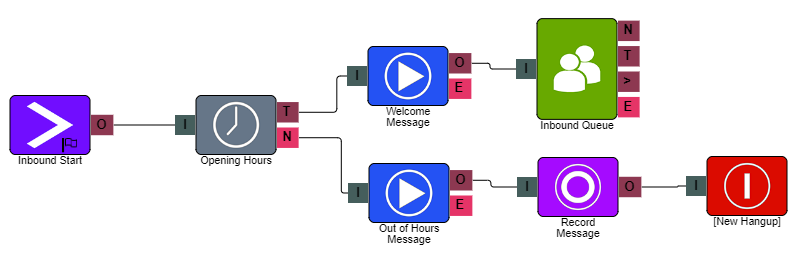
Example Scenario 2 - Updating Existing Phrases.
In the below example, we have an internal ivr that will allow me to record a message and update existing phrases on the fly.

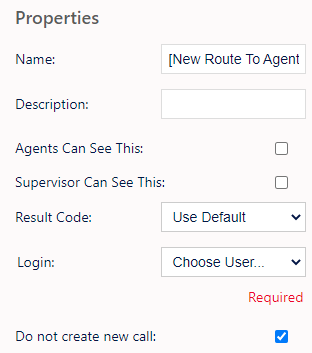
Route to Agent
Allows a direct route to certain users via the IVR.

I = Input
N = Output
E = Error
Name, Description - On each IVR element, you can add a name and a description of the element.
Agent Can See This - This means that if the inbound call comes through to an agent, they can select this to transfer the caller to this IVR element.
Supervisor Can See This - Anyone with the role type set as 'supervisor' within their main role, will be able to see the option but no-one else.
Result Code - You can assign a result code to the IVR element.
Login - Here, you can choose a specific Agent to put the customer through to.
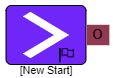
Start
The 'Start' element will be present on every IVR route created. It is key to ensure each 'Start' element has a clear name to ensure you can distinguish between each one when configuring any inbound routing.
O = Output
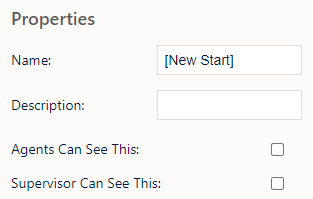
Name, Description - On each IVR element, you can add a name and a description of the element.
Agent Can See This - This means that if the inbound call comes through to an agent, they can select this to transfer the caller to this IVR element.
Supervisor Can See This - Anyone with the role type set as 'supervisor' within their main role, will be able to see the option but no-one else.
Time
The 'Time' element allows you to input your inbound opening hours for the system to check against when receiving an inbound call.
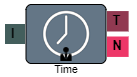
I = Input
T = True
N = No Match

Name, Description - On each IVR element, you can add a name and a description of the element.
Agent Can See This - This means that if the inbound call comes through to an agent, they can select this to transfer the caller to this IVR element.
Supervisor Can See This - Anyone with the role type set as 'supervisor' within their main role, will be able to see the option but no-one else.
Result Code - You can assign a result code to the IVR element.
Time Block - Adding a time block allows you to set the times for the message options.
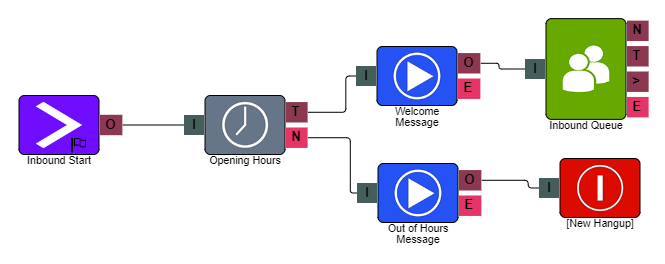
Example.
In the example below, when a customer calls in within the set opening hours, they will go through to a welcome message and then the queue element. If the customer calls outside the set hours, they will go through to the 'Out of hours' message.
Compare
Allows a check for figures/information entered through the IVR e.g. payment amounts.
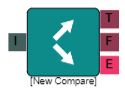
I = Input
T = True
F = False
E = Error
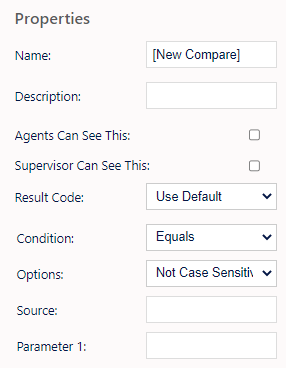
Name, Description - On each IVR element, you can add a name and a description of the element.
Agent Can See This - This means that if the inbound call comes through to an agent, they can select this to transfer the caller to this IVR element.
Supervisor Can See This - Anyone with the role type set as 'supervisor' within their main role, will be able to see the option but no-one else.
Result Code - You can assign a result code to the IVR element.
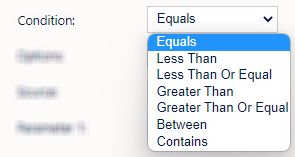
Condition - You can select the condition that will affect the true or false outcome of the element.
The options available are;
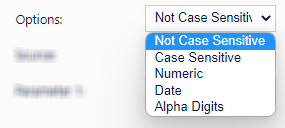
Options - You can set the option to use on the 'Compare' element.
Available options;
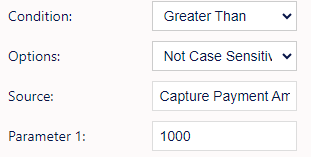
Source - Here, you set which IVR Element the Compare element is making the calculation, e.g. A capture digits element where a customer enters a figure to pay the company. This determines the 'left side' argument to be evaluated.
Parameter - This box is affected by the selection made in the 'Condition' drop down. All options apart from 'Between' have 1 Parameter, selecting 'Between' gives 2 parameter boxes to complete. Parameter 1 determines the 'right side' argument to be evaluated.
Example.
In the Basic example below, we have the customer enter a payment amount within the 'Capture Digits' element, and then using the 'Compare' element, we can route to either 'Inbound Queue 1' or 'Inbound Queue 2' based on if the payment amount entered is greater than 1000 or not.
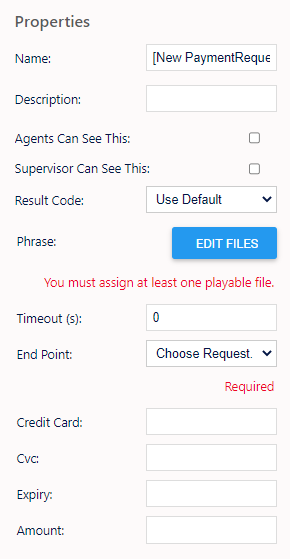
Payment API Request
Part of the payment engine. Allows connection to a payment engine to complete an IVR transaction.
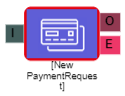
I = Input
O = Output
E = Error
Name, Description - On each IVR element, you can add a name and a description of the element.
Workflow Summary - Clicking the ![]() icon will display a dialog box detailing what the next elements actions are.
icon will display a dialog box detailing what the next elements actions are.
Agent Can See This - This means that if the inbound call comes through to an agent, they can select this to transfer the caller to this IVR element.
Supervisor Can See This - Anyone with the role type set as 'supervisor' within their main role, will be able to see the option but no-one else.
Result Code - You can assign a result code to the IVR element.
Phrase - You can select a phrase/music to be played whilst the request is being processed. Sometimes the transaction will be so quick it wont have time to play.
Timeout - Allows you to set a period of time, in seconds, for timing out the elements action if it cant be completed. Timing out is considered an error and will follow the 'Error IVR' branch.
End Point - Allows you to set the payment service destination they are using for transactions, e.g. Worldpay.
Credit Card - The name of the 'Capture Digits' IVR element for the customers card number should be input here.*
CVC/CCV - The name of the 'CVC/CCV' IVR element for the customers card should be input here.*
Expiry - The name of the 'Expiry Date' IVR element for the customers card should be input here.*
Amount - The name of the 'Currency Amount' IVR element for the customers card should be input here.*
* - Must be entered exactly as written on the individual elements for it to work correctly, including case sensitivity.
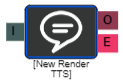
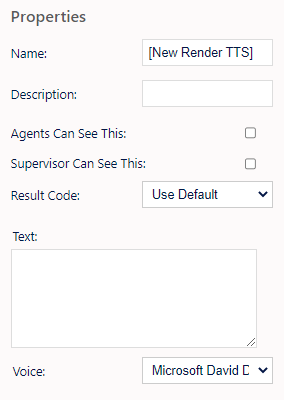
Text To Speech
Allows for personalised speech, typed into the element, to be relayed to the customer via the IVR.
I = Input
O = Output
E = Error
Name, Description - On each IVR element, you can add a name and a description of the element.
Agent Can See This - This means that if the inbound call comes through to an agent, they can select this to transfer the caller to this IVR element.
Supervisor Can See This - Anyone with the role type set as 'supervisor' within their main role, will be able to see the option but no-one else.
Result Code - You can assign a result code to the IVR element.
Text - Here, you can input what they want spoken to the customer.
Voice - You can choose which voice to use by selecting from the drop-down list.
Additional information on the capabilities of TTS can be found HERE, including the ability for it to read dynamic content
Note - It is possible to purchase different voice packages from various 3rd party suppliers which we can add to your system for use with the TTS element.
Example.
In the below example, we are using 'Text-To-Speech' elements to play custom welcome and out of hours messages.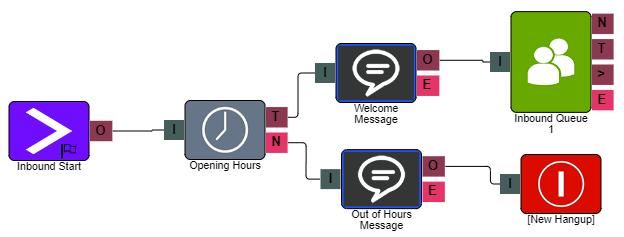
Branch Element
Allows you to route inbound calls based on parameters set in the IVR
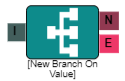
I = Input
N = No Match
E = Error
0,1,2,3 = Values can be added
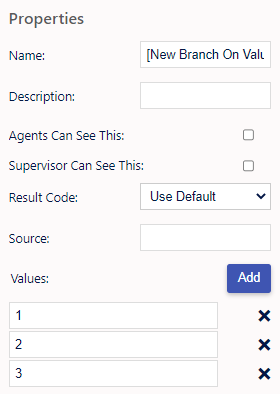
Name, Description - On each IVR element, you can add a name and a description of the element.
Agent Can See This - This means that if the inbound call comes through to an agent, they can select this to transfer the caller to this IVR element.
Supervisor Can See This - Anyone with the role type set as 'supervisor' within their main role, will be able to see the option but no-one else.
Result Code - You can assign a result code to the IVR element.
Source - The name of a field from the lead table, tag or previous IVR element to compare the branch values to, E.g. call.dnis
Values - Upon clicking the 'Add' button, you can assign values to as many route options as required.
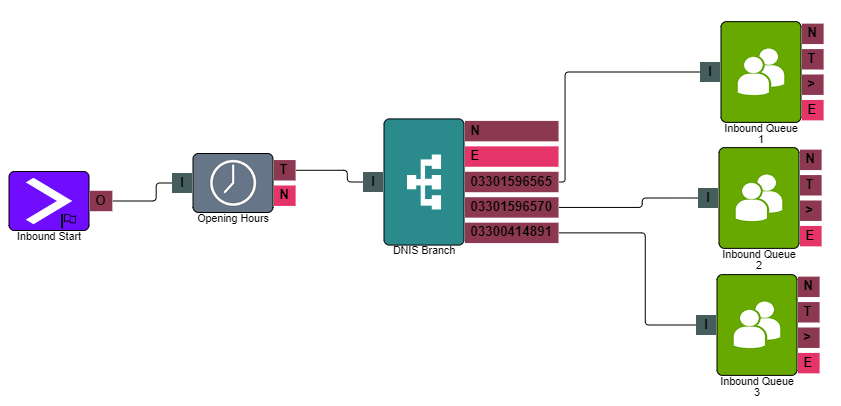
Example.
In the example below, we have the 'Branch' element configured to check against the inbound number the customer has dialed into. We are then routing the call to a different queue based on the inbound number matched.
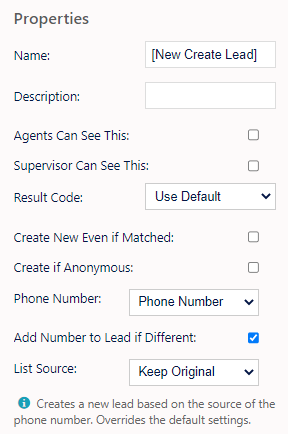
Create Lead
The Create Lead IVR element allows for the immediate creation of a new Lead from an inbound call.
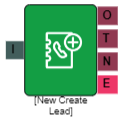
I = Input
O = Output
T = Timeout
N = No Match
E = Error
Name, Description - On each IVR element, you can add a name and a description of the element.
Agent Can See This - This means that if the inbound call comes through to an agent, they can select this to transfer the caller to this IVR element.
Supervisor Can See This - Anyone with the role type set as 'supervisor' within their main role, will be able to see the option but no-one else.
Result Code - You can assign a result code to the IVR element.
Create New Even If Matched - Causes the element to always create a new lead even if matched, unless the call is anonymous.
Create If Anonymous - A lead will be created even if the number is anonymous.
Phone Number - Allows you to set the source of the phone number; either the original phone number the call came in on or another property like DTMF digits entered in an earlier element.

If selecting 'Other Property', you will see the following box where you can enter the name of the element you want to take the number from. The name of the element would need to end with .digits

This would mean you would need to enter capture_number.digits in the 'Property' box.
Add Number To Lead If Different - If the number is different to the Leads existing number(s) checking this will add the new number to the Lead.
List Source - This option allows you to set what list you wish the call to report against upon lead match. To Note this is not the list the system will look up against, the system will do a global search unless configured with Tagging.
You can select from the following options.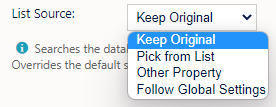
- Keep original - Keep whatever list the call is currently set to.
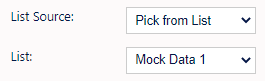
- Pick from list - Use the list set in the drop down.
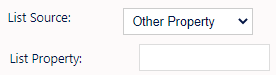
- Other Property - Lets you enter a List ID.
- (If the value is invalid, it will keep the original List value)
Get Stat
The GetStats IVR element is an IVR element which retrieves statistical data and stores that data in the databin (general IVR data storage) for later usage.
I = Input
O = Output
E = Error
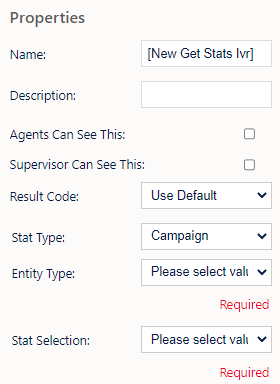
Name, Description - On each IVR element, you can add a name and a description of the element.
Agent Can See This - This means that if the inbound call comes through to an agent, they can select this to transfer the caller to this IVR element.
Supervisor Can See This - Anyone with the role type set as 'supervisor' within their main role, will be able to see the option but no-one else.
Result Code - You can assign a result code to the IVR element.
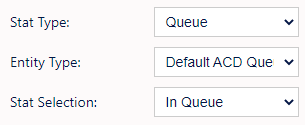
Stat Type - Here you can choose from Campaign, Queue/Skill, List, Team, User.
Entity Type - Allows you to choose one of the relevant choices from the stat type e.g. Choose campaign in Stat Type and you can select the specific campaign in the Entity Type drop-down.
Stat Selection - Allows you to choose the particular stat you want to look at.
Campaign options
- Wait Time
- Average Wait Time
Queue options
- Average Queue Time
- Max Queue Time
- Staffed
- Estimated Queue Time
List options
- Inbound Calls
Team options
- Wait Time
- Average Wait Time
User options
- Wait Time
- Inbound Calls
Example;
An example of an IVR setup with Get Stats Ivr Element is as follows:
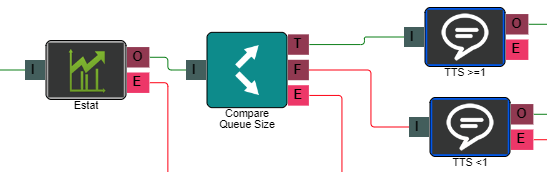
This IVR has the sole functionality of reading back the Get Stats Ivr Element stats via a Text-To-Speech element (the output element looks at the stat also and routes accordingly).
On the Get Stats element properties;
On the Text To Speech element properties;
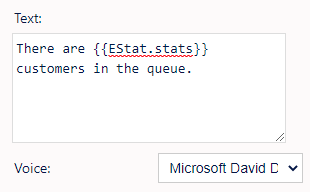
When entering information into a TTS element for playback, you can also use the following options to read back the stat in different formats;
{{Get Stats IVR Element name.stats:
converts milliseconds to seconds
plays "[Seconds Number] seconds"
converts milliseconds to minutes
plays "[Minutes Number] minutes [Seconds Number]"
plays "[Percentage Number] percentage"
plays "[Seconds Number] second"
Lookup Lead
The Lookup Lead IVR element allows the system to look up a lead using other information besides the inbound phone number the caller may have called from.
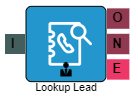
I = Input
O = Output
N = No Match
E = Error
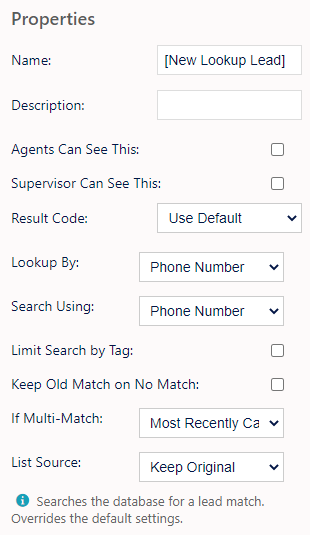
Name, Description - On each IVR element, you can add a name and a description of the element.
Agent Can See This - This means that if the inbound call comes through to an agent, they can select this to transfer the caller to this IVR element.
Supervisor Can See This - Anyone with the role type set as 'supervisor' within their main role, will be able to see the option but no-one else.
Result Code - You can assign a result code to the IVR element.
Lookup By - Phone Number/Reference ID - Determine which field to look the record up by.
Search Using - Phone Number/Other Property (selecting 'Other Property' will present you with the following input box;
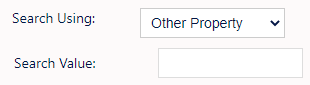
- Search Value - Specify what other property of the call to use for the search value used to lookup the lead. For example; An inbound call where you're asking a customer to enter a reference number. You can set the element name & property here e.g. a set property element.
Keep Old Match On No Match - If ticked and the call already has a lead matched to it either automatically or by another Lookup Lead element, then that match will not be discarded in case a lead lookup using these parameters does not result in a match.
If Multi Match - Will allow you to select from the following options;
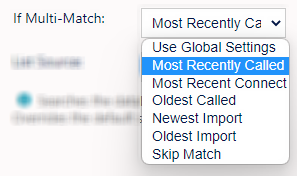
- Use global settings - Follow the rules set in the inbound settings.
- Most recently called - Match to the lead that was most recently called.
- Oldest called - Match to the oldest lead
- Newest import - Match the most recent import
- Oldest import - Match to the oldest imported match
- Skip Match - Agent will decide: Do not pick any leads and let agents or another lead lookup decide.
List Source - Will allow you to select from the following options;
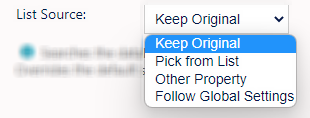
- Keep original - Keep whatever list the call is currently set to.
- Pick from list - Use the list set in the drop down.
- Other property - Use a value that comes from another property of the call.
If other property is selected you will see this box
 Specify what other property (element name) of the call to use to set the calls list value.
- Use global settings - Follows the rules set by the Global Settings which may use the campaigns default list ID or DNIS routing rules.
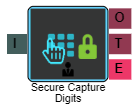
Secure Capture Digits
Secure capture digits is configured in the same way as the capture digits element except with this element we suppress the DTMF tones. This element will mainly be used within payment IVR's where you are capturing client card data.
Properties
I = Input
O = Output
T = Timeout
E = Error

Name, Description - On each IVR element, you can add a name and a description of the element.
Agent Can See This - This means that if the inbound call comes through to an agent, they can select this to transfer the caller to this IVR element.
Supervisor Can See This - Anyone with the role type set as 'supervisor' within their main role, will be able to see the option but no-one else.
Result Code - You can assign a result code to the IVR element.
Clear Digits Buffer - Checking this will clear any previous digits pressed by the customer.
Min Digits (Len) - You can set a minimum digit length here.
Max Digits (Len) - You can set a maximum digit length here.
Retries - You can set a retry limit here.
Terminate Digit - Here, you can set the terminate digit - "When finished, press the # key."
Timeout (s) - You can set the length of time to timeout if there is no response from the customer. After this it will retry.
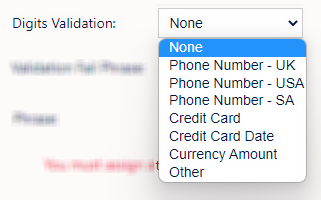
Digits Validation - Here, you can select from a drop down menu of default validation rules. The options being;
Validation Fail Phrase - Here, you can assign an audio file to play if the details the customer gives fails validation.
Phrase - Here, you can assign an audio file to play when the customer gets to this element.
Output
The secure capture digits elements differs to the capture digits element in that the output for it is ‘elementname.secure’ instead of ‘elementname.digits’. As well as this change, the output from this element can only be used by the payment provider element or the web API element, which means that the output can not be used in elements such as the Compare element or Text To Speech element.