
Overview
Channel Hubs let you group multiple webchat channels together and present them to customers as selectable options when they open the webchat widget on your website. This lets you direct customers to the right team or department from the outset — similar to how an IVR routes inbound calls.
To access it, go to Admin > Channels > Channel Hubs.
Example use cases:
- A business offering multiple products or services can present a separate webchat channel for each, allowing the customer to select what they want to discuss before the chat starts.
- A business with multiple departments can let customers choose which team to connect with directly from the webchat widget.
Page controls
The controls across the top of the page let you manage your channel hubs.
| Control | Description |
|---|---|
| View filter | Switches the left-hand list between all hubs, active only, or inactive only. |
| Undo | Reverts unsaved changes. Has no effect on changes that have already been saved. |
| Refresh | Reloads the page to pick up changes made by other users, and refreshes the channel list to reflect any active/inactive status changes. |
| Clone | Creates a copy of the selected channel hub with all the same configuration, so you can make minimal changes rather than building from scratch. |
| Add | Creates a new channel hub. Save before navigating away from the page or your new hub will be lost. |
| Save | Saves all changes and additions to the page. |

Channel hubs list
All channel hubs are listed in the left-hand panel. Select a hub to view and edit its configuration in the right-hand panel. The list can be filtered by active, inactive, or all hubs using the view filter control.
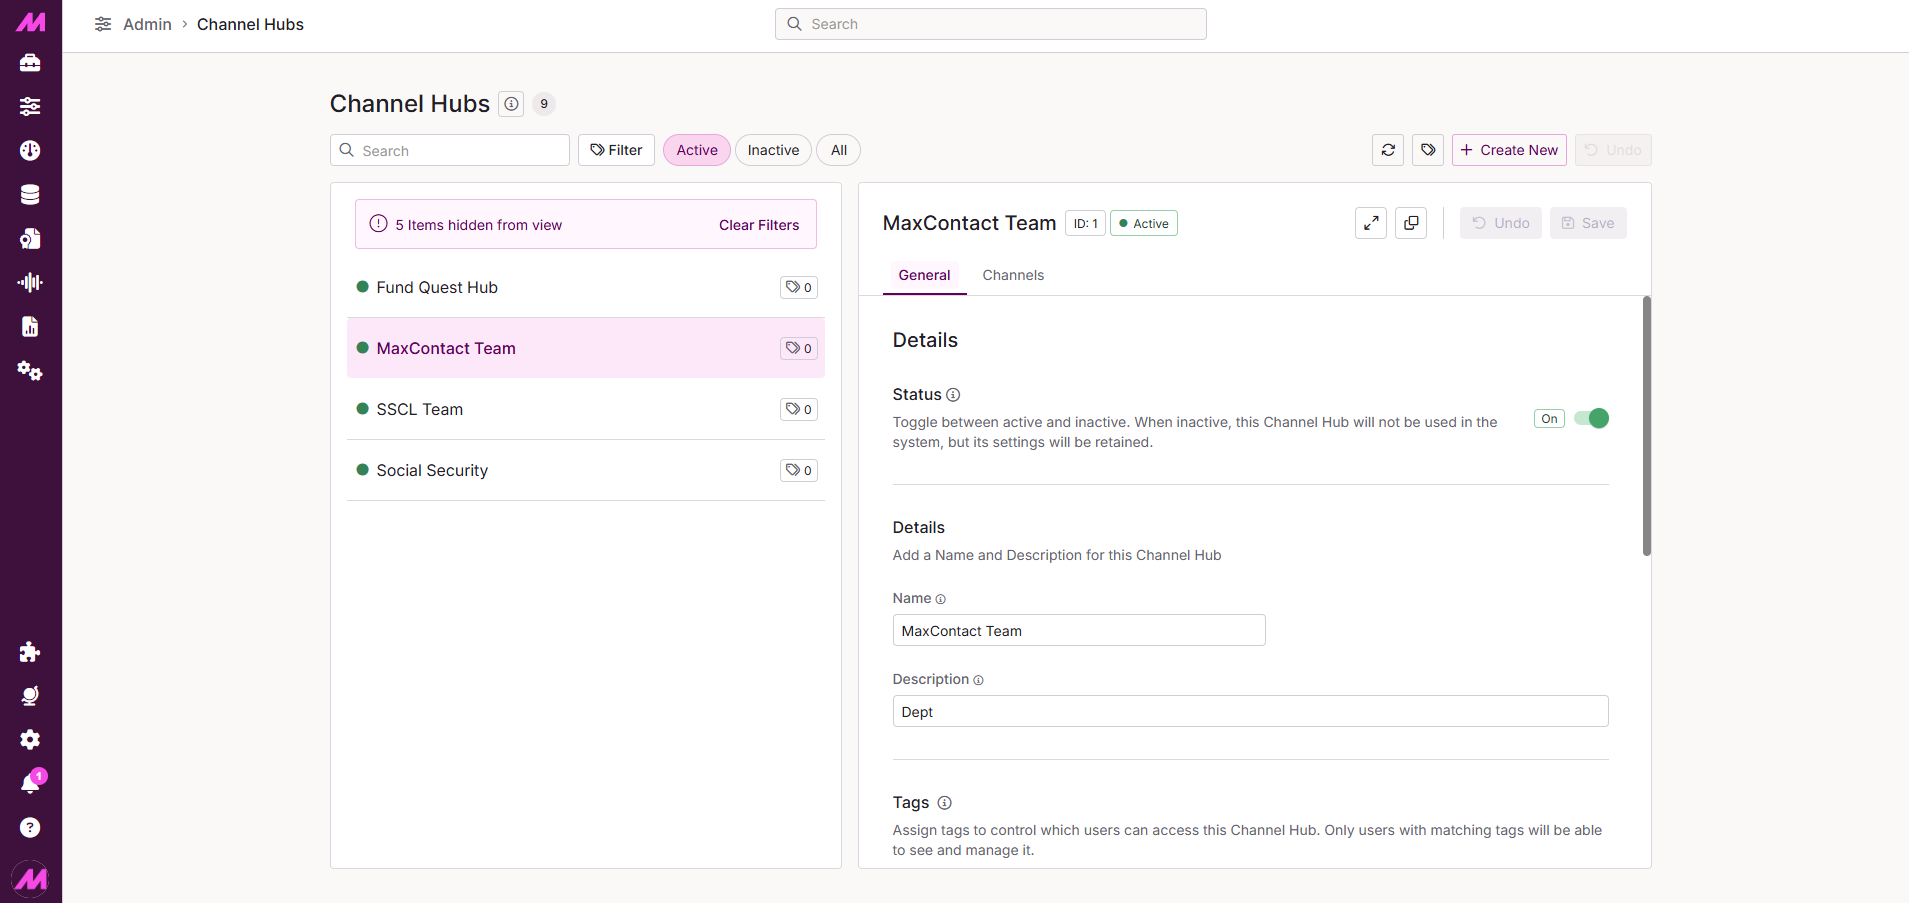
General tab
The general tab contains the core settings for the selected channel hub.
| Field | Description |
|---|---|
| Active | Toggles the hub between active and inactive. |
| Name * | The internal name for the hub. Use something specific so its purpose is clear to all users and in reports. Between 4–100 characters. Required. |
| Description | A longer description of the hub's purpose. Useful as the number of hubs grows. Maximum 100 characters. |
| Greeting Messages * | A short introductory message displayed to customers when they open the webchat widget, appearing just above the hub headline. Maximum 24 characters. Required. |
| Headline Message * | The main prompt displayed to customers when they open the webchat widget — typically asking them what they need help with. Maximum 55 characters. Required. |
| Hub Key | A unique key for this channel hub, used to embed it into your website. The hub key replaces individual channel keys — you do not need to use the separate key for each channel within the hub. This lets you place different combinations of hubs and channels in different areas of your website. |
* Required field
Tags
Tags can be added or removed from a channel hub in the tags section. For more on tagging, see the Tagging guide.
Channels tab
The channels card is where you select which webchat channels are included in this hub. A minimum of 1 channel is required; a maximum of 25 can be added. Use the Add Channel button at the bottom of the section to add more channels.
Because your channel names are typically internal-facing, each channel in a hub can be given a display name — this is the label customers see when choosing from the hub options in the webchat widget. Display names must be between 4–100 characters.
Channels can be reordered by dragging the handle at the start of each row.
| Field / Control | Description |
|---|---|
| Display Name* | The name displayed to customers in the webchat widget for this channel. Between 4–100 characters. Required. |
| Channel* | Select a channel from the dropdown. All active channels on the system are shown, including those already assigned to other hubs — there is no limit to how many hubs a channel can belong to. Required. |
| Status | Icons indicate whether the channel is active, inactive, or suspended. Use the go-to button to change its status via the Channels page. |
| Remove | Removes the channel from this hub. The channel itself is not affected. |
Go-to-button | Opens the Channels page in a new tab so you can check or update the channel's configuration before adding it to the hub. |
* Required field
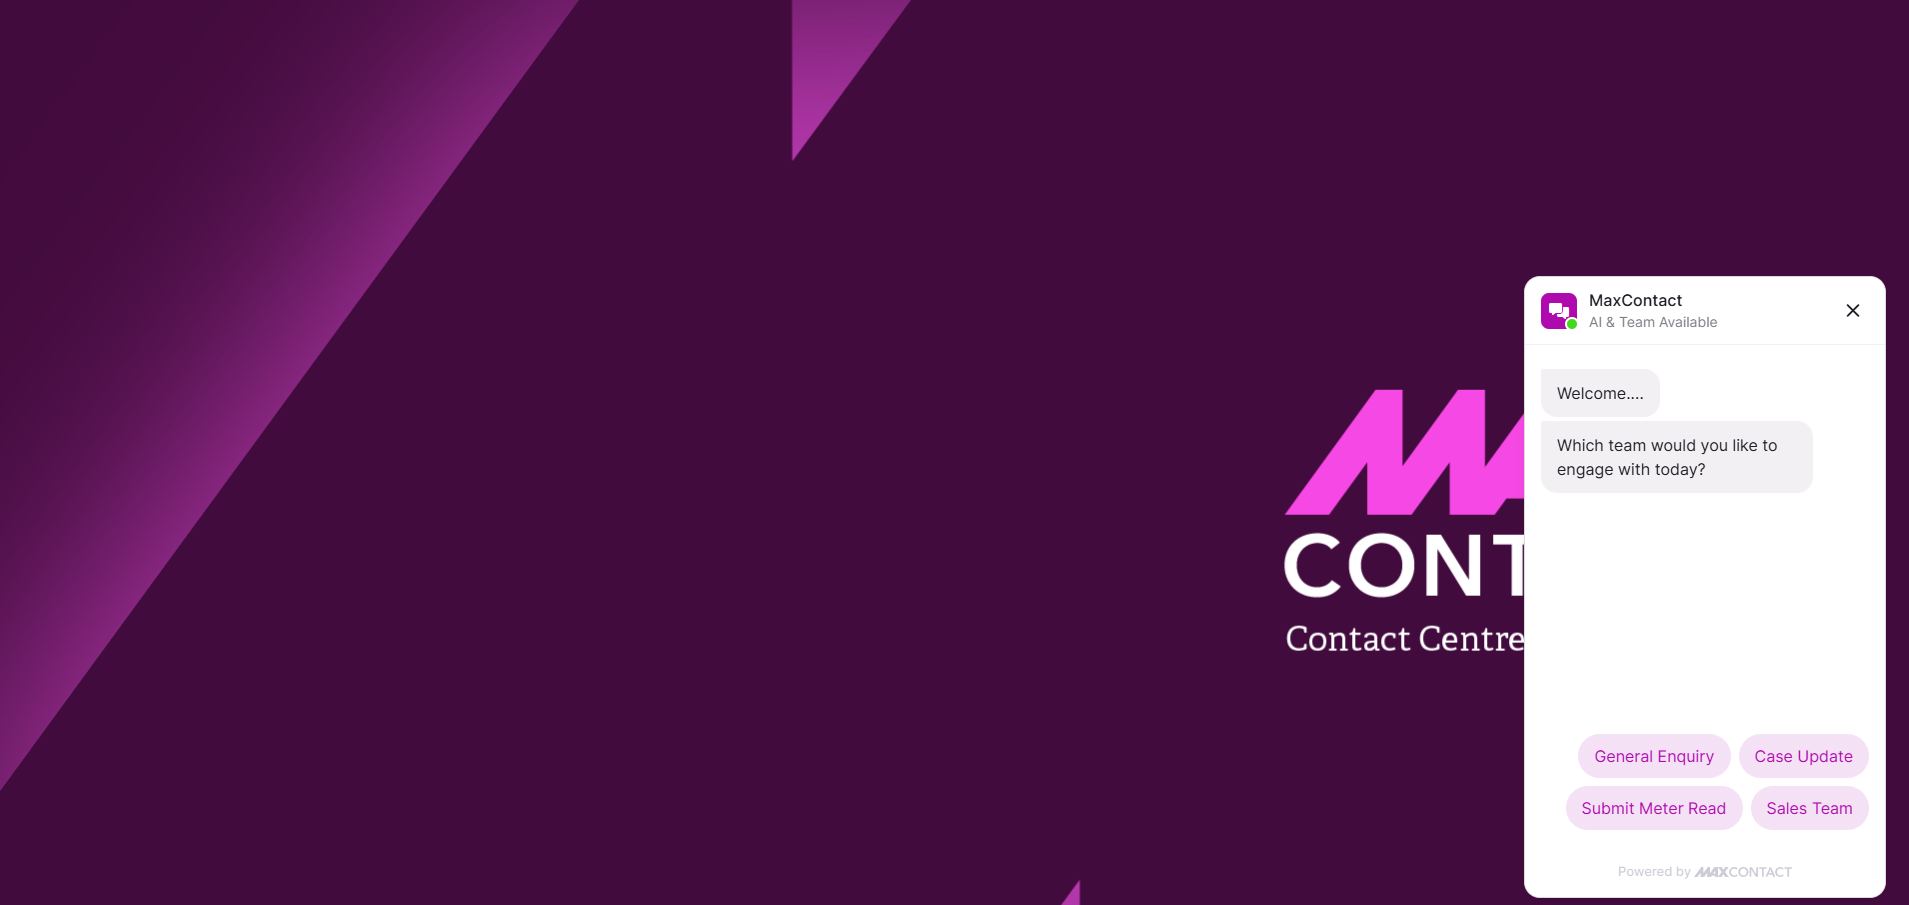
Customer view
When a customer opens the webchat widget on your website, they are presented with the channel hub options. The hub greeting and headline messages are displayed at the top, and each channel is listed using its friendly name for the customer to select from.