TABLE OF CONTENTS
If you are using emails as part of the MaxContact platform, you have the ability to create custom email signatures for all users via the CTU page. This information, once entered into the CTU page, can be added to your various email templates (both for email interaction replies and emails sent from scripts) and will be automatically populated on the email when sent to the customer.
Please click on the images below for a larger view.On the CTU page, when selecting a user, you can see a second tab called 'Custom Data'. Upon selecting the tab, you can see a series of boxes for admin staff to enter custom attributes.
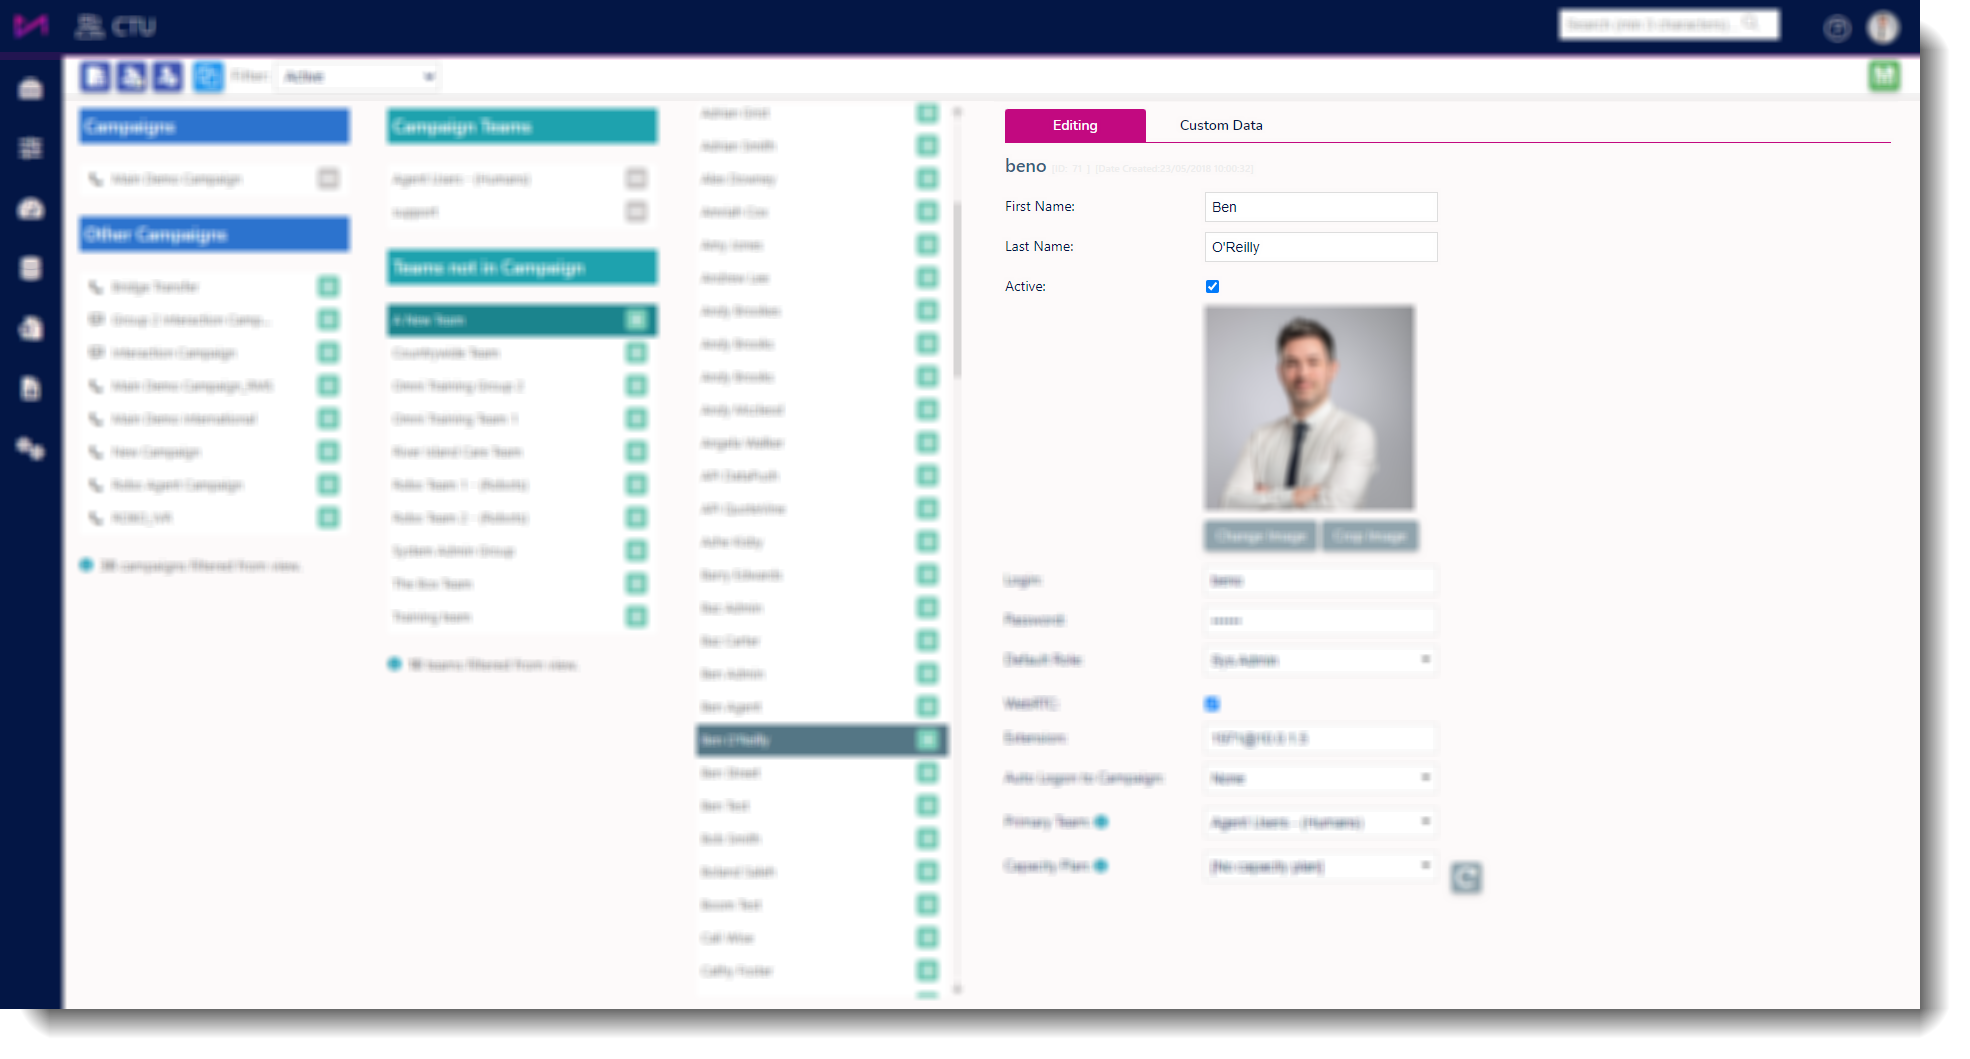
Fig 1. The CTU page with user selected.
These fields can be renamed and customised to help with SSO temporary passwords. See this guide for more.

Fig 2. The CTU page with custom data tab selected.
Custom data/attributes
The fields on the CTU page relate to the email templates accessed via ADMIN - MESSAGE TEMPLATES and are used in conjunction with fill points.
1 - On the CTU page, complete the relevant custom fields and save (You must do this for each user you wish to show data for, ensure you save after editing each user).
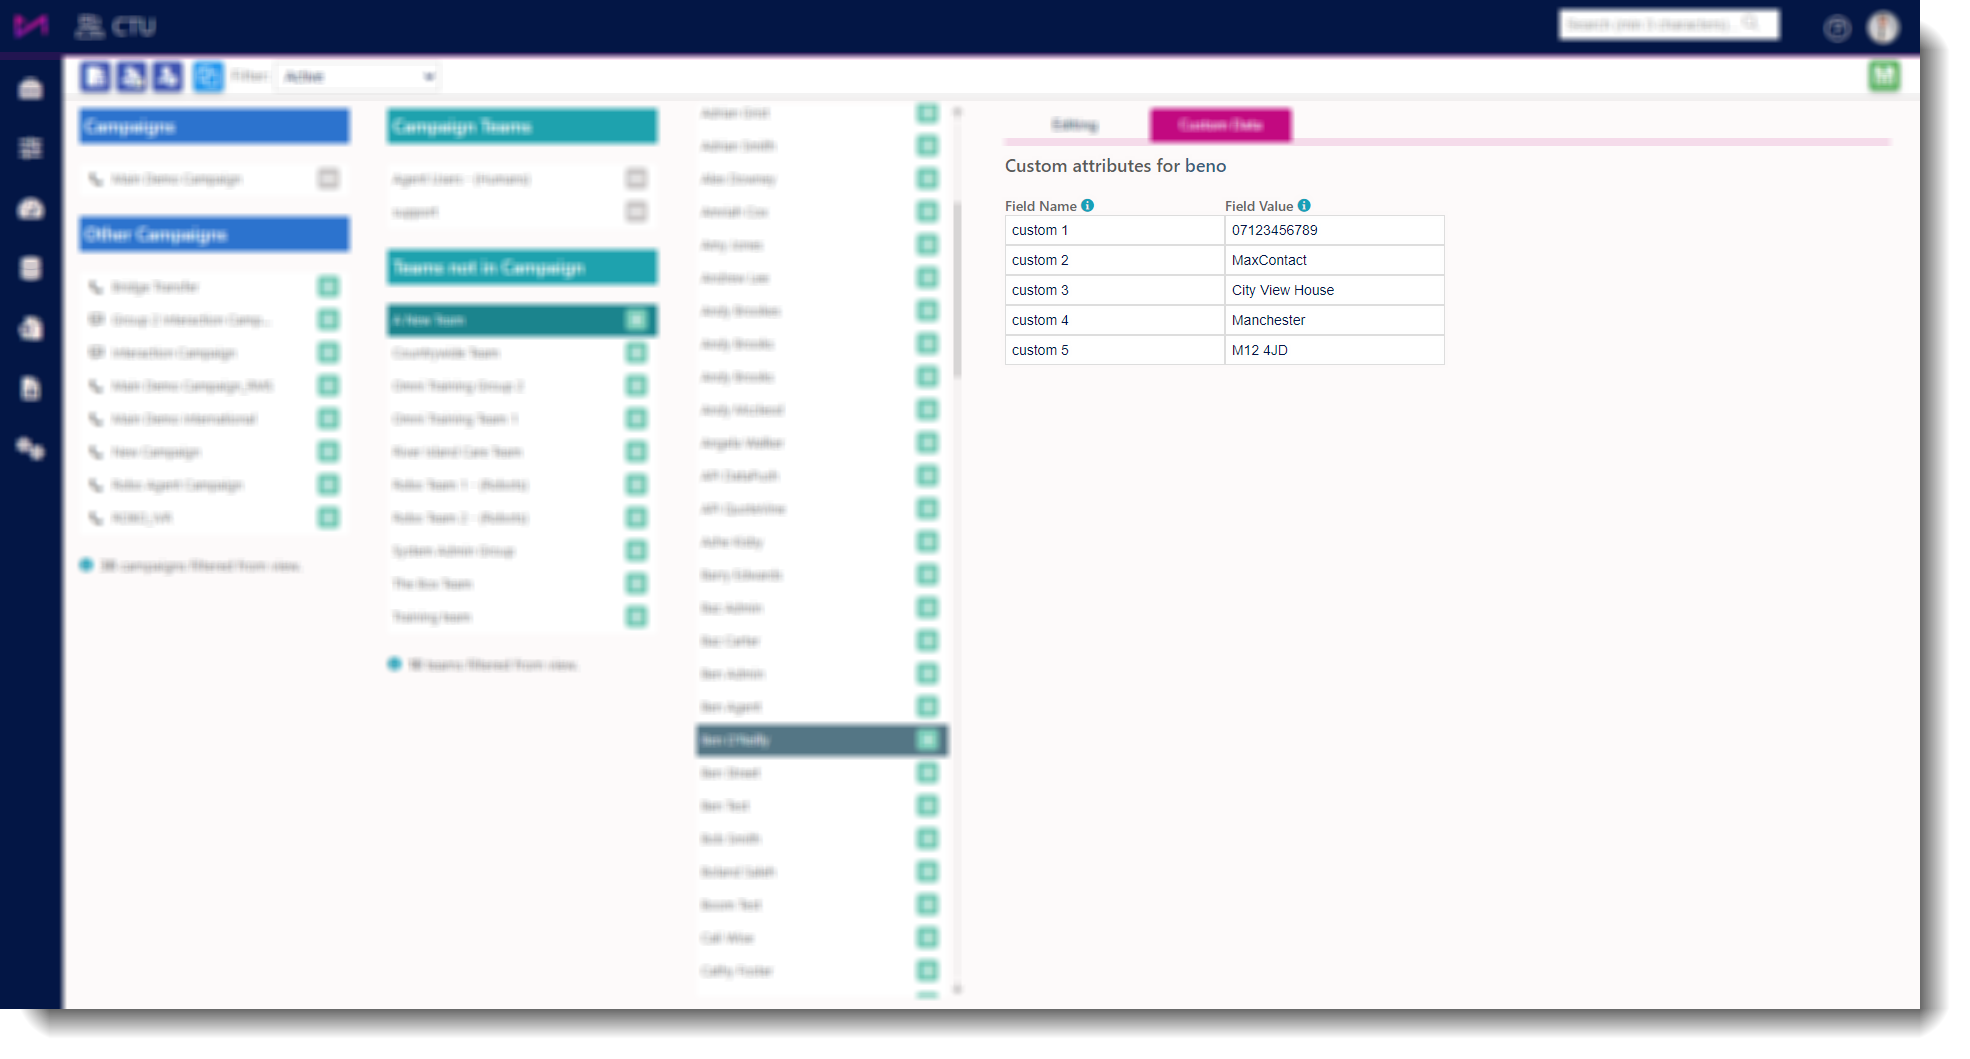
Fig 3. The CTU page with custom data entered.
2 - Navigate to the Message Templates page under the Admin option in the main menu.
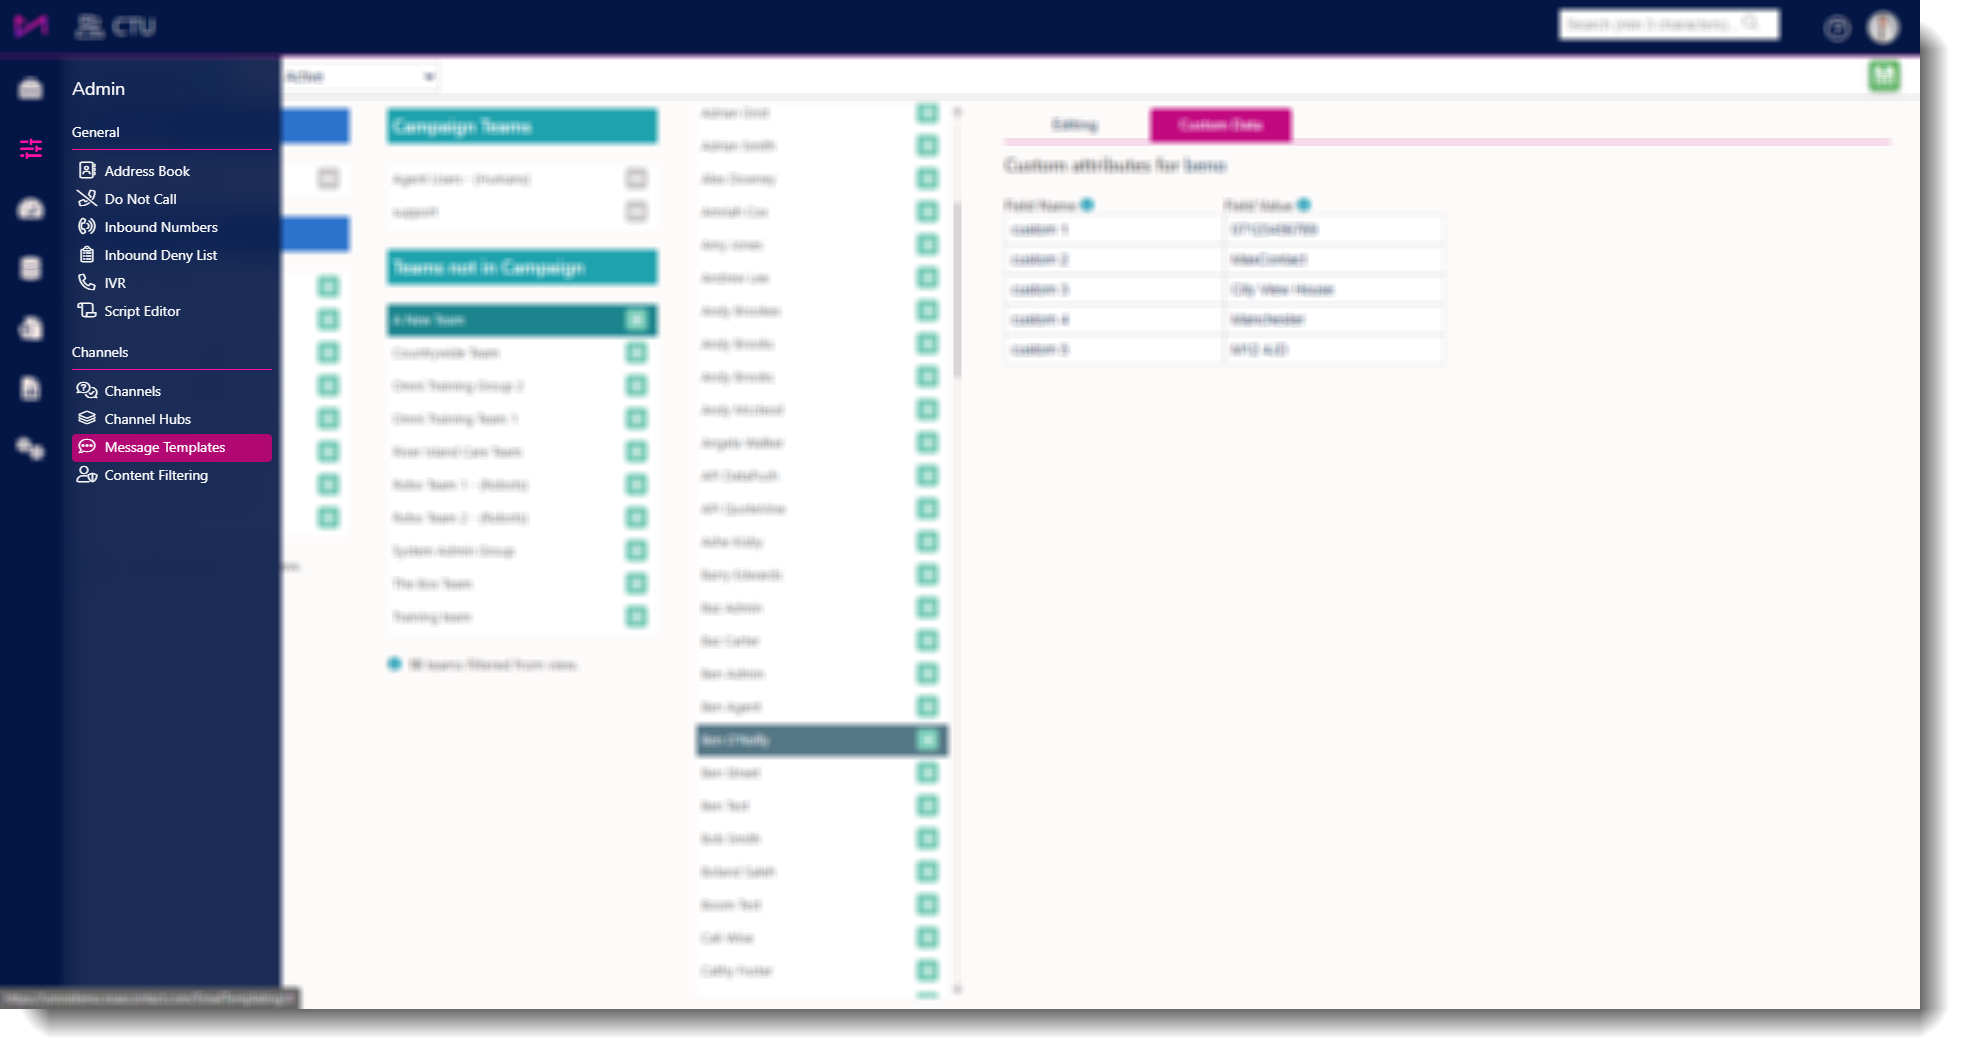
Fig 4. Locate the Message Templates page via the right hand menu.
3 - Once you are in the templates screen you should be able to see all your existing templates. For more on creating templates, see this guide.
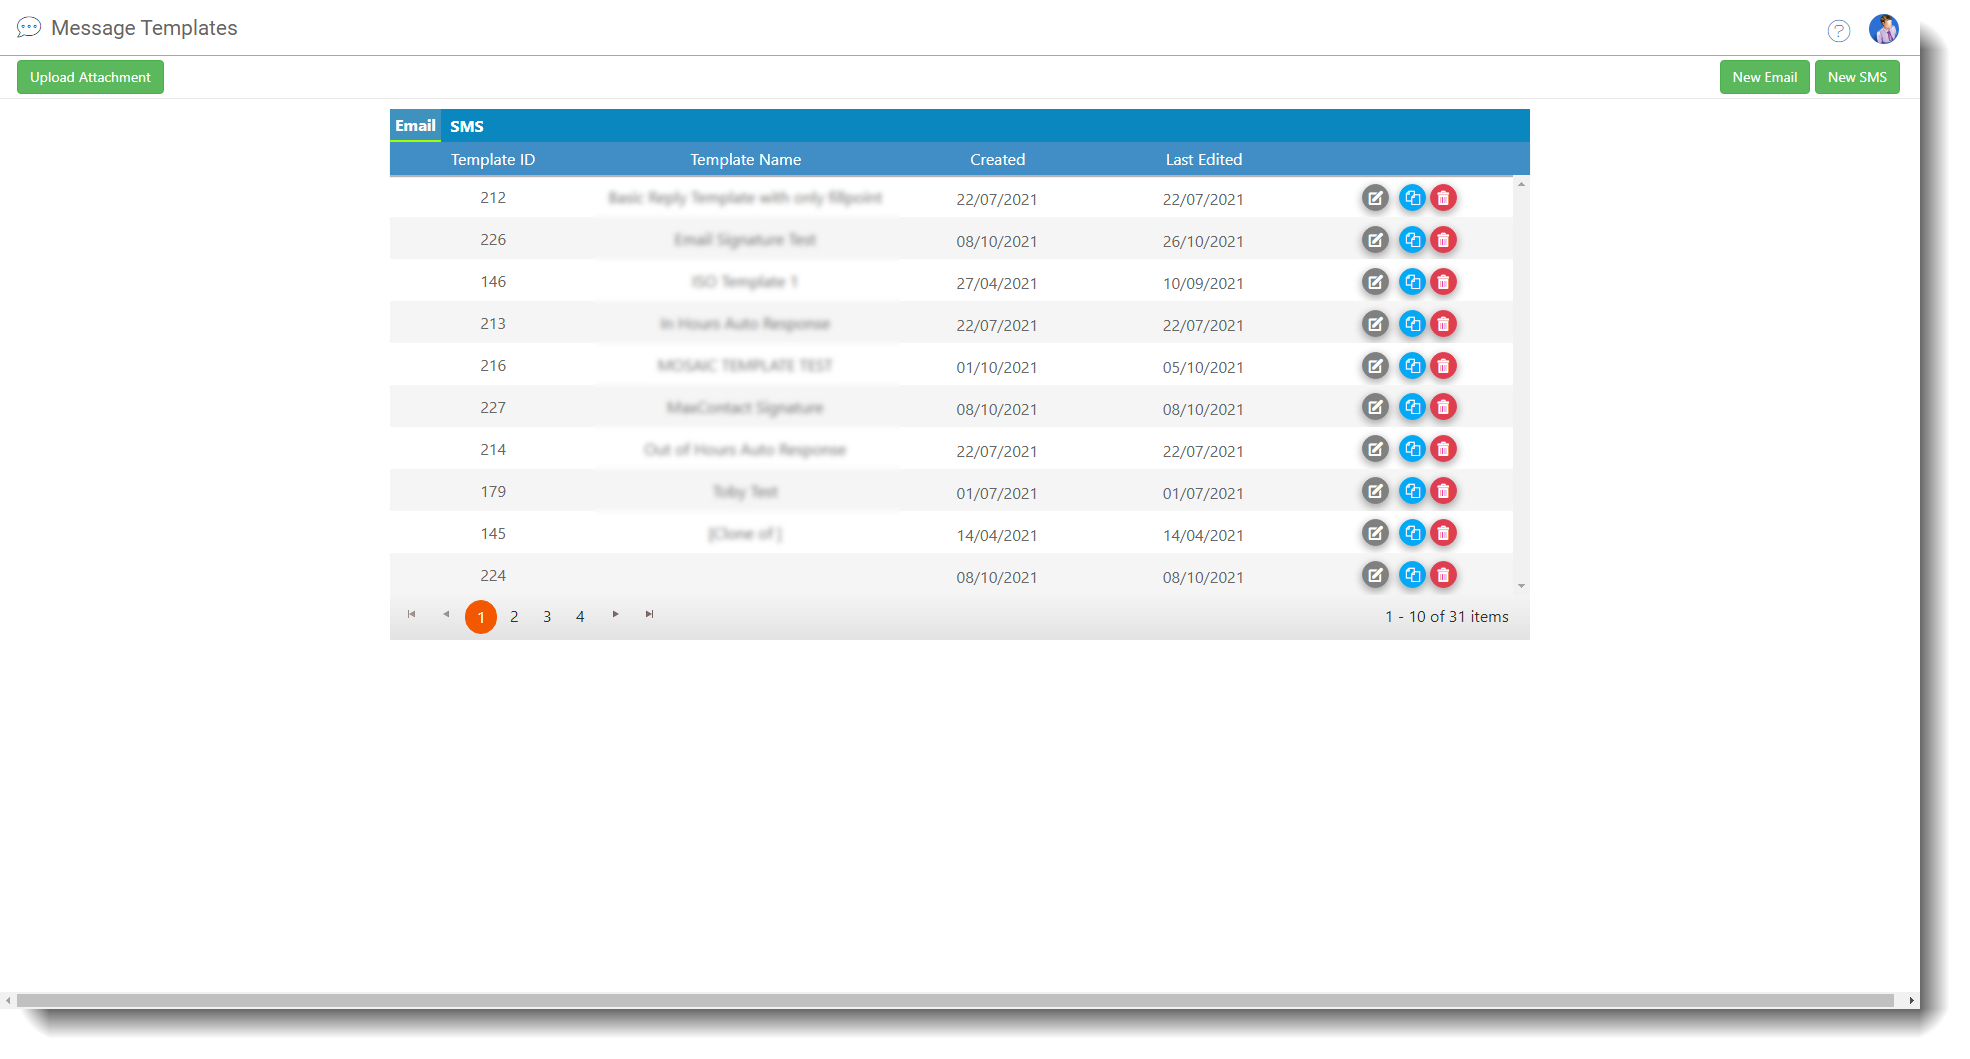
Fig 5. The message template selection screen
4 - Select the template you wish to edit (and add the signatures to) by clicking the edit button.
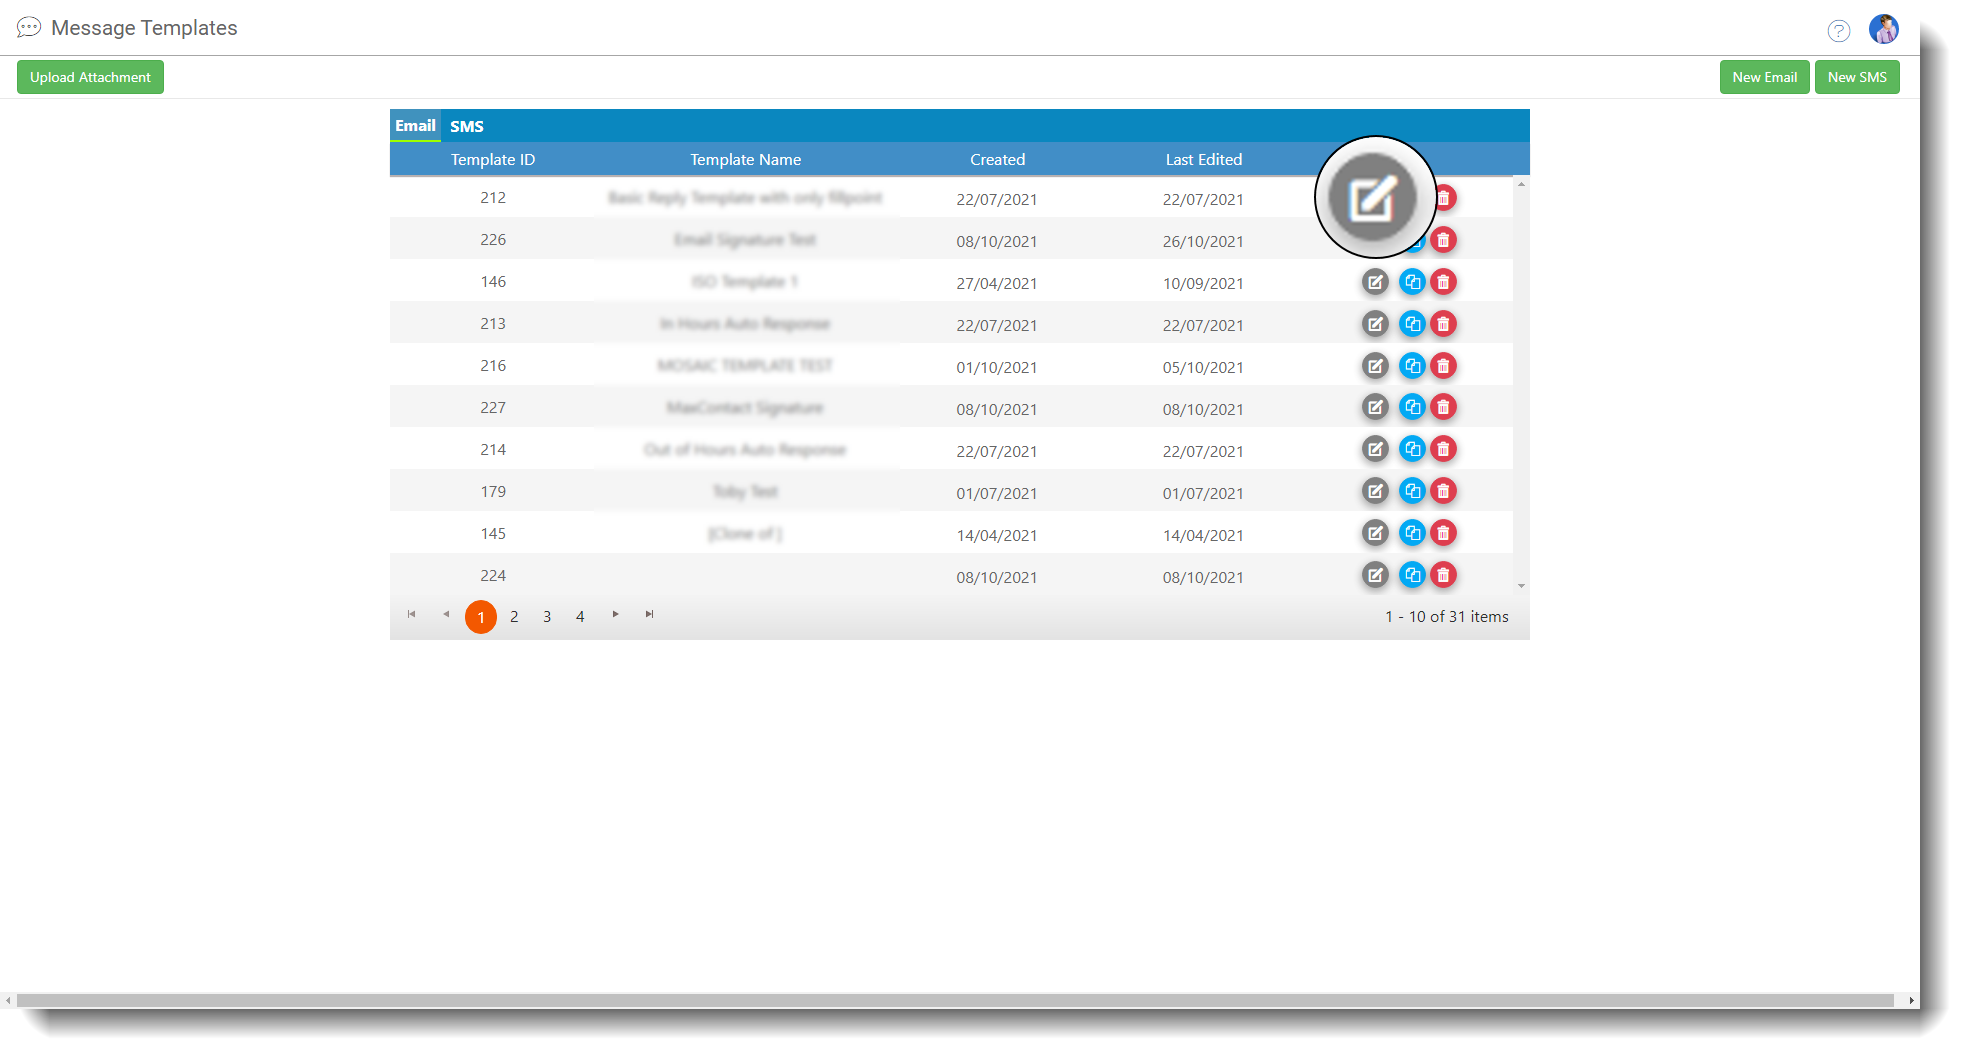
Fig 6. Edit button highlighted on templates page.
5 - When in the template, you can select the text area you want to edit.
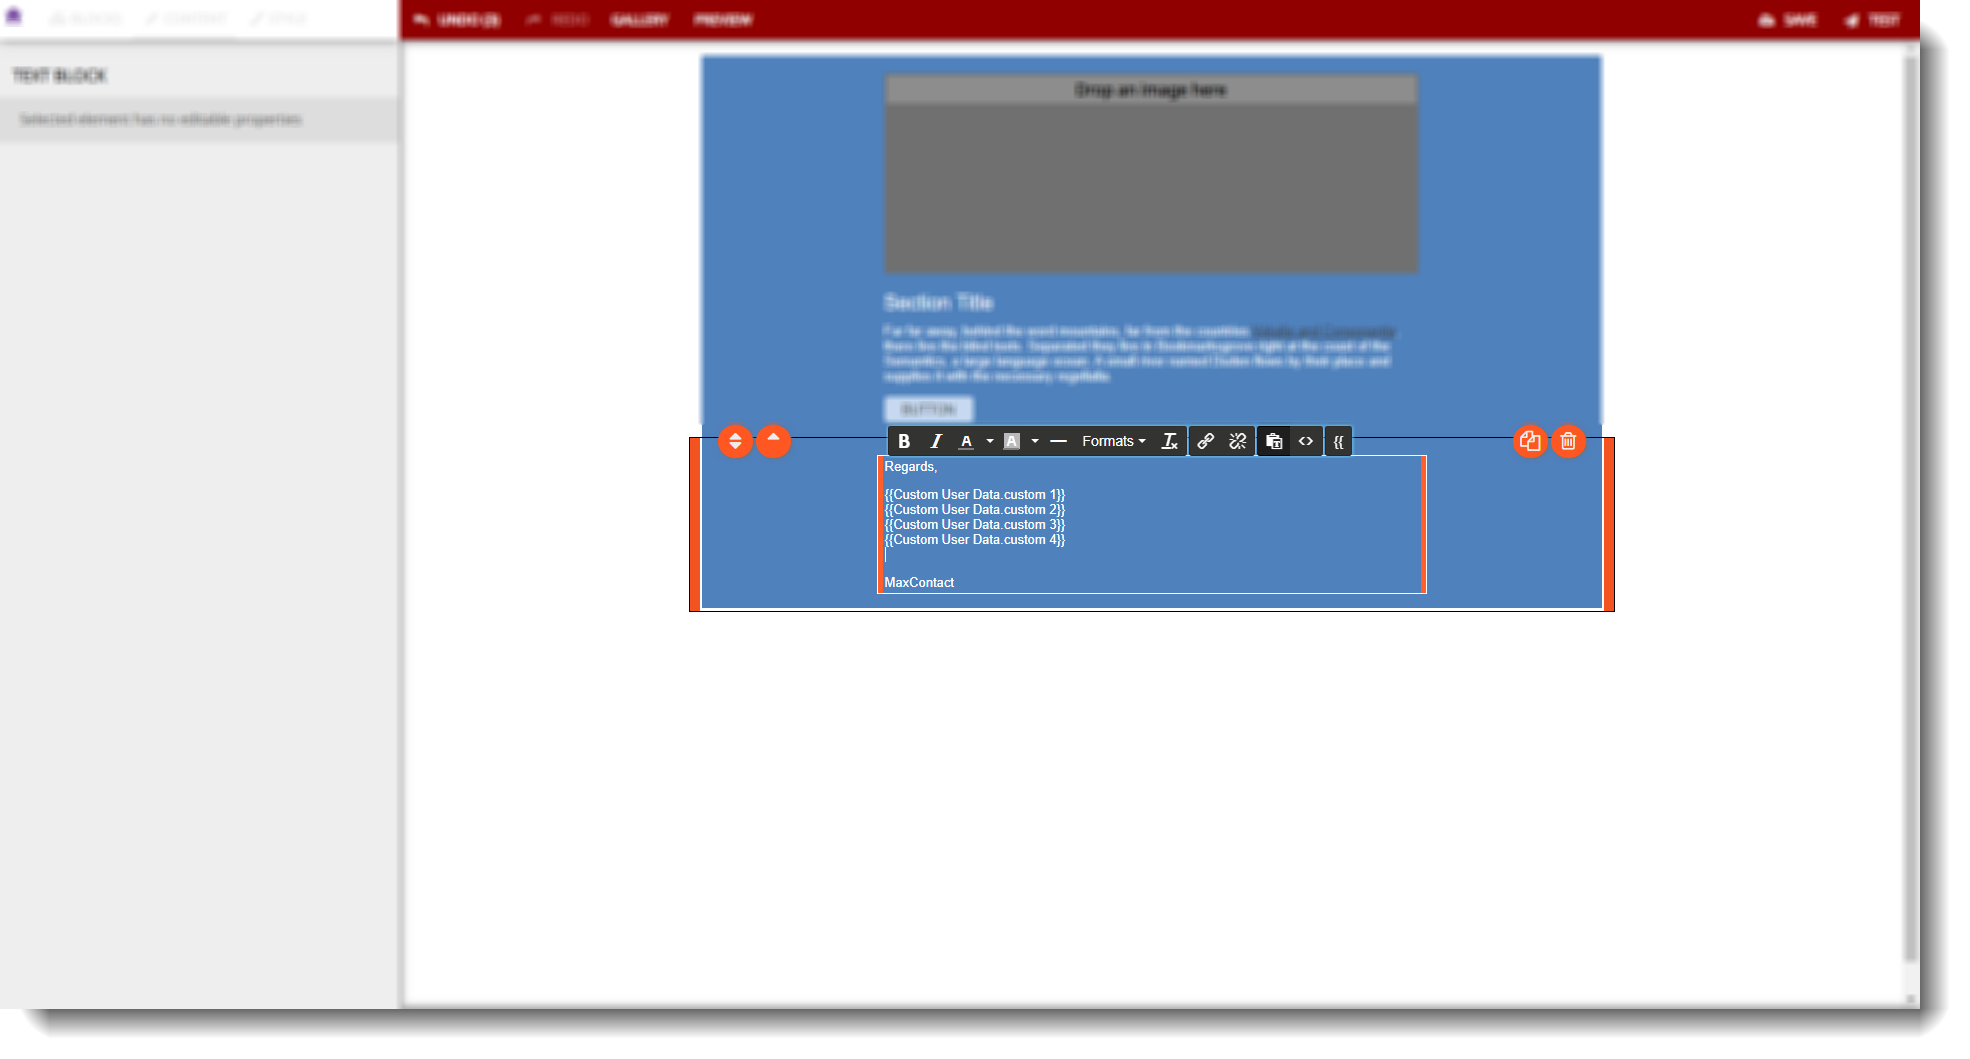
Fig 7. Block selected in the template and a new line added under {{Custom User Data.custom4}} fillpoint. Edit options in black show a fillpoint button at the end.
6 - Selecting the fillpoint button will give you the option to select a data table. Here you should select 'Custom User Data'.
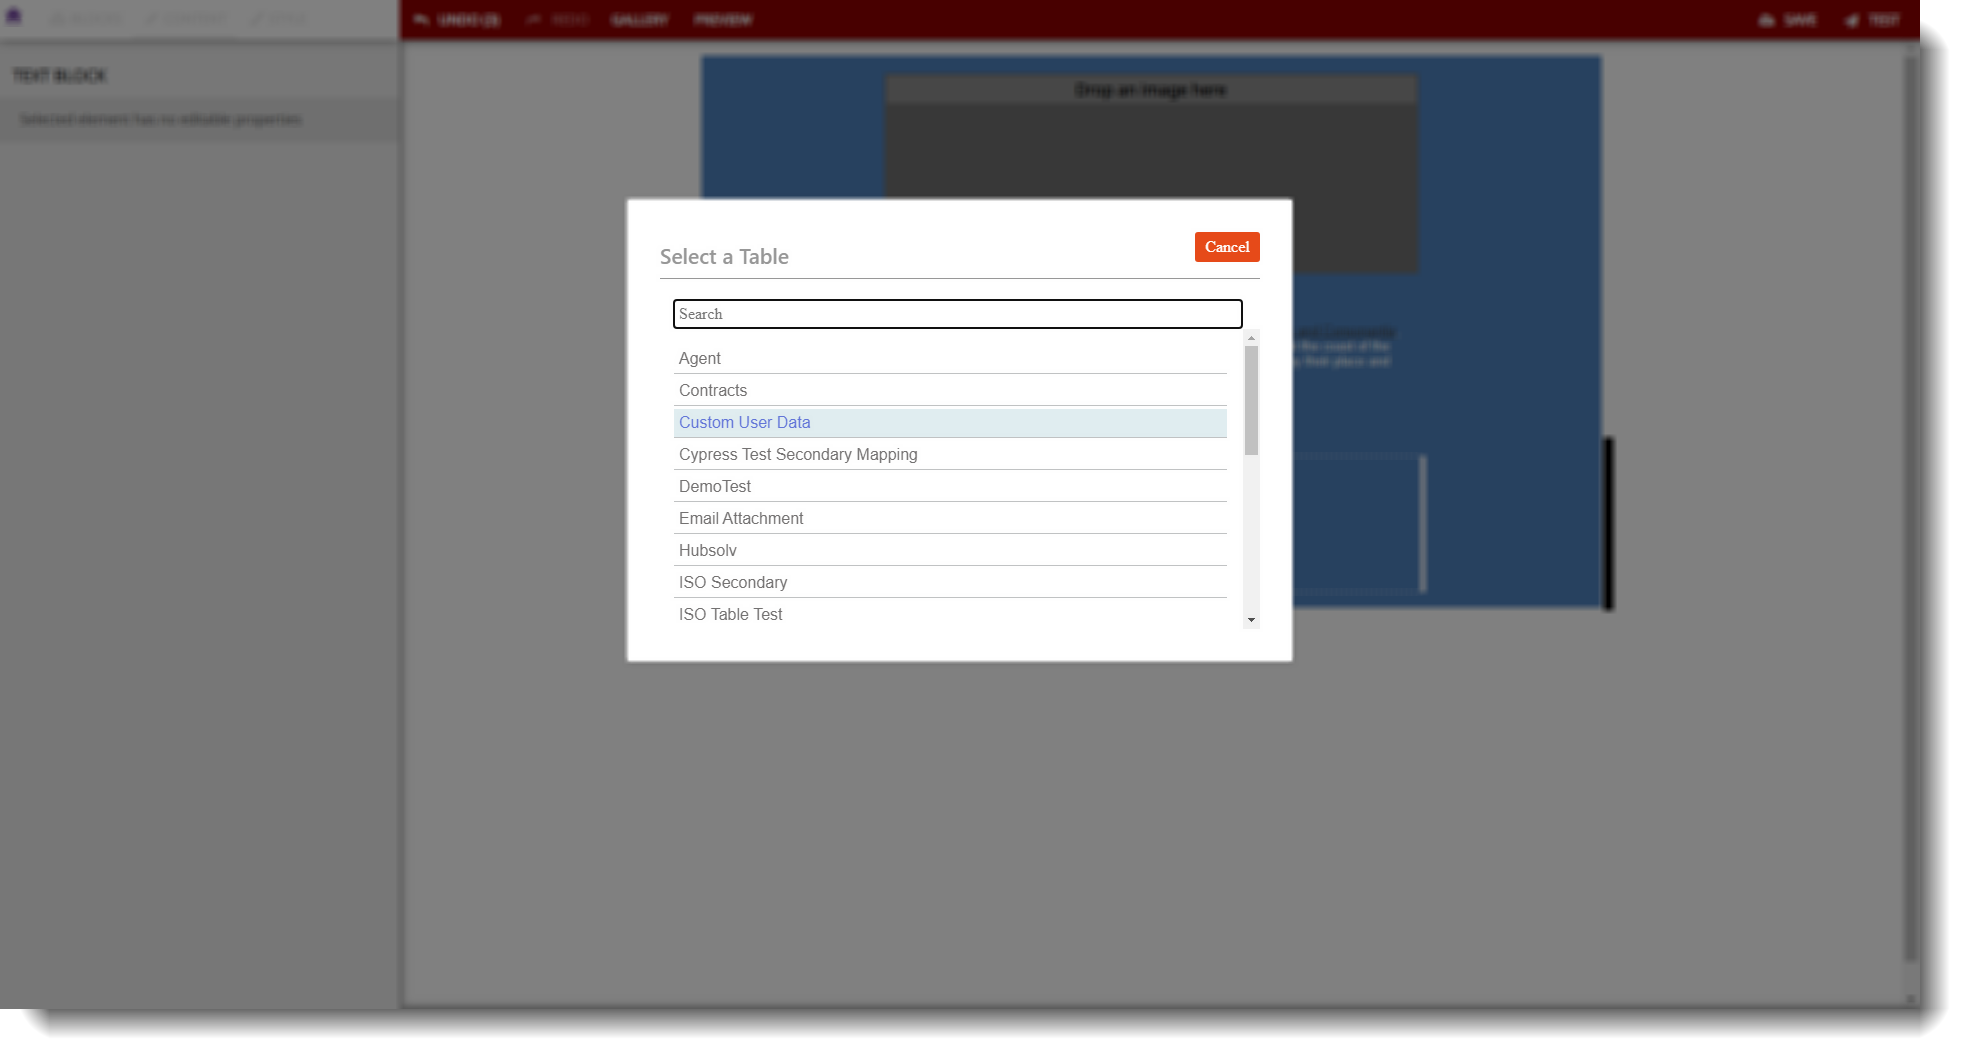
Fig 8. Custom User Data selected.
7 - You will then be presented with the options within that data table, in this case the 5 custom fields witch match the CTU pages custom fields.
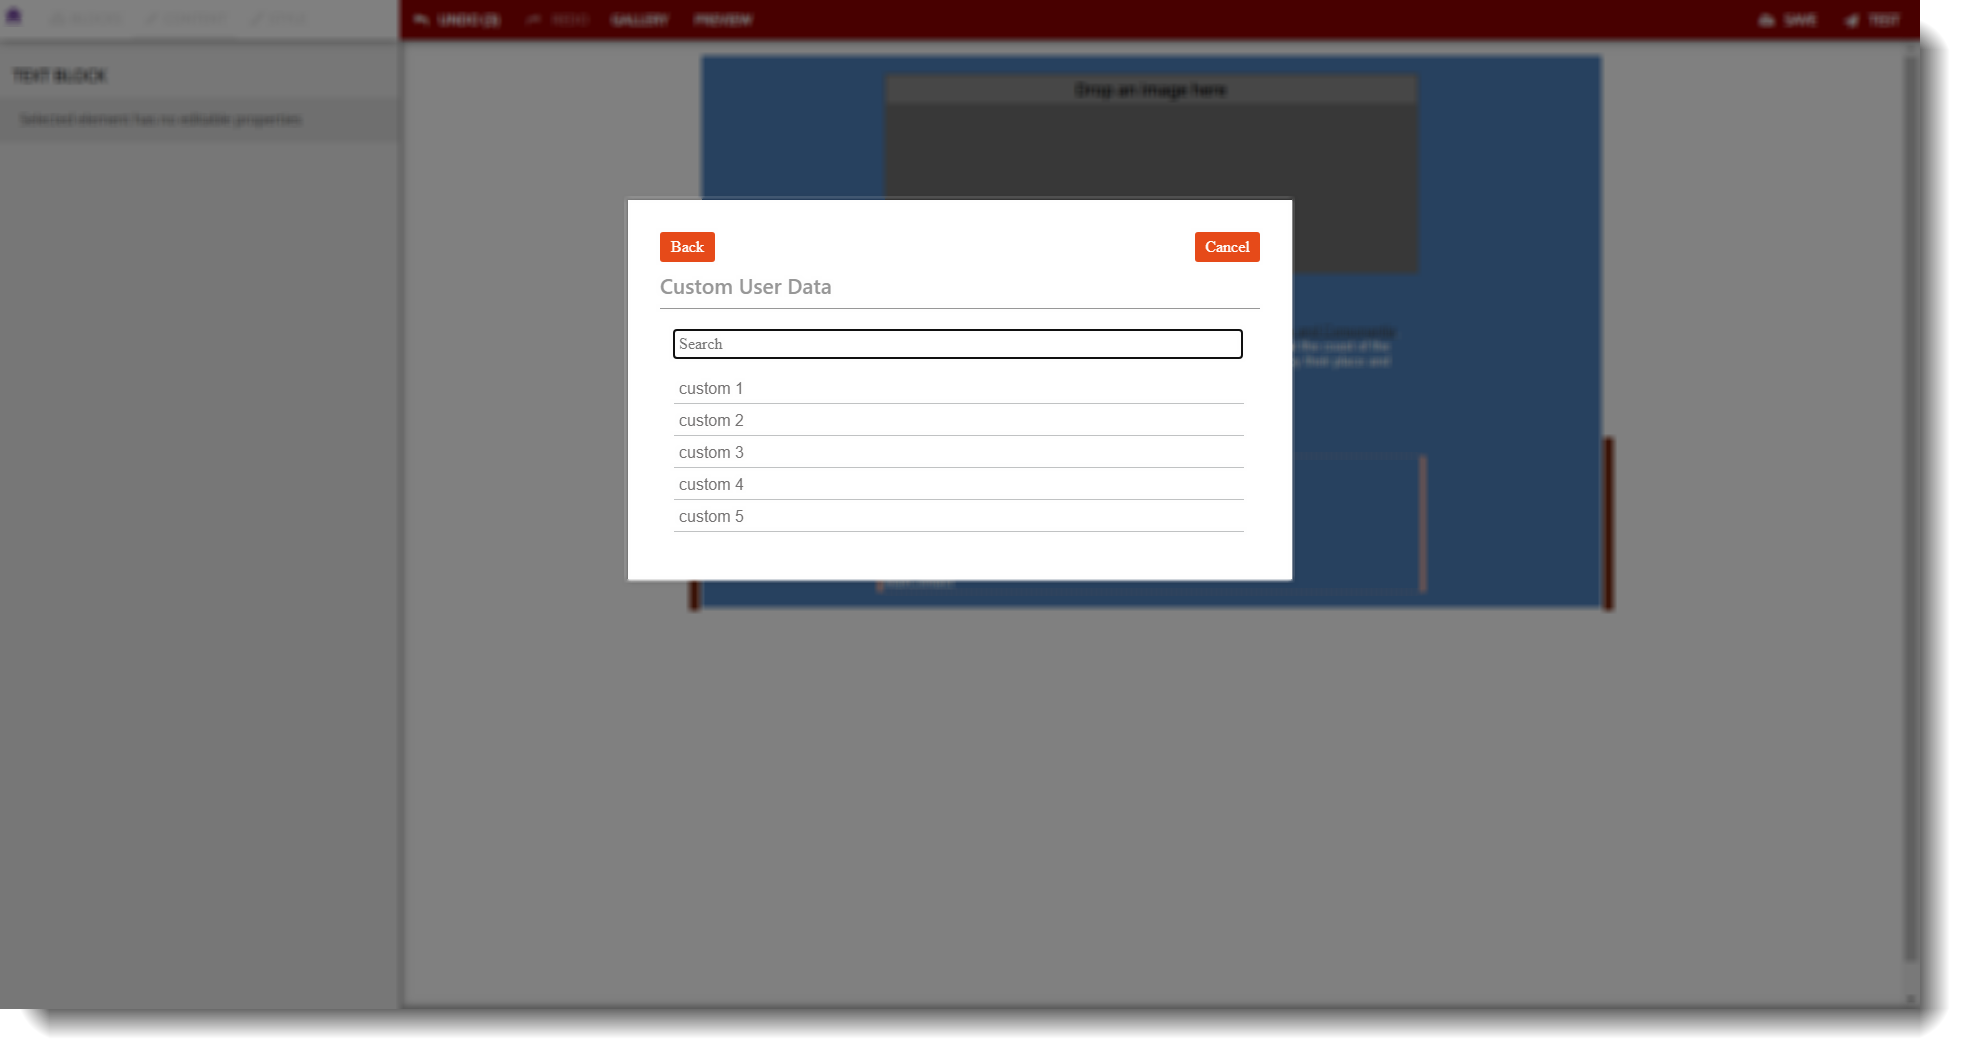
Fig 9. Custom User Data fields.
8 - Selecting a field will insert the fillpoint into the text.
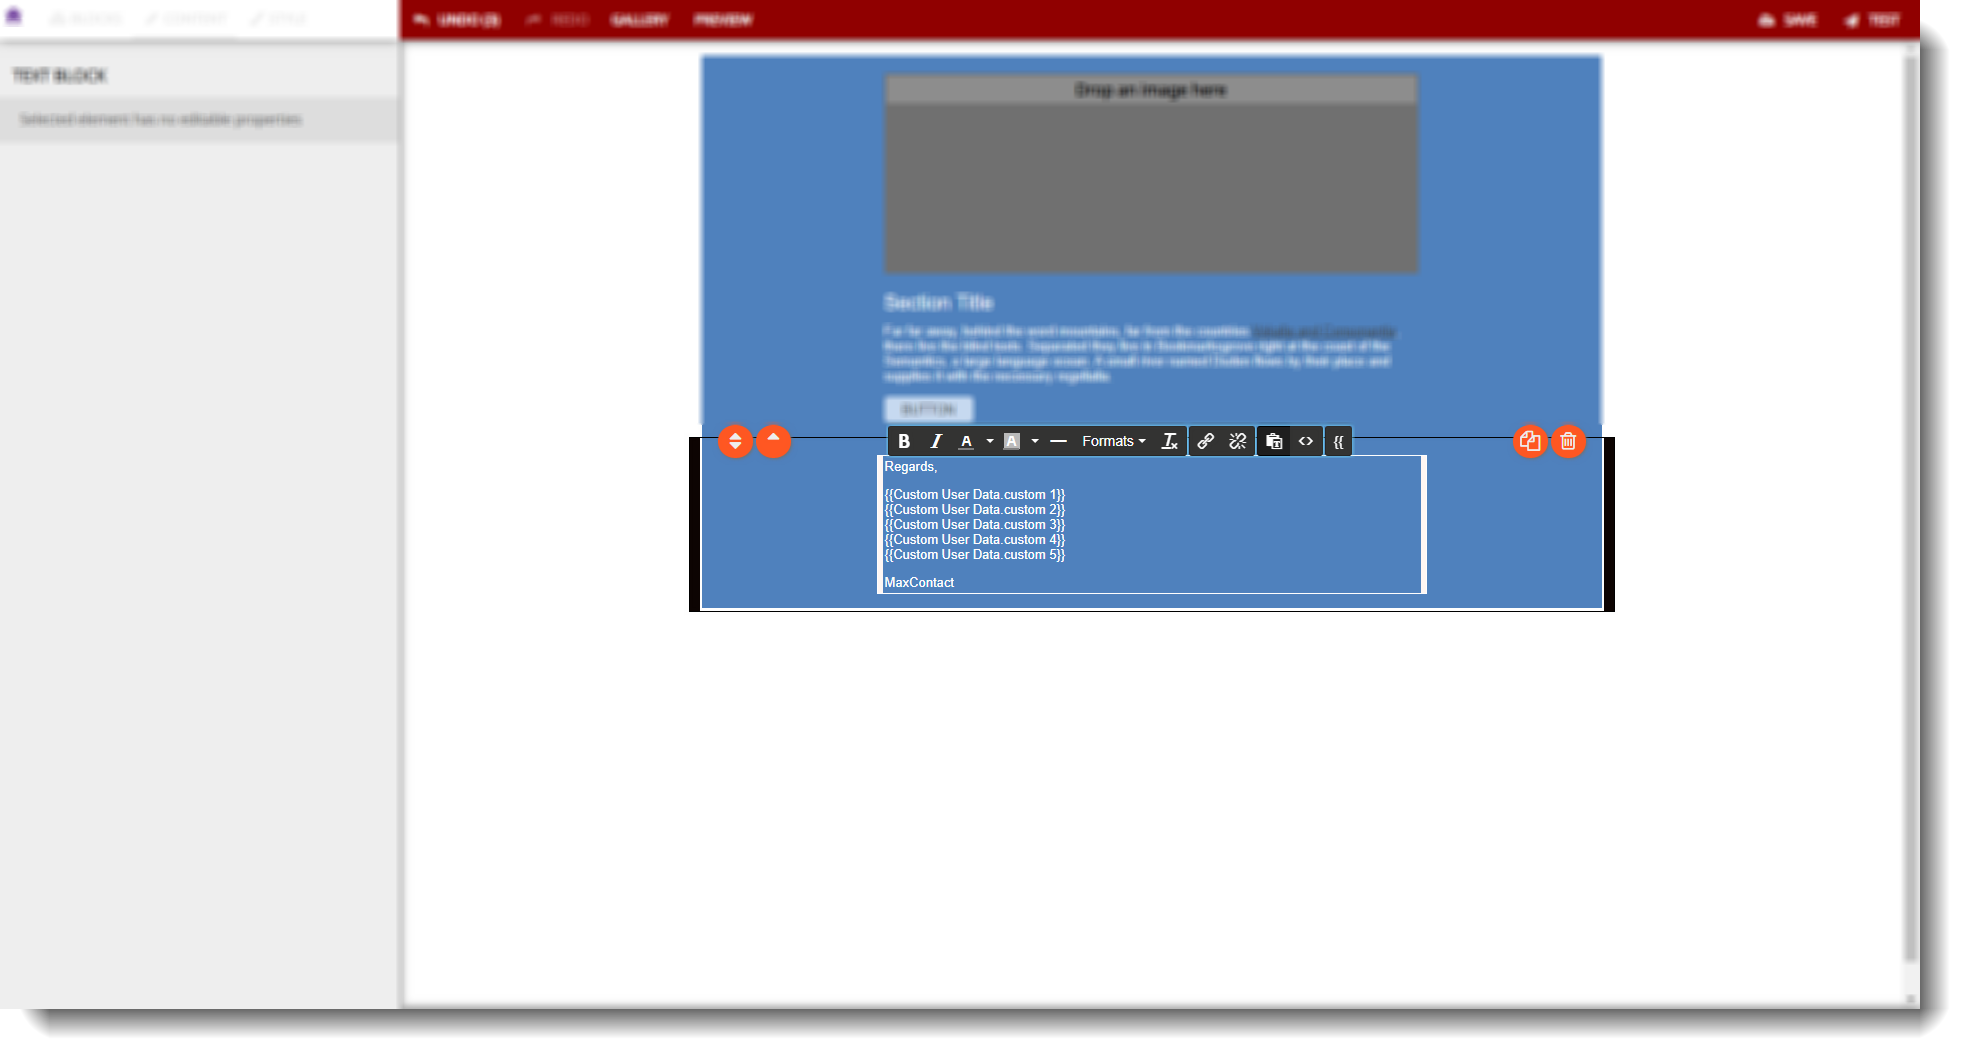
Fig 10. The selected field (Custom 5) has been added to the email template (see fig 7 for difference).
9 - When a user replies to an email using the template OR when they send an email from the script using that template, the customer will see the 5 lines of data from the CTU page for the user who sent the email.
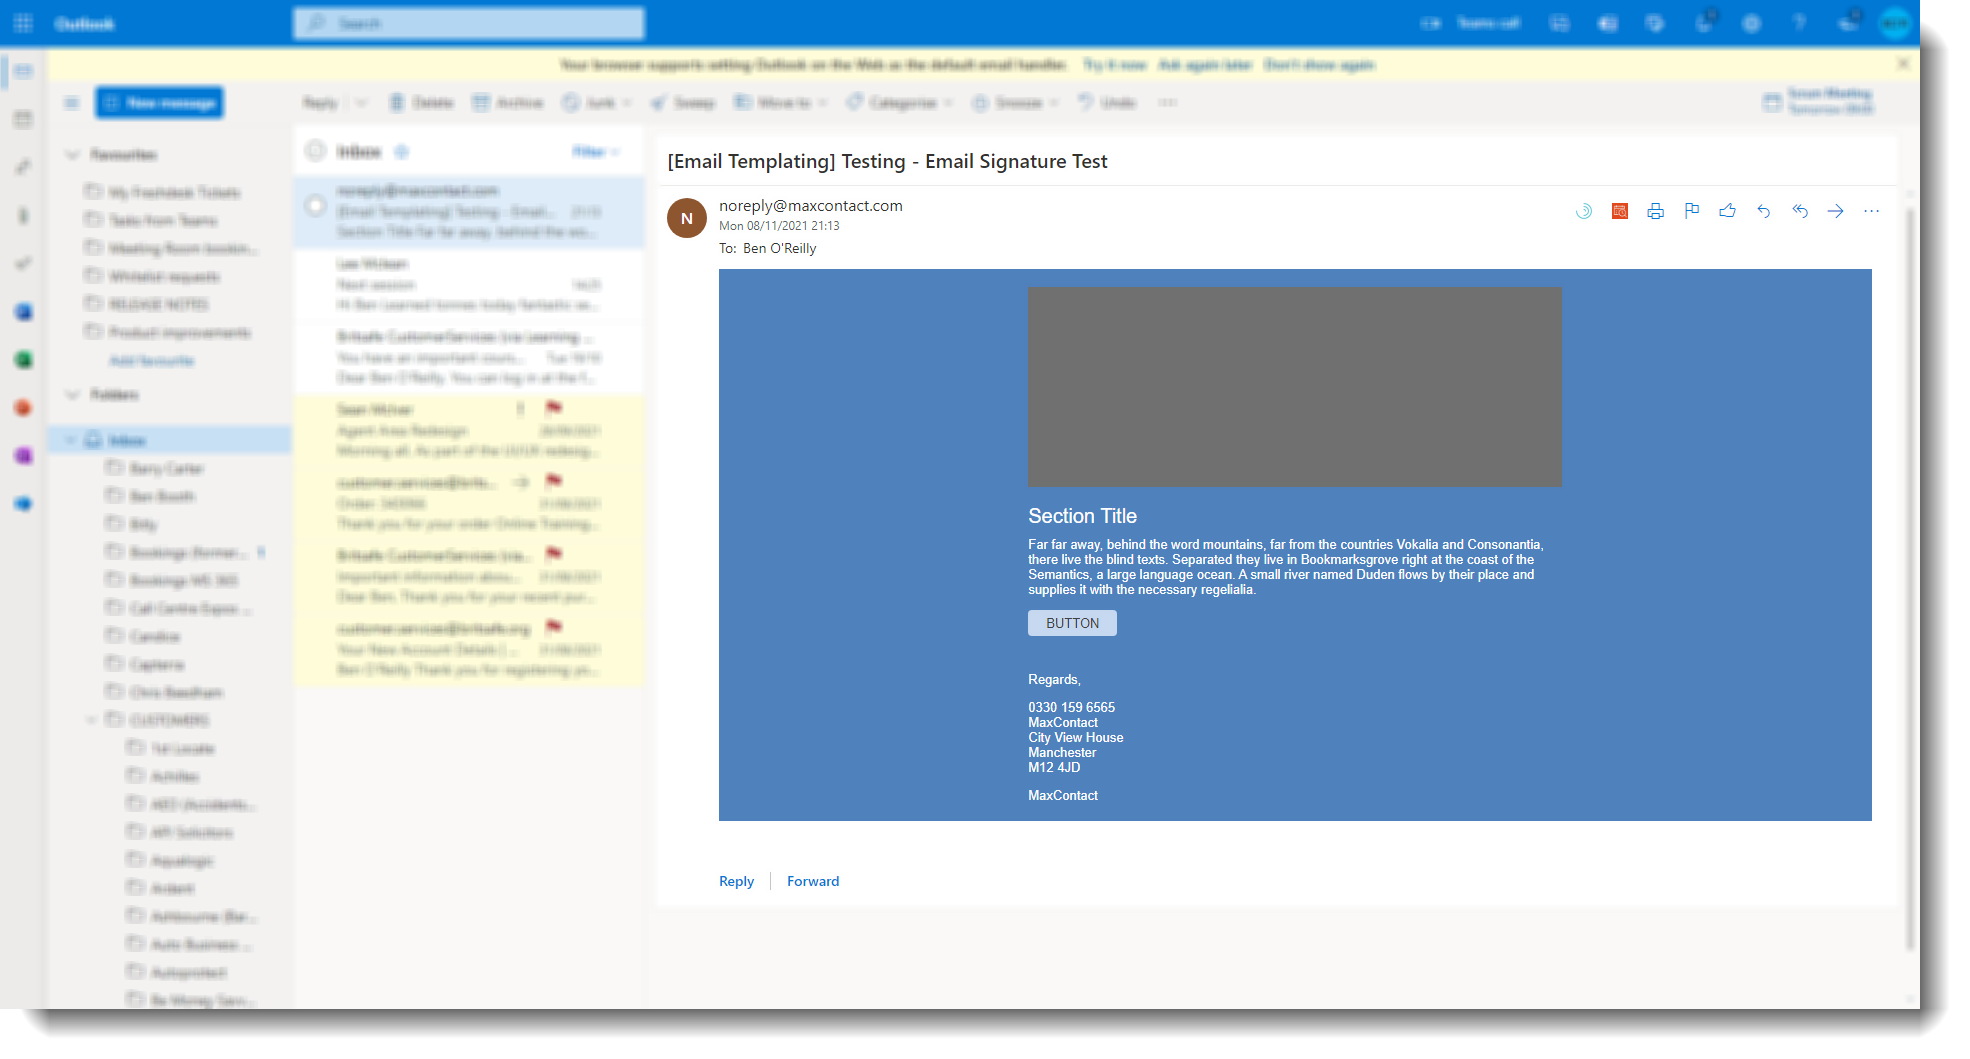
Fig 11. An email reply to the customer with the data visible from the CTU page shown in fig 3.
If a field is left blank on the CTU page but a fillpoint is used, there will just be an empty line on the email to the customer.